Apps
GitLab
Getting started
Difference between CE and EE
GitLab CE - Community Edition
Includes the basic, free feature set of GitLab.
GitLab EE - Enterprise Edition
You benefit from 100+ enterprise features
Here you need Enterprise licences that are not included in the NWS. The GitLab Enterprise licenses must be purchased separately from GitLab. We can gladly take over the procurement process for you here (also with invoicing by us).
Starting the app
Create an account on NWS Customer Interface.
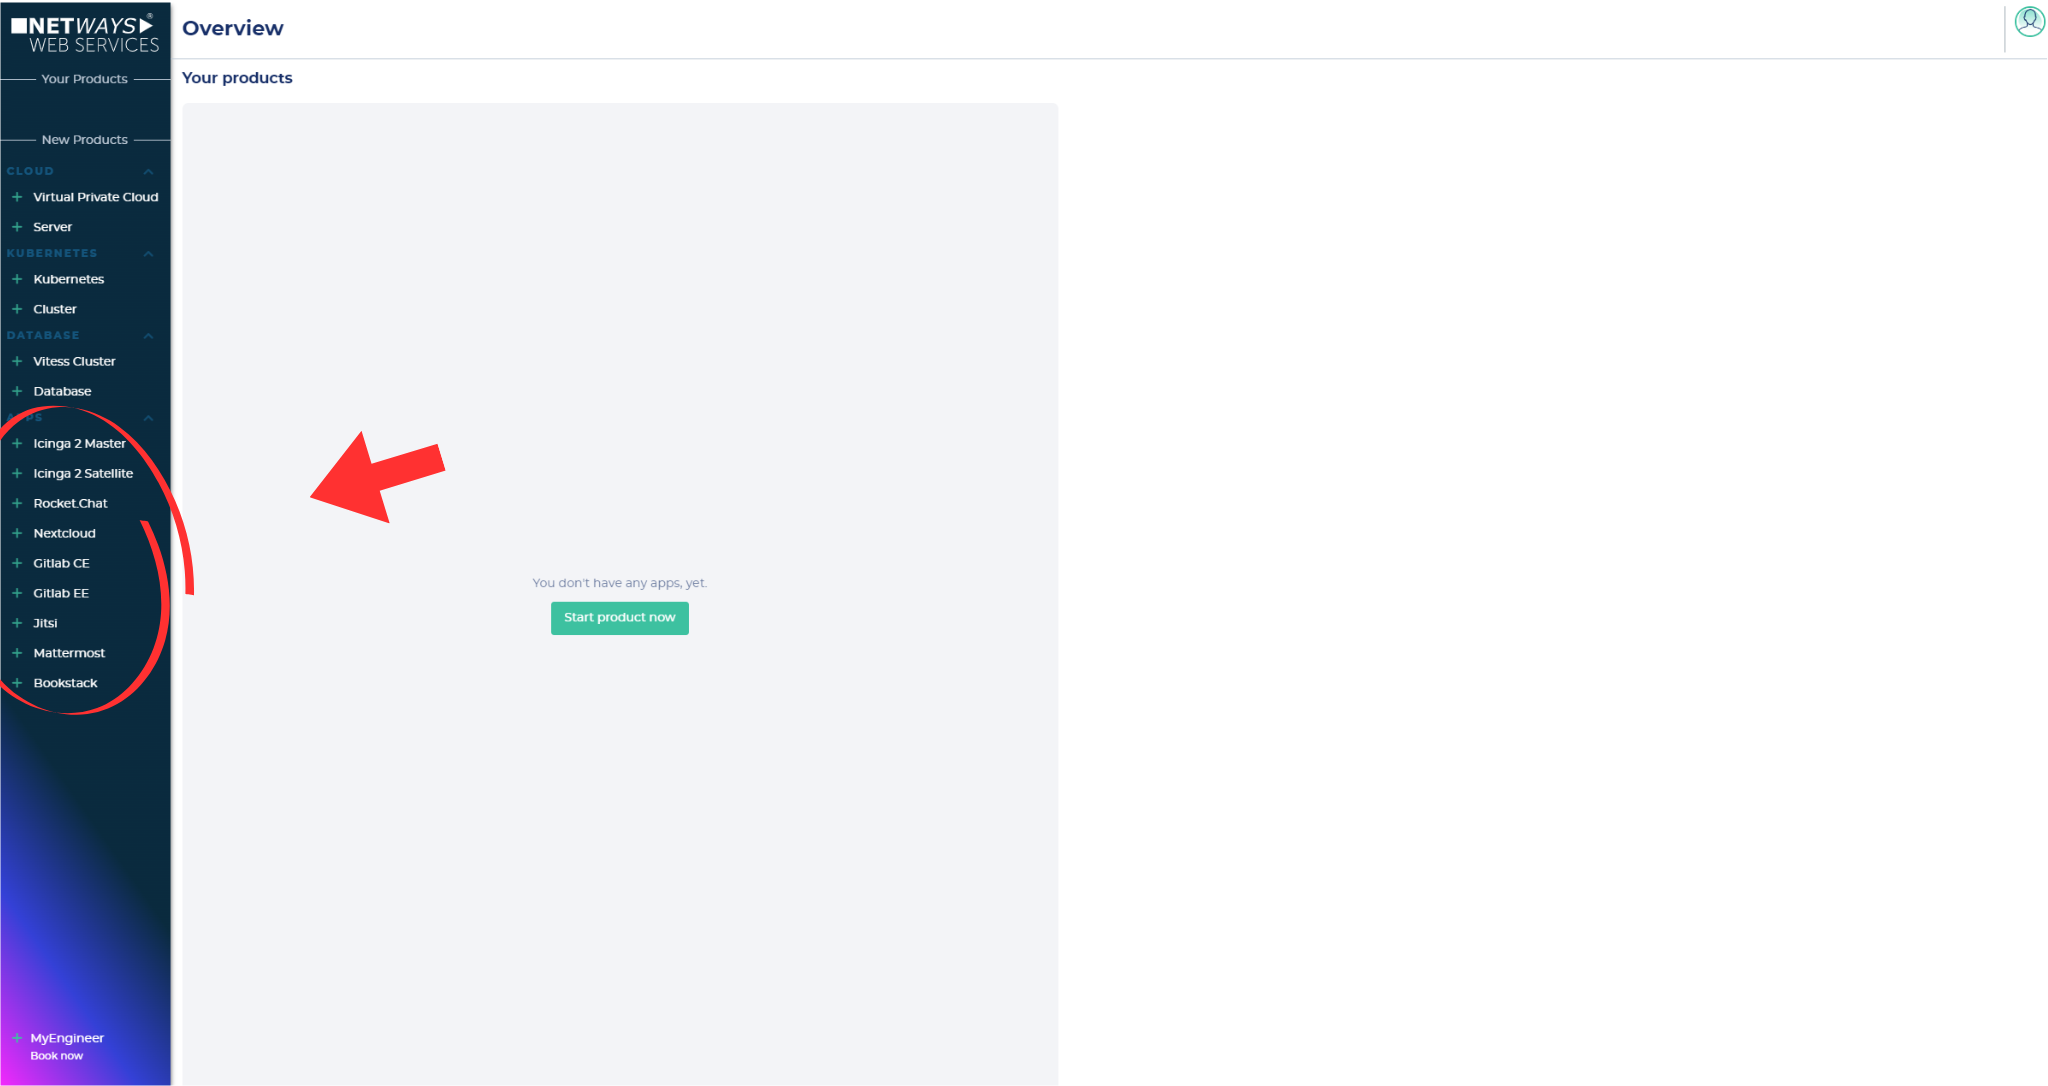
- After finishing your registration, you have two possibilities to start your app:
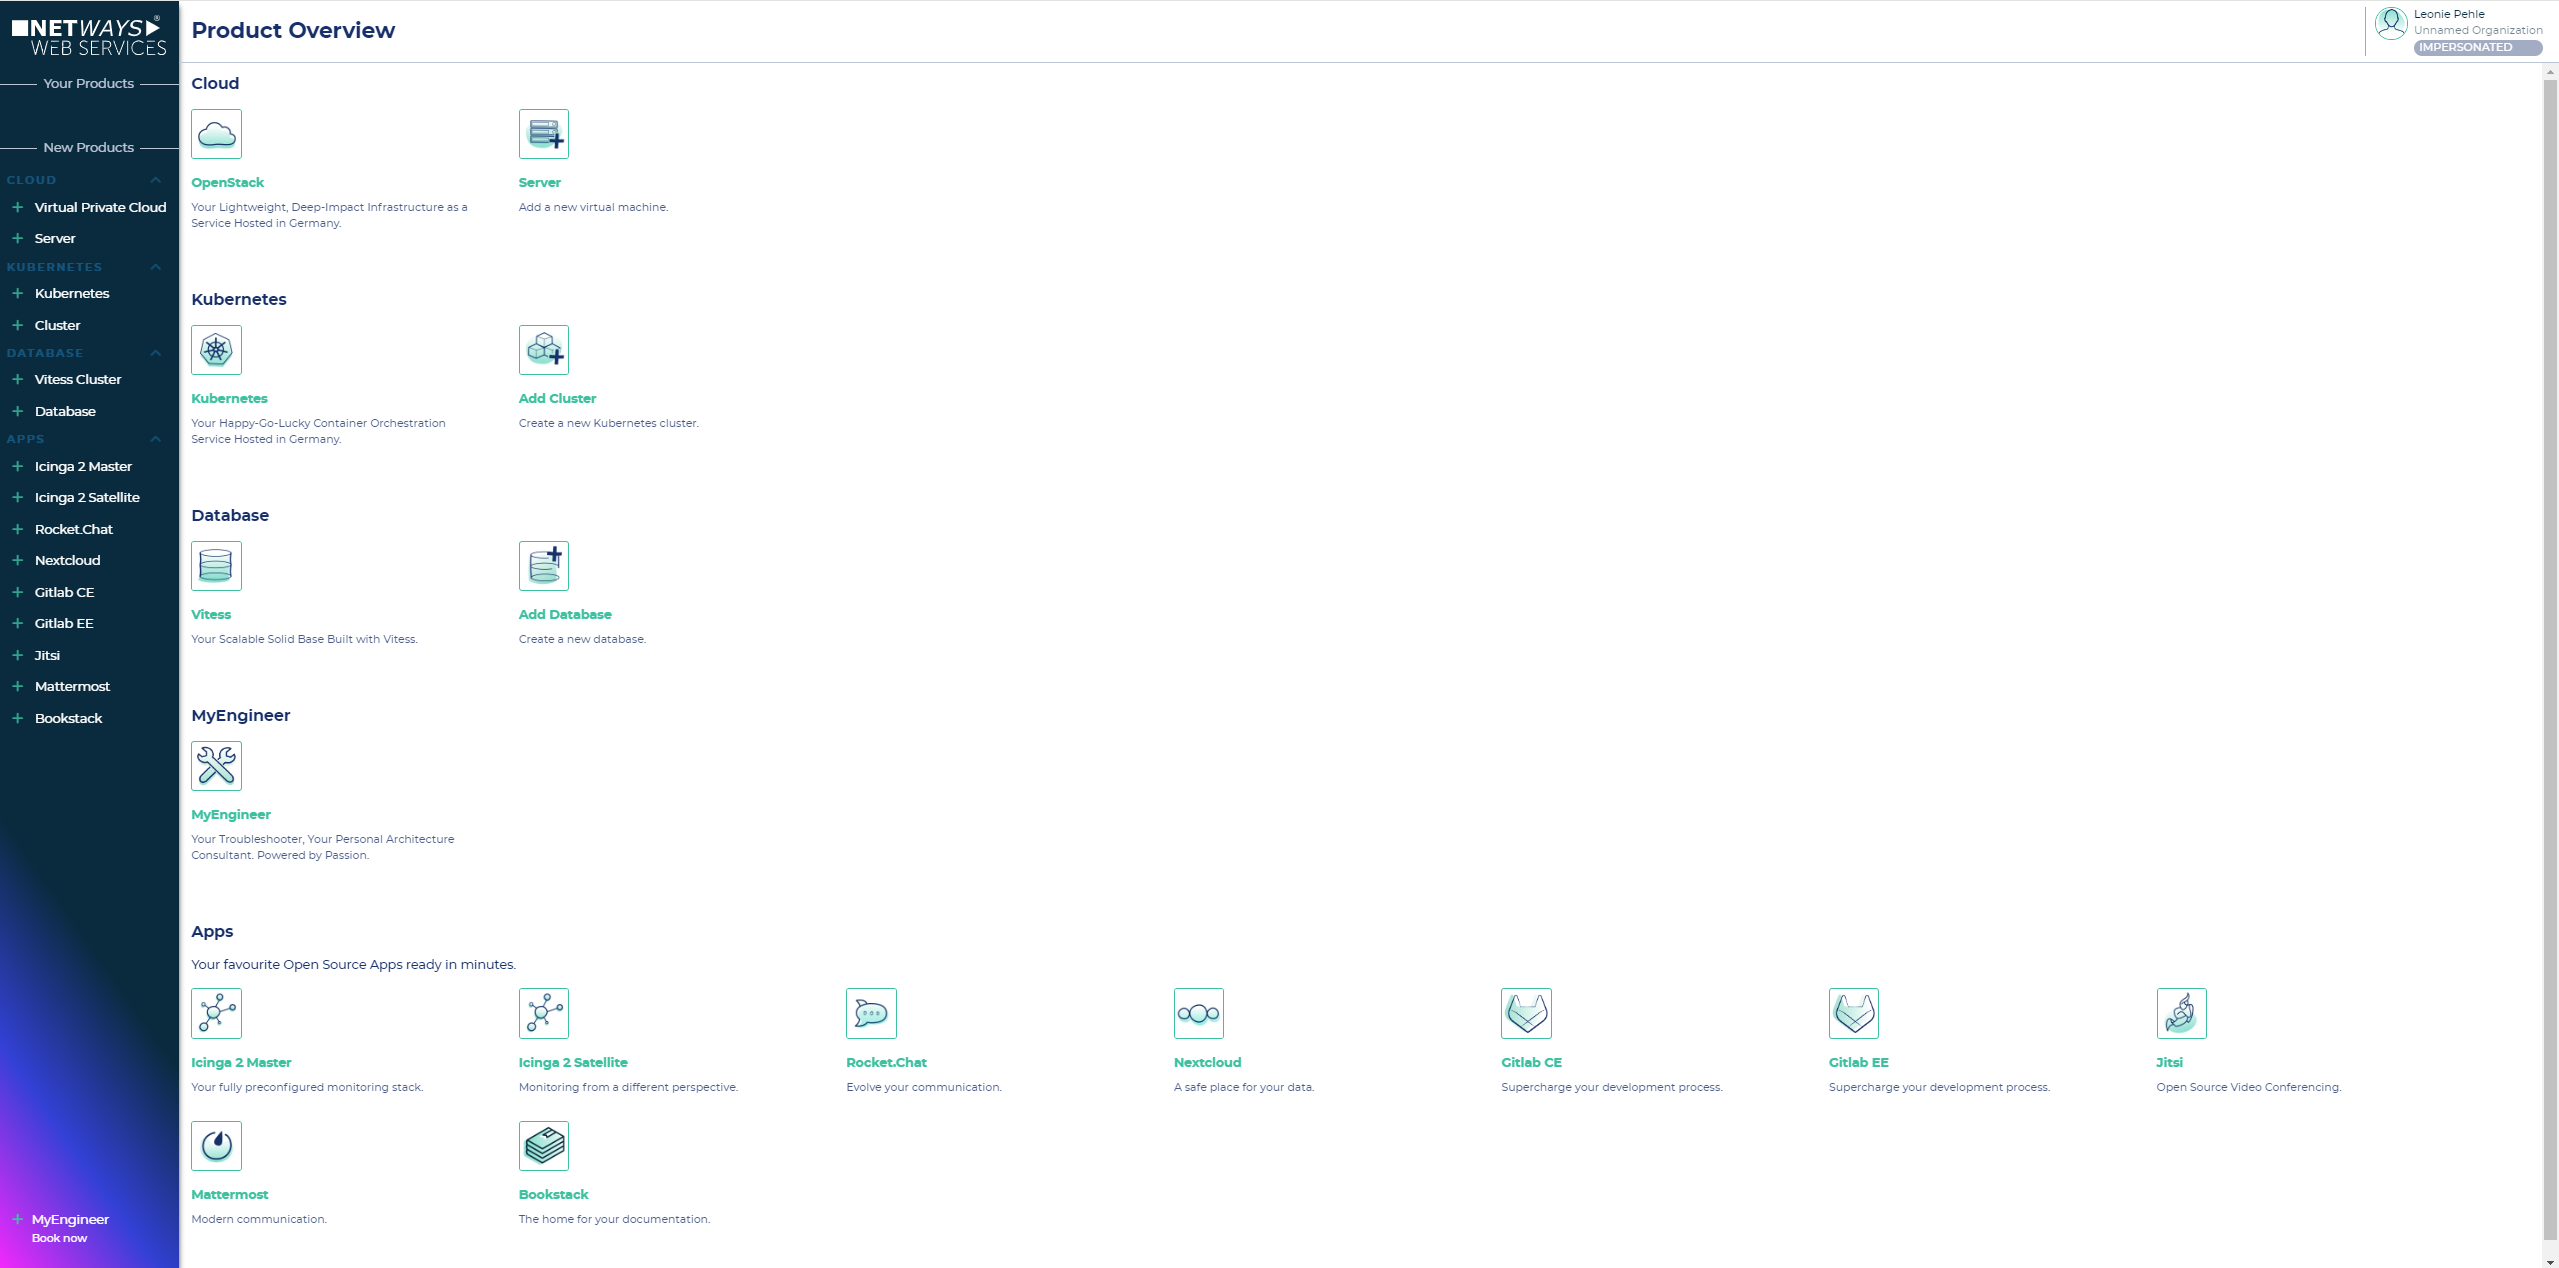
- Click on the desired service at the left tool bar

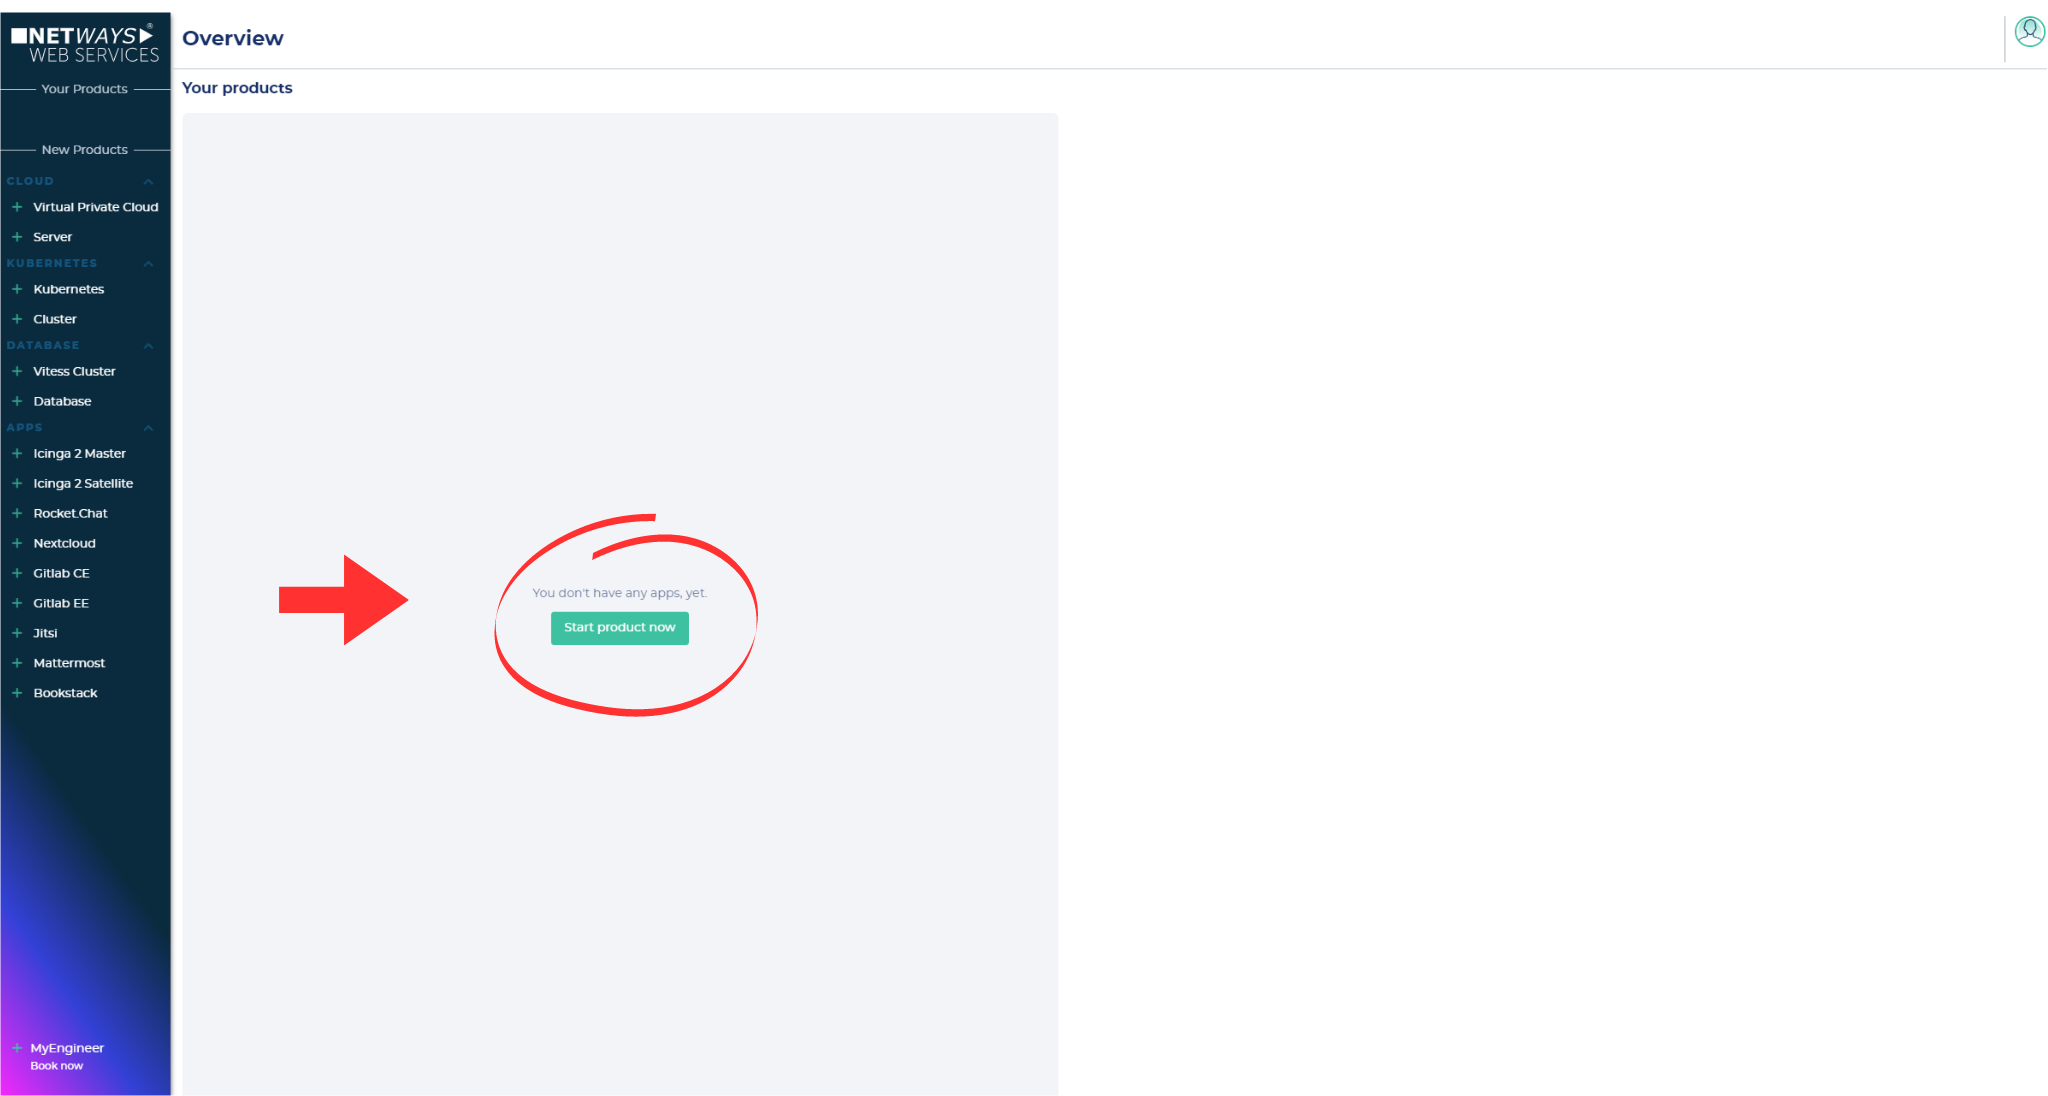
- Click on the "start app now"-button and choose the desired service


- Click on the desired service at the left tool bar
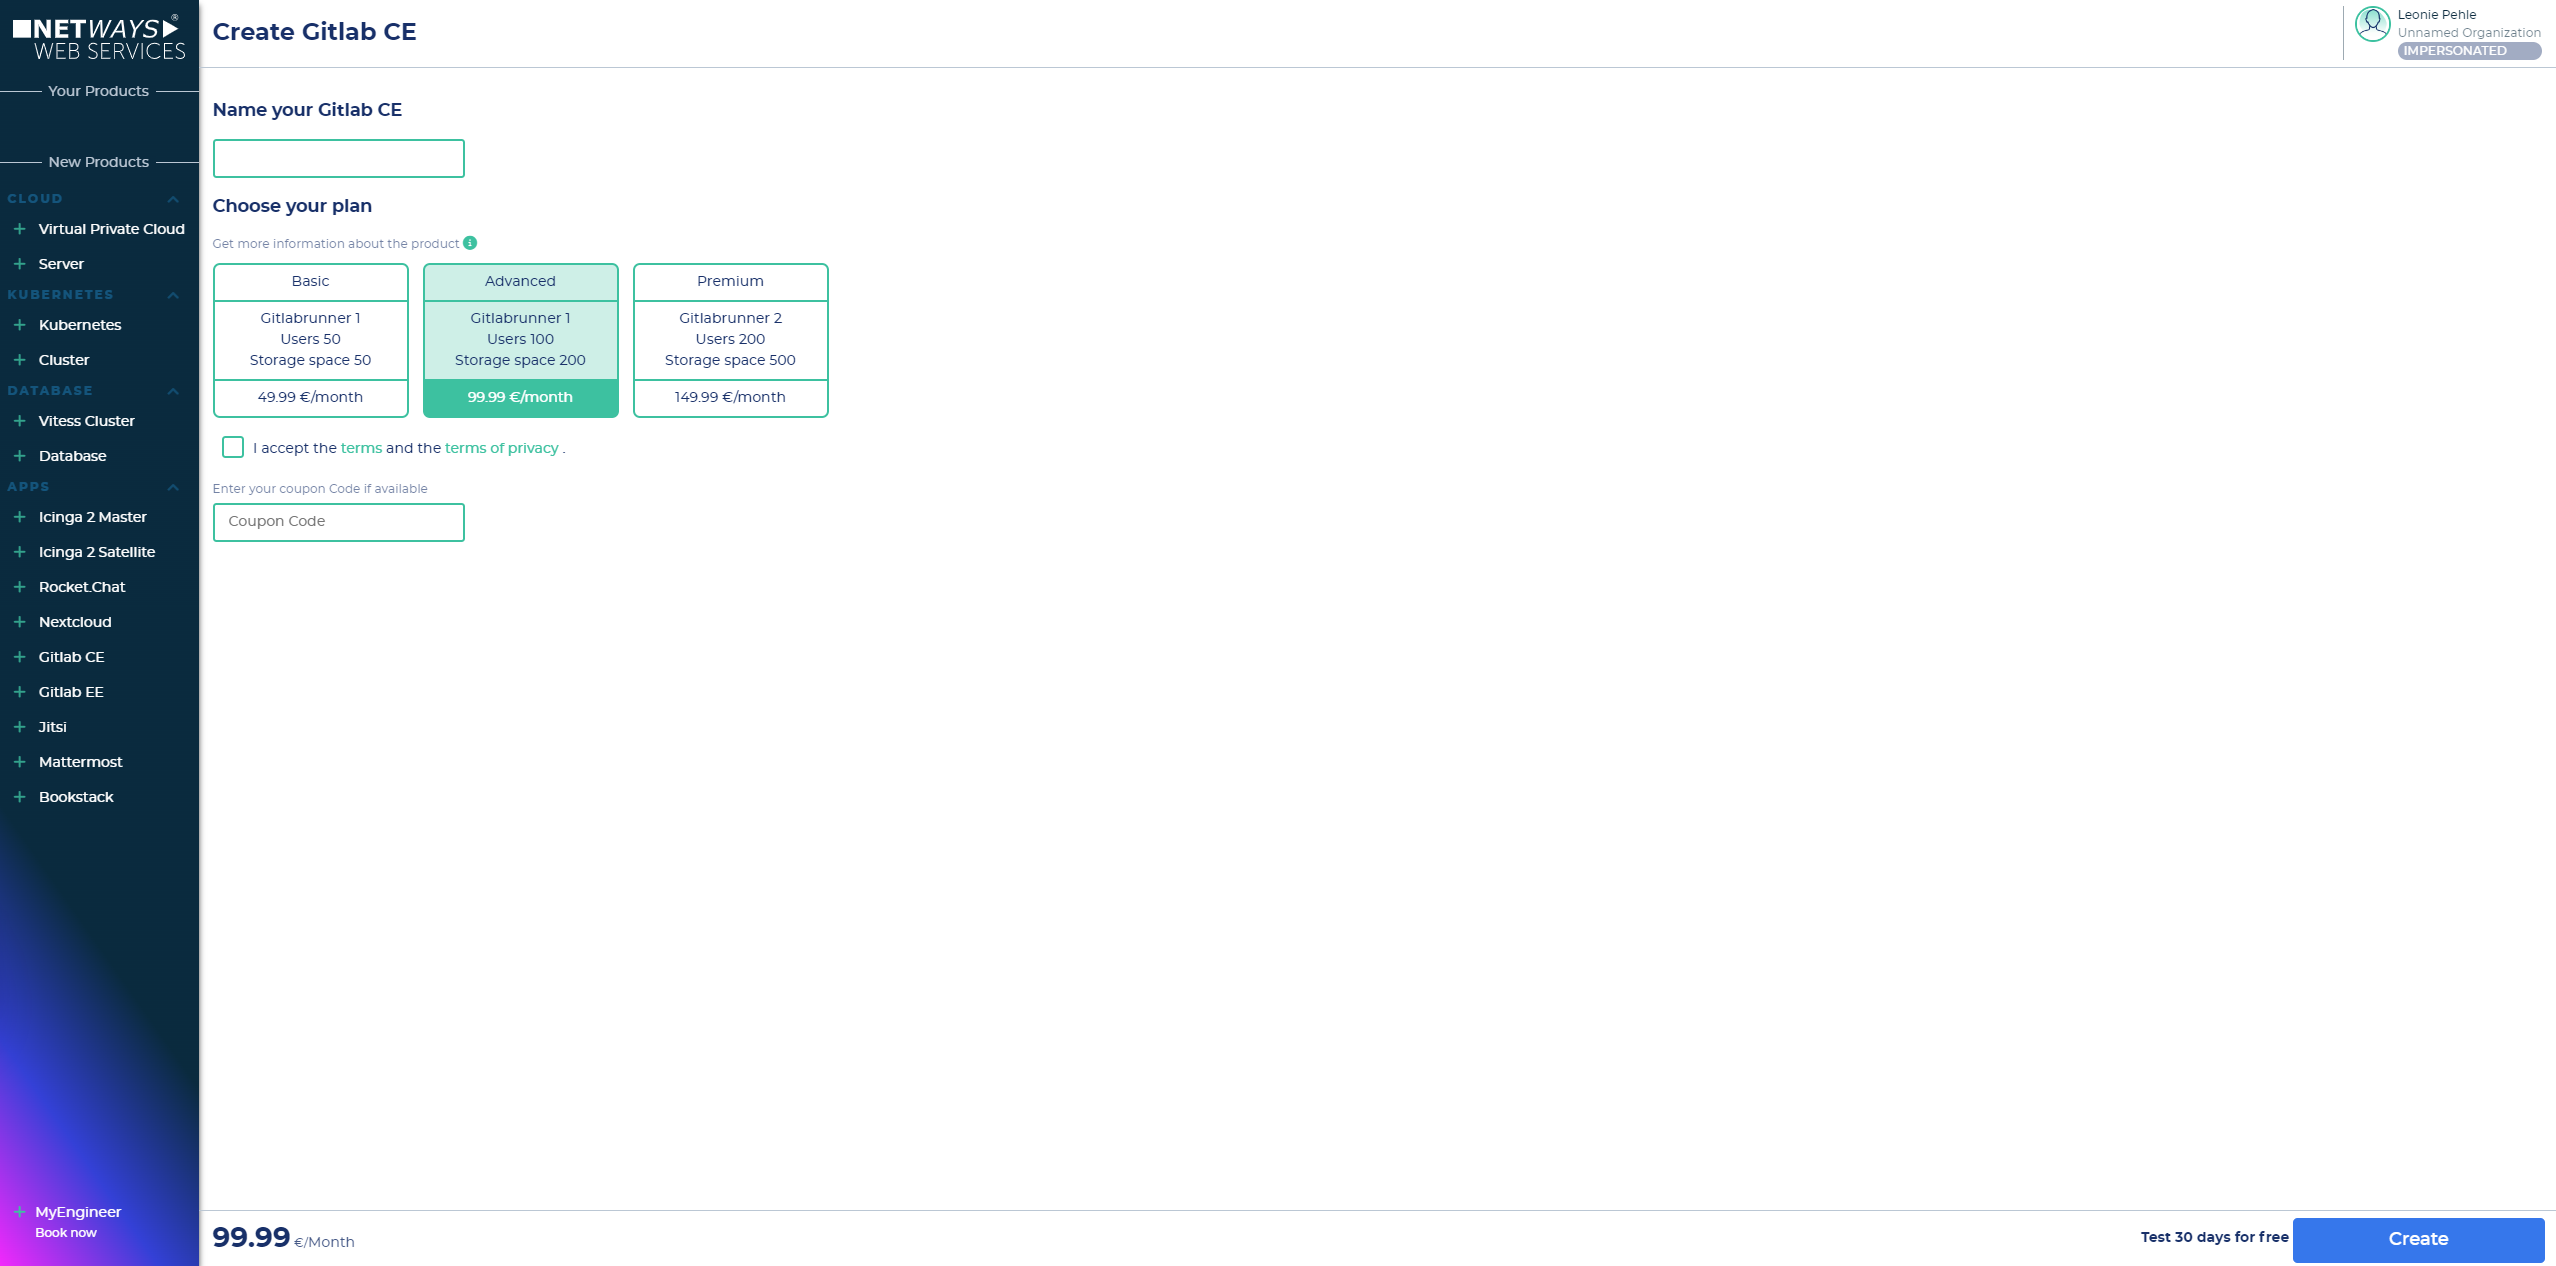
- Now name your instance, choose a plan and accept the terms of conditions -> press down-right "create"-button

- Now your app is beeing created ->
- Now you are ready to go

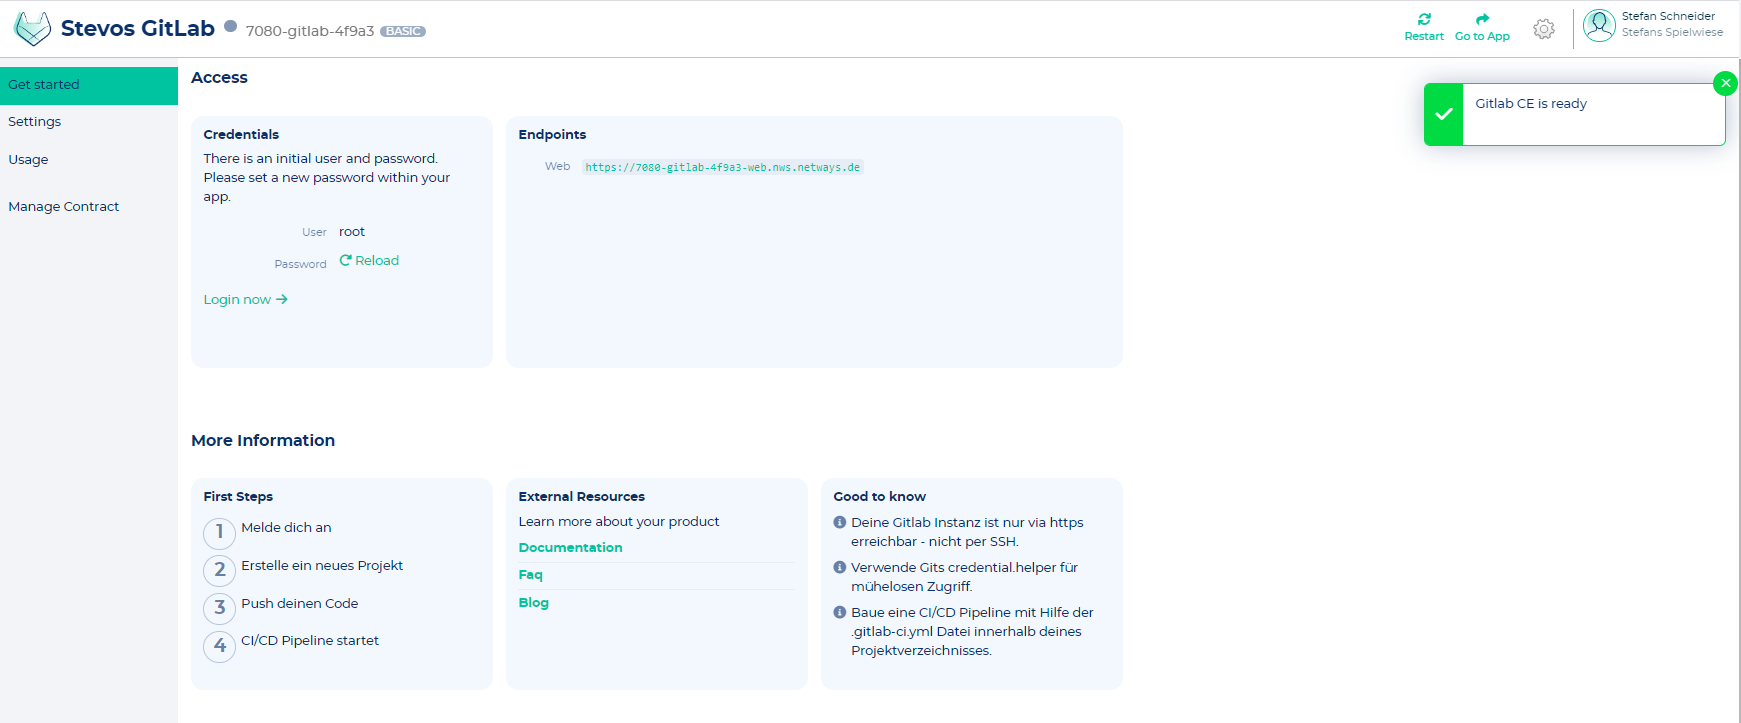
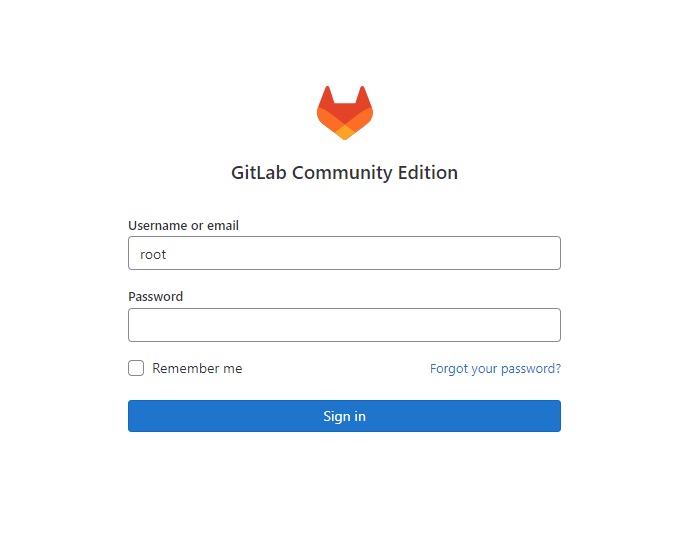
Loggin in
- You will find your credentials on the "Get started" tab -> To copy the password, you must first set it to visible
- now click on the Endpoints Web-Link to get to your GitLab instance and enter your credentials


Administrative Tasks
Customization
1. Subdomain
Just go to your GitLab app in the NWS Customer Interface and click on "Settings". Open the "CNAME"- tab and fill in your subdomain.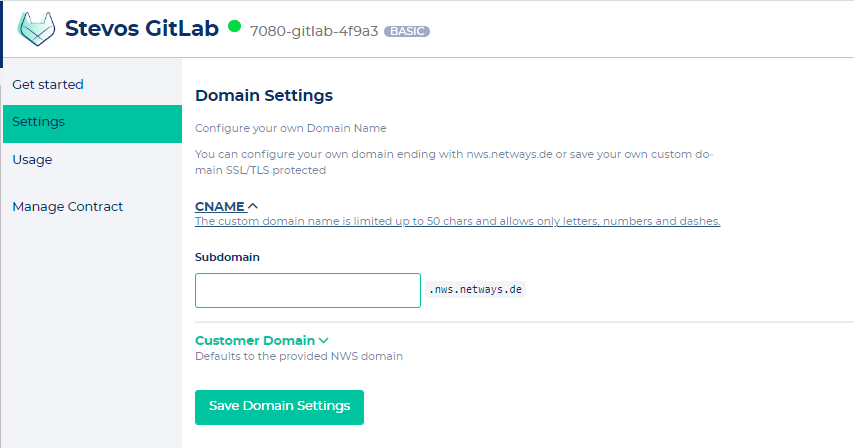
2. Customer Domain
To setup your Customer Domain, the following things must be fulfilled /accomplished:
- Domain must belong to you
- You must set an A-record to IP 185.11.255.46 for the domain name
- You enter this in our NWS Customer interface at your GitLab app under "Settings"

- You specify if you want to have a Let's encrypt certificate or an SSL certificate

3. Changing title of your GitLab instance
Just go to your GitLab app in the NWS Customer Interface and click on "Manage contract". Here you can change the title of your GitLab instance 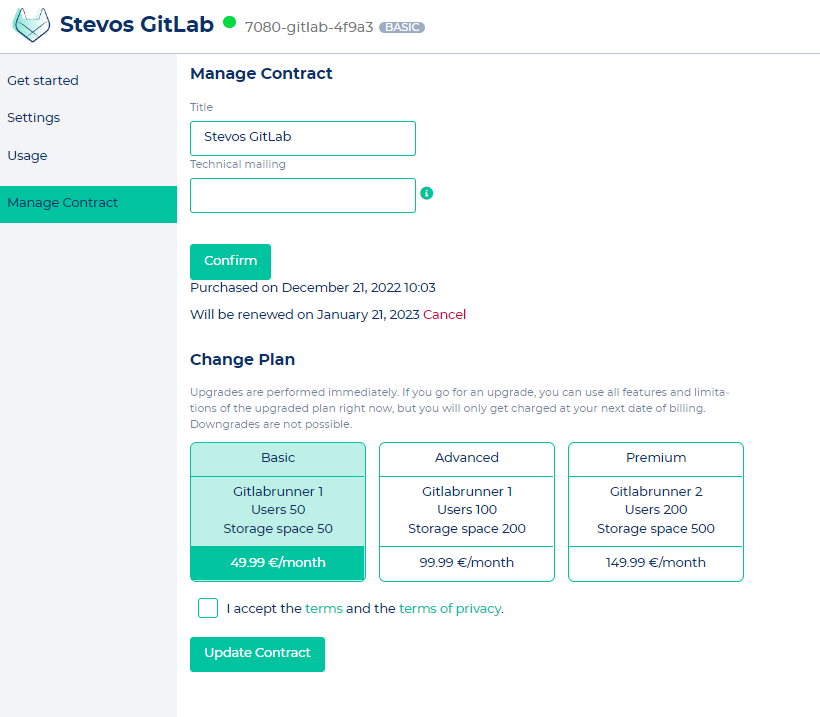
OAuth for user integration
GitLab provides OAuth for an easy user integration. Just go to your GitLab app in the NWS Customer Interface and click on "Settings". You can drop your OAuth credentials to use the pre-configured providers (GitHub, Twitter, Goolge, Facebook, GitLab.com, BitBucket, AzureAD, ADFS) at "External authentication with OAuth".
Runner Updates
Just go to your GitLab app in the NWS Customer Interface and click on "Settings". Scroll down to "Update GitLab Runner" and push the button. 
Remaining storage volume
Just go to your GitLab app in the NWS Customer Interface and click on "Usage". 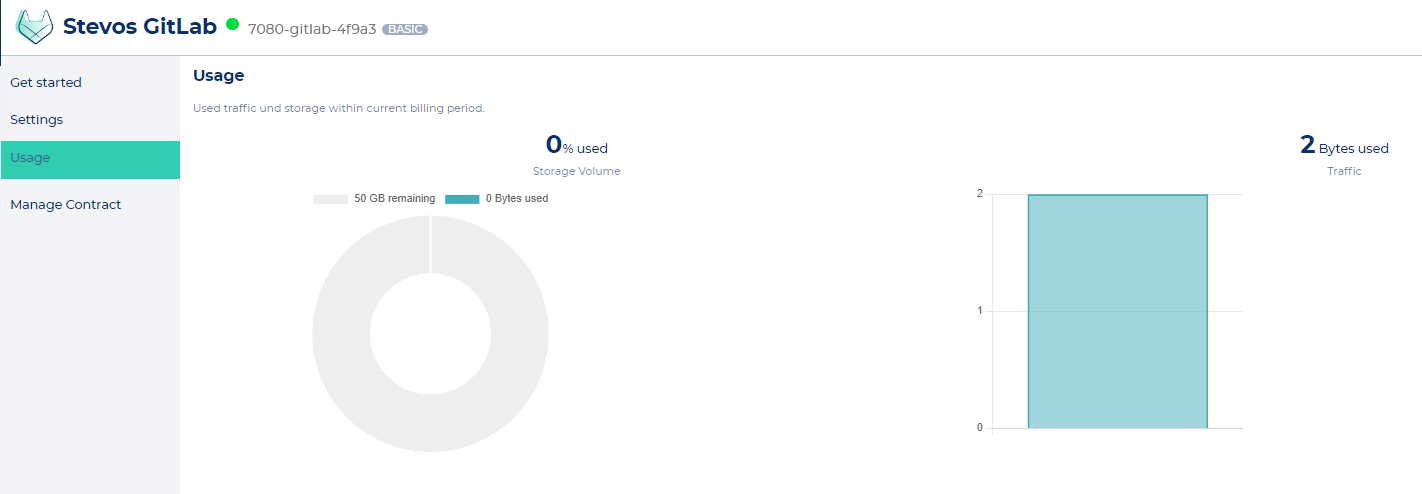
Upgrade to a bigger plan
Just go to your GitLab app in the NWS Customer Interface and click on "Manage contract". Here you can upgrade to Advanced or Premium plan. If the Premium plan is no longer sufficient, contact us via sales@netways.de and we will provide you with a customized solution on OpenStack.
SSH access
Access via SSH is not possible with the GitLab SaaS app.
You can only access your GitLab via https.
But you can use Git's credential.helper for effortless access. Just set this up once and you won't have to enter your credentials (username + PW) every time. You can do your Git pulls and Git pushes comfortably that way.
If access via SSH is essential for you, we can set up a custom GitLab instance on our OpenStack.
Here, the resources (CPU, RAM, storage) can be freely determined and adapted at any time.
Features that are not possible in our standardized SaaS app can also be implemented here (e.g. access via SSH, GitLab pages, self-selected update period, freely selectable backup cycle).
There is no contract period and billing is based on the resources used and the support time provided (which is accounted for separately in contrast to our SaaS offer). Just write us here, if this sounds interesting for you.
FAQ
Updates
How often are updates installed?
Security critical updates are installed on the same day (depending on their severity).
Otherwise, the latest versions are usually installed within a week.
Are you notified before updating?
Usually 1-2 days in advance.
Is there any downtime during the update?
Approximately 15-30 minutes for updates.
Is the operating system updated?
We install Ubuntu as the operating system and the OS update is also installed with each Gitlab update.
Backups
When are backups made?
Once a day at night from the storage area.
Except for the registry: this is not currently backed up.
How quickly can a backup be imported?
Approximately 15-30 minutes after starting work.
Support
Will we take over migration too?
We can perform the migration for you for a fee as part of our MyEngineer support service.
Do we help with all things regarding Gitlab?
We are happy to help with operational issues free of charge.
What does support cover?
We will help as much as we can. However, we cannot fix bugs and errors in GitLab. This is the responsibility of the GitLab developers themselves.
What does the price indclude?
Traffic: Traffic is not charged separately, it is included in the price.
Maintenance: Also included in the price, we always make sure that new updates are installed as quickly as possible.
Support: We are also happy to help with problems that go beyond operation of the app, e.g. consulting services for a CI/CD configuration in GitLab or how what is operated - however, we will provide these consulting in form of our chargeable MyEngineer Support service
Monitoring: We also make sure that the apps are always available.
Further technical details
Is there a limit to the size of the repository, or can problems occur above a certain size?
We are not aware of this at the moment. We can enable Git LFS for you if you need it.
Can the runner cache overflow and need to be emptied manually?
Yes. The local runner cache is not emptied automatically. Otherwise fragments that a customer needs could be lost.
On which operating system do the supplied runners run?
Currently Fedora CoreOS 37 (June 2024)
Would it also be possible to connect your own runners?
This is possible. You can connect all the runners you want. They only need to be able to reach the GitLab instance with us.
You can also run additional runners in our OpenStack (you can set these up and maintain them yourself or our MyEngineer support service can do this for you).
Is the registry space expandable?
From the Advanced plan onwards, you can also book more storage space in this way. The price for storage can be found in the NWS price table: https://nws.netways.de/pricing/
Is there a certain number of repositories/projects in the CE variant?
We do not set any limits and we are not aware of any from GitLab CE in this respect.
Is OAuth or Personal Access Token set up?
Various OAuth providers can be set up via my.nws.netways.de
You can read more about this in our documentation for the GitLab application: https://docs.nws.netways.de/link/80#bkmrk-do-you-provide-oauth
Do I get full admin rights or full access to the server(s)?
You will be given full access to the GitLab web interface with full admin privileges. You will not have access to the underlying system.
Is IP whitelisting possible for incoming connections so that only our outgoing connections reach the Gitlab instance?
Unfortunately, this is not possible with our SaaS app. However, IP whitelisting could be mapped via the individually set up GitLab VM on our OpenStack.
Related links
Nextcloud
Getting started
Starting the app
Create an account on NWS Customer Interface.
- After finishing your registration, you have two possibilities to start your app:
- Click on the desired service at the left tool bar
- Click on the "start app now"-button and choose the desired service
- Click on the desired service at the left tool bar
- Now name your instance, choose a plan and accept the terms of conditions -> press down-right "create"-button

- Now your app is beeing created ->
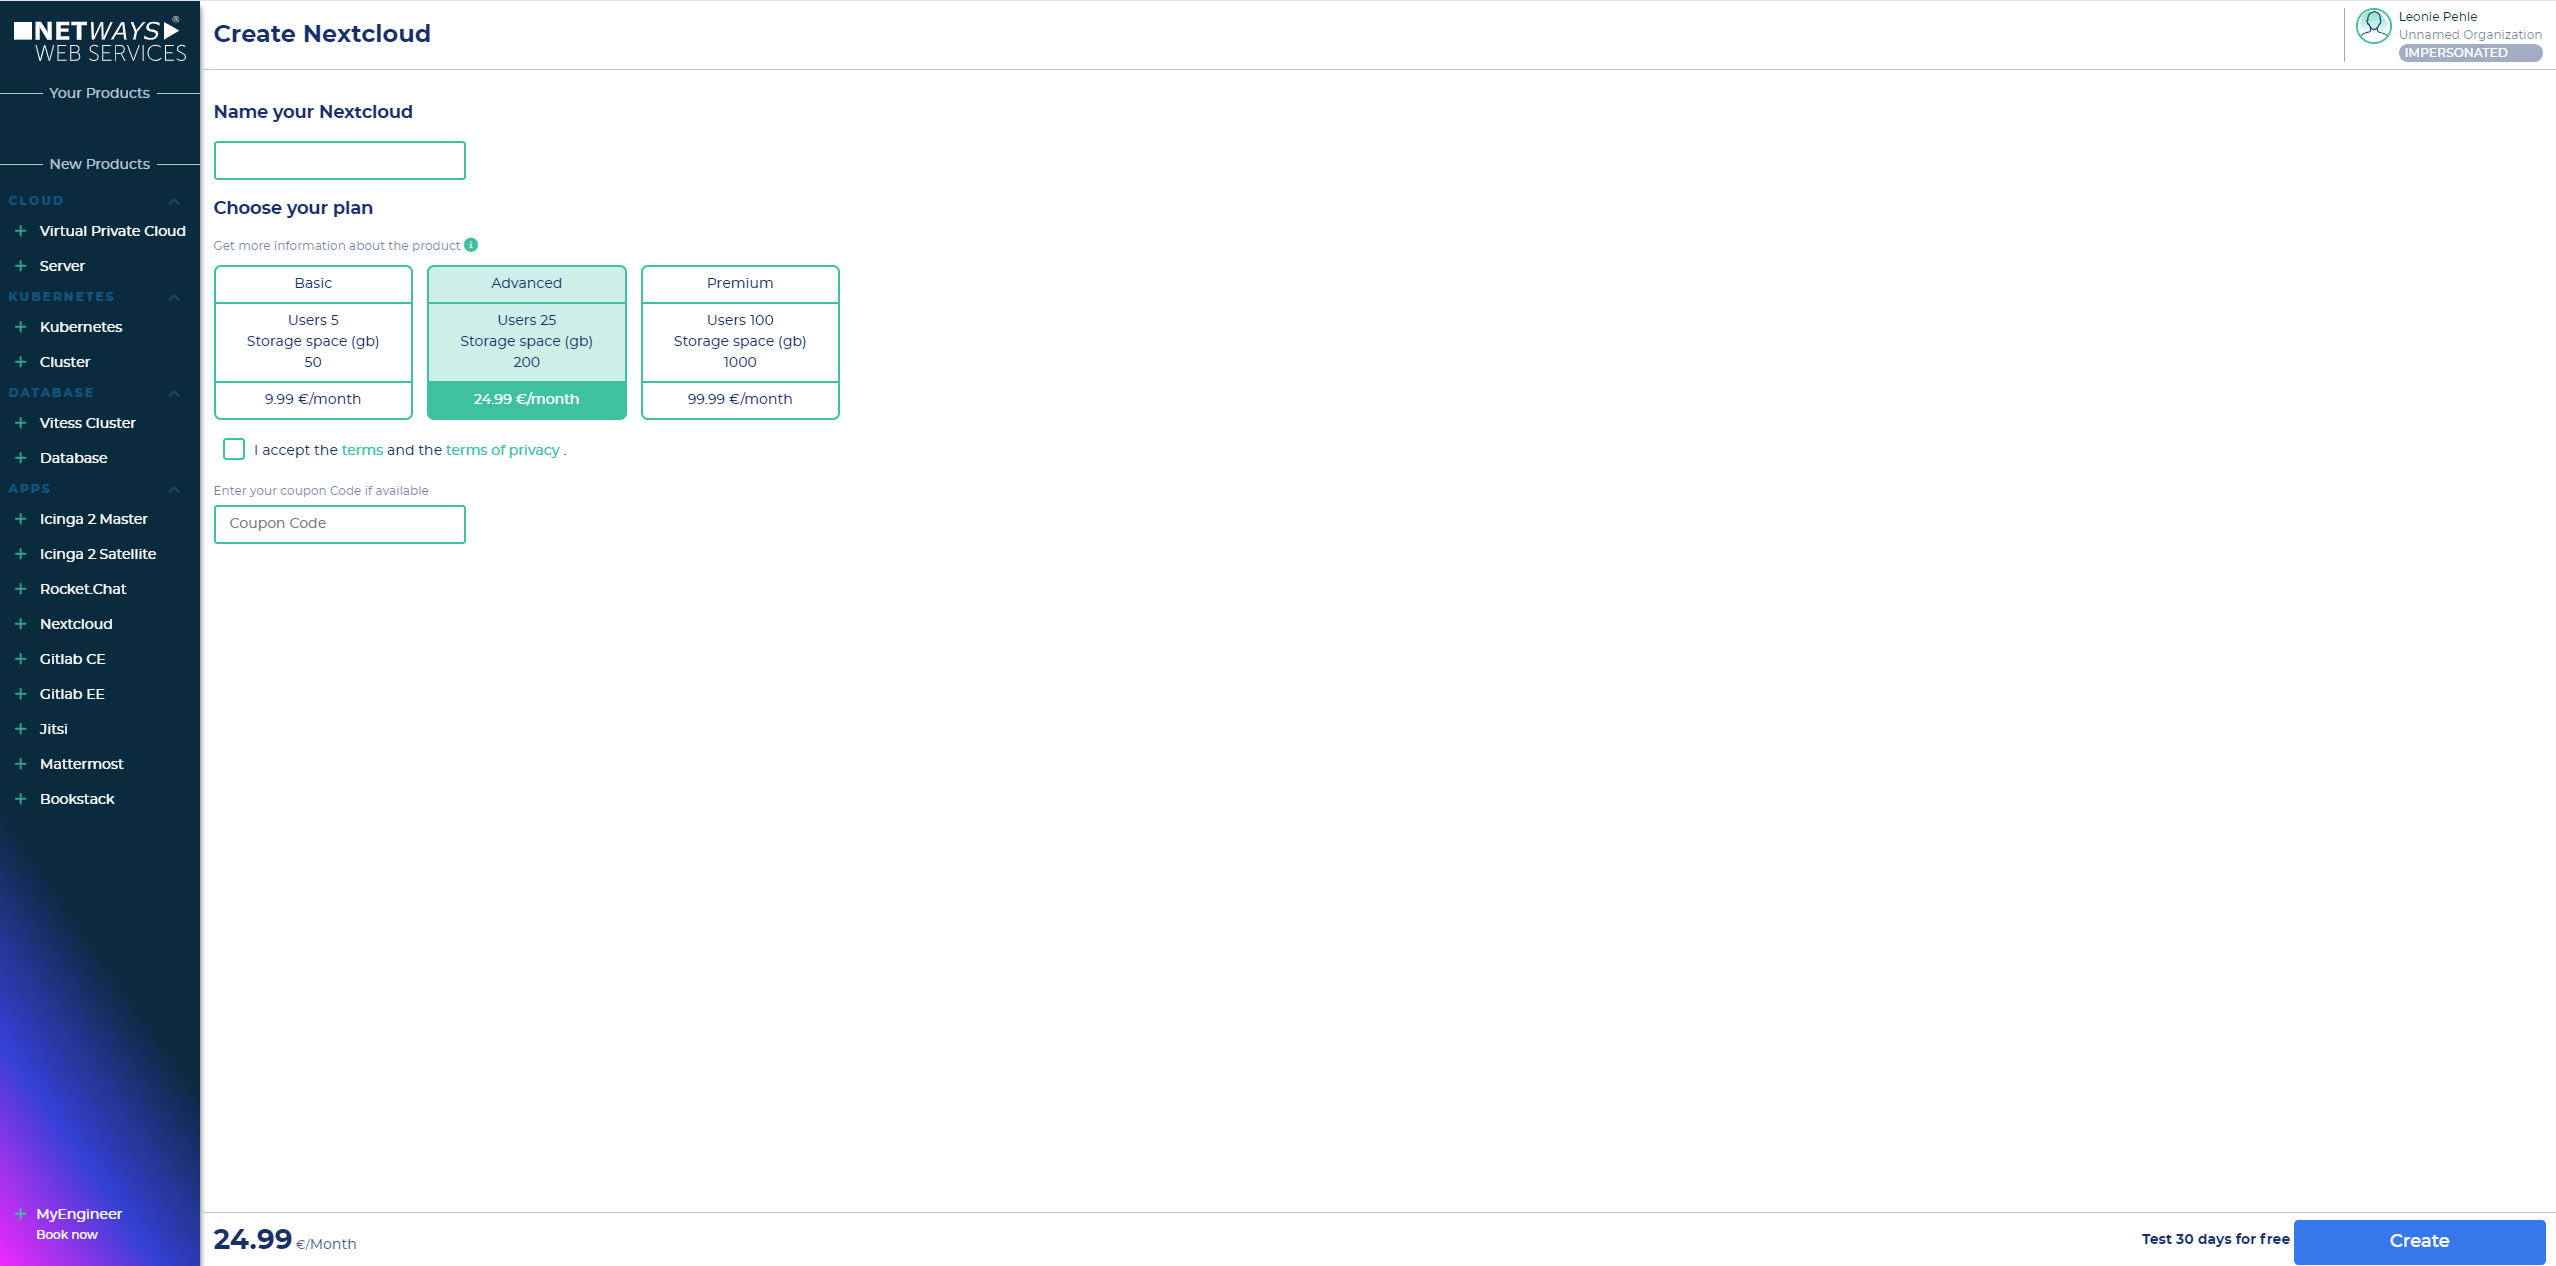

- Now you are ready to go

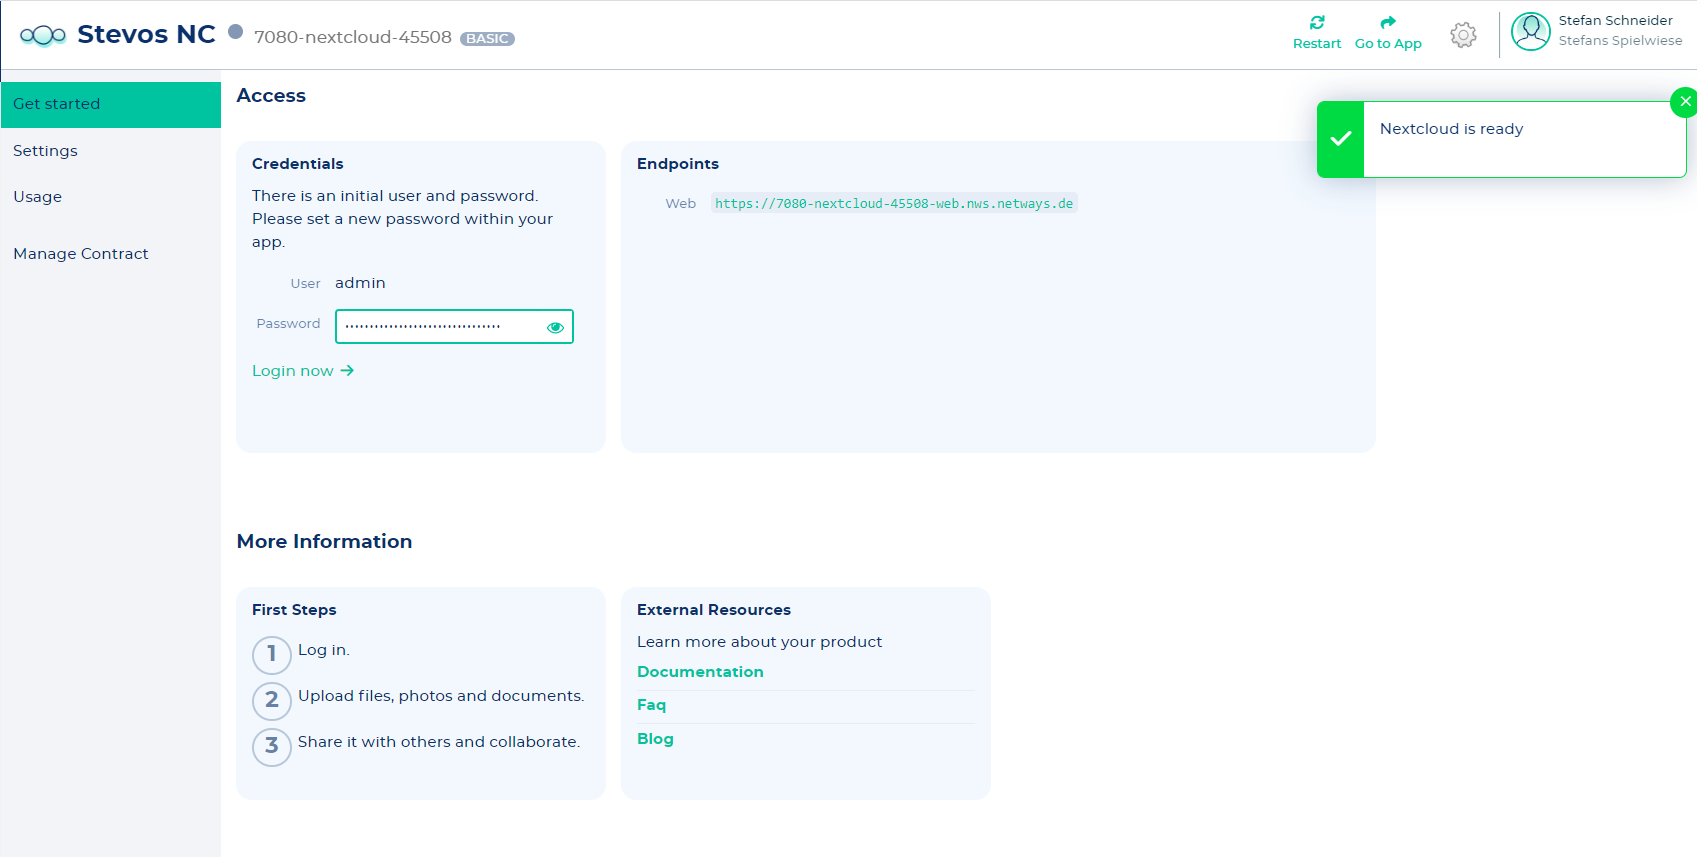
Logging in
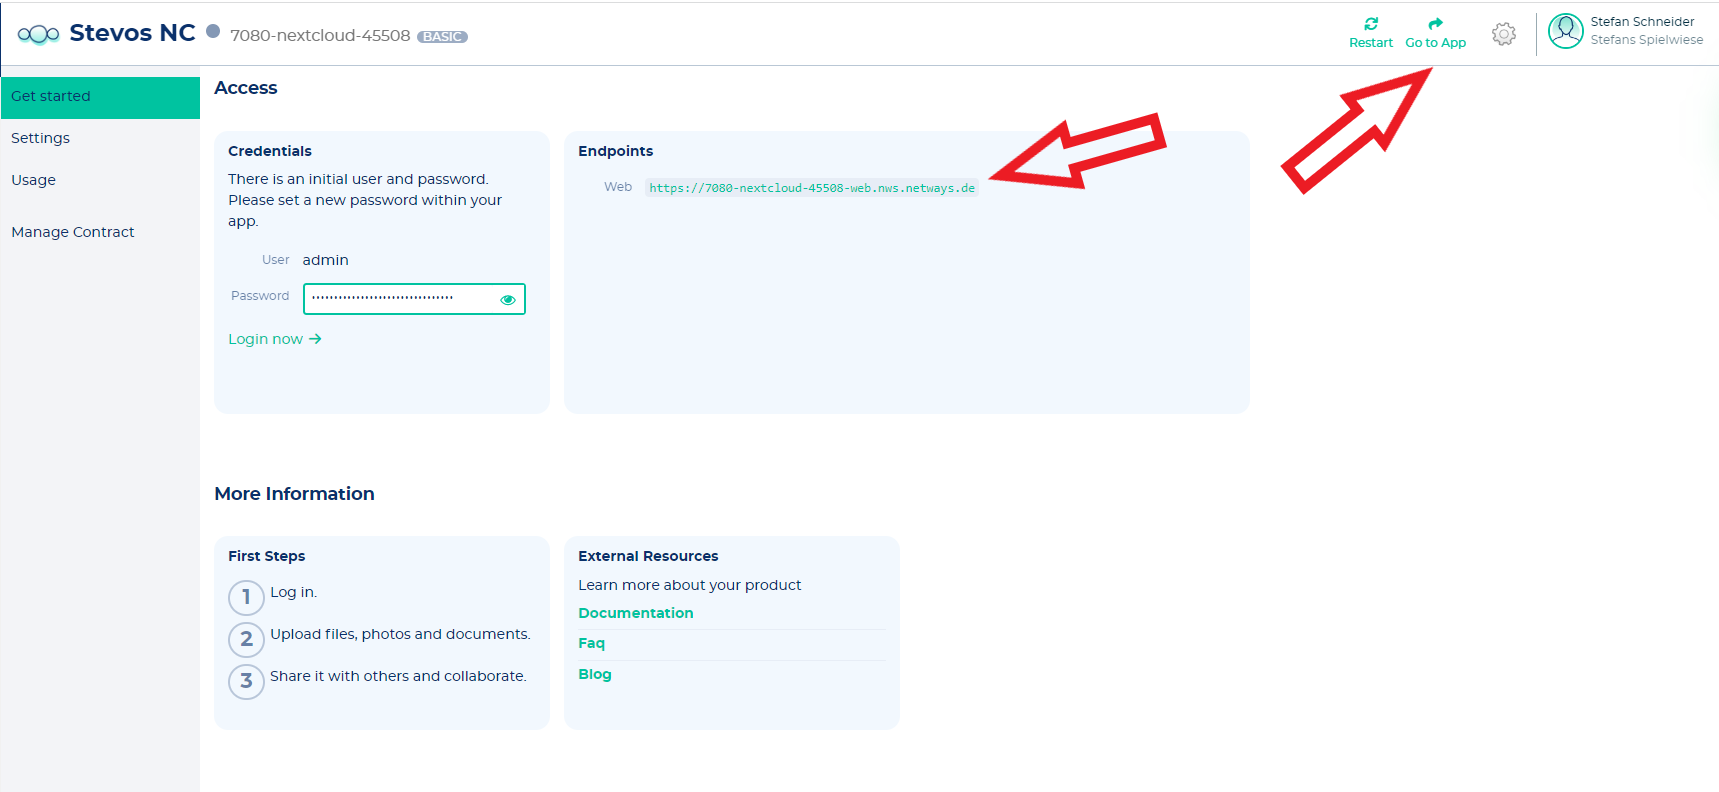
- You will find your credentials on the "Get started" tab -> To copy the password, you must first set it to visible
- now click on the Endpoints Web-Link (or on the "Go to App"- button) to get to your Nextcloud instance and enter your credentials


Administrative Tasks
Changing language
Just go to your Nextcloud app in the NWS Customer Interface and click on "Settings". The first point is setting up the "Default language". 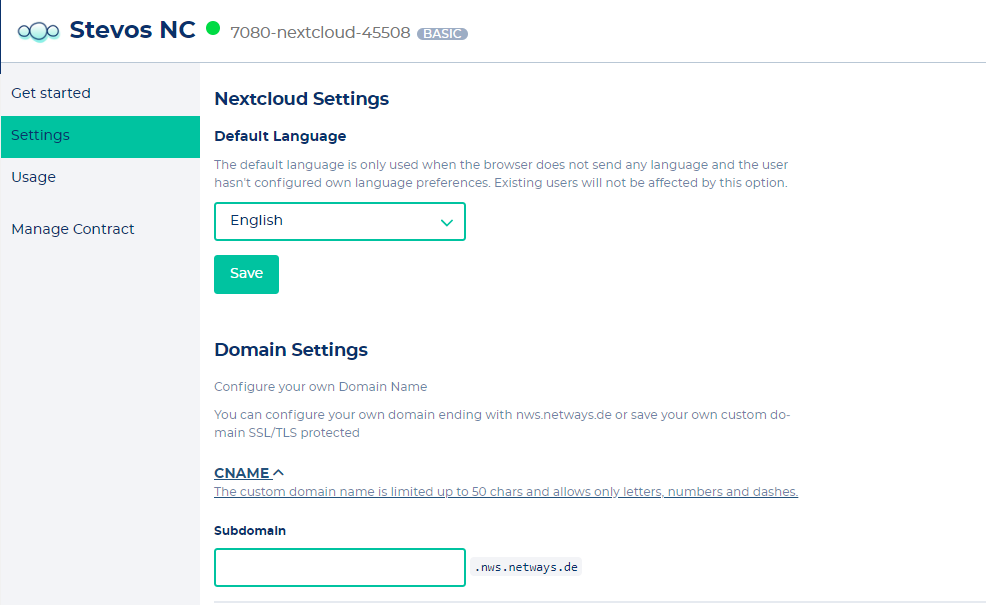
Customization
1. Subdomain
Just go to your Nextcloud app in the NWS Customer Interface and click on "Settings". Open the "CNAME"- tab and fill in your subdomain.
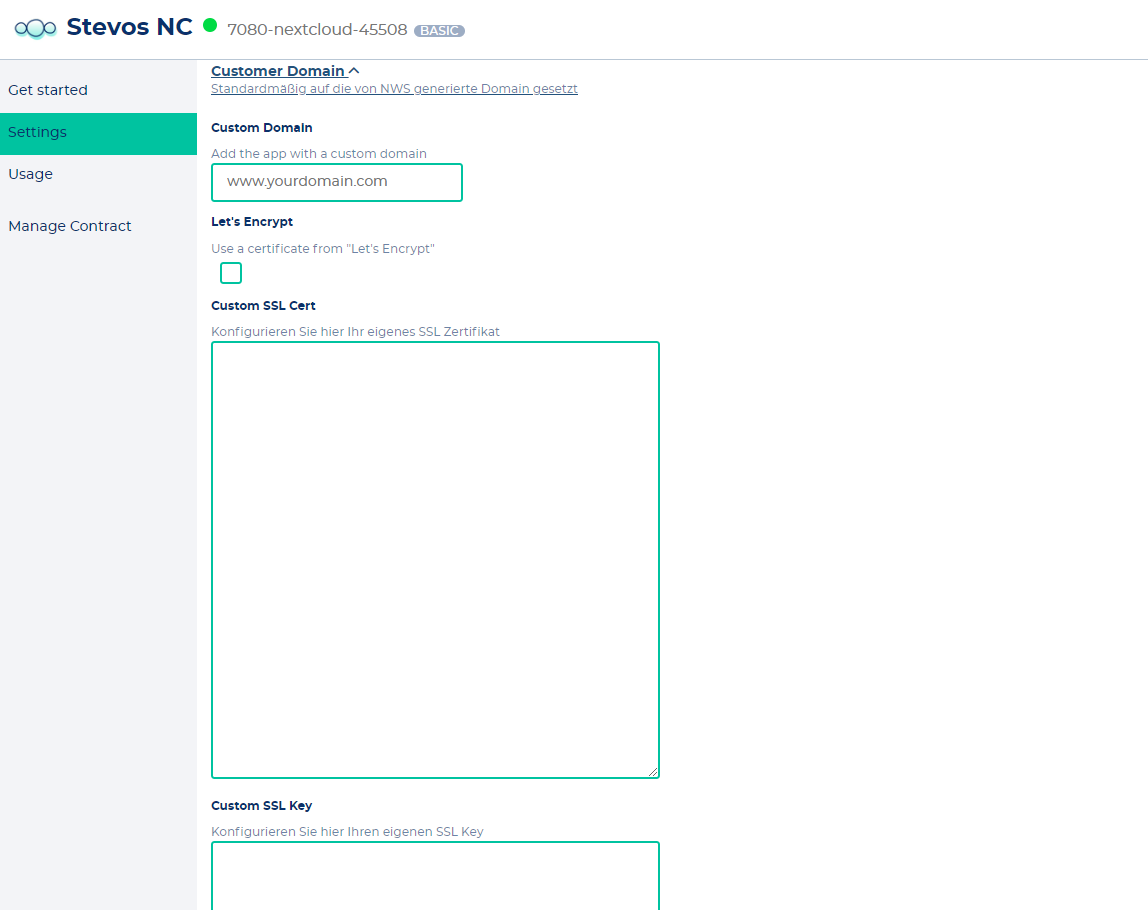
2. Customer domain
Just go to your Nextcloud app in the NWS Customer Interface and click on "Settings". Open the "Customer domain"- tab and fill in your domain.
You also have to choose whether you want to take a Let´s encrypt or a Custom SSL certificate.
3. Changing title of Nextcloud instance
Just go to your Nextcloud app in the NWS Customer Interface and click on "Manage contract". Here you can change the title of your Nextcloud instance 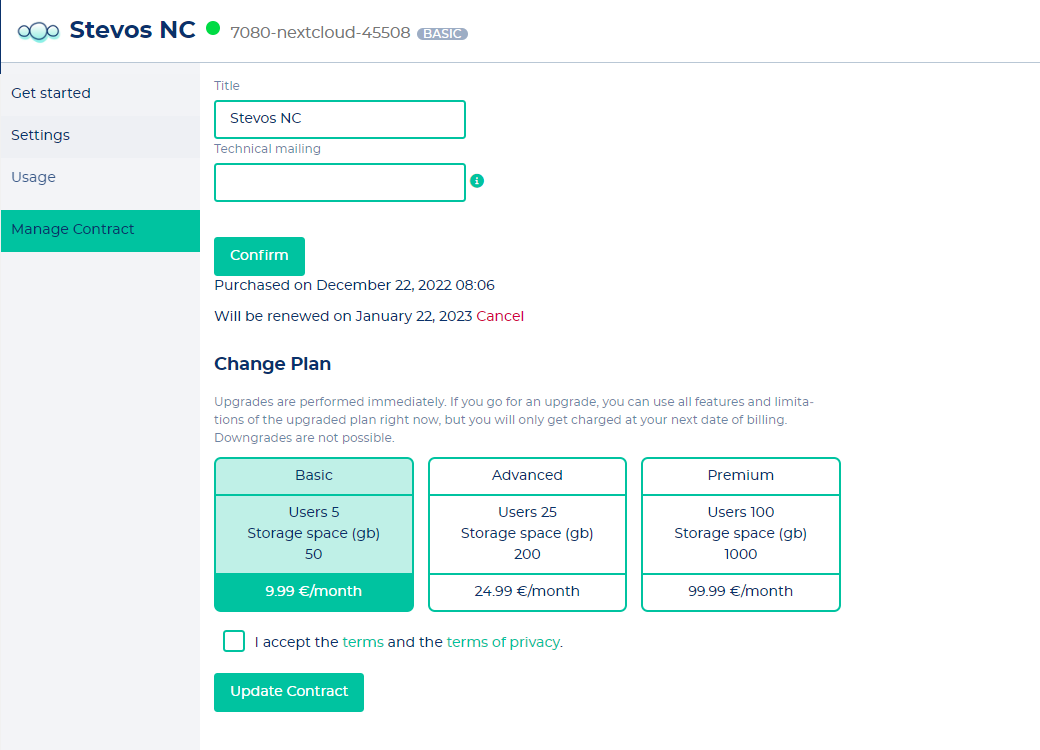
Remaining storage volume
Just go to your Nextcloud app in the NWS Customer Interface and click on "Usage". 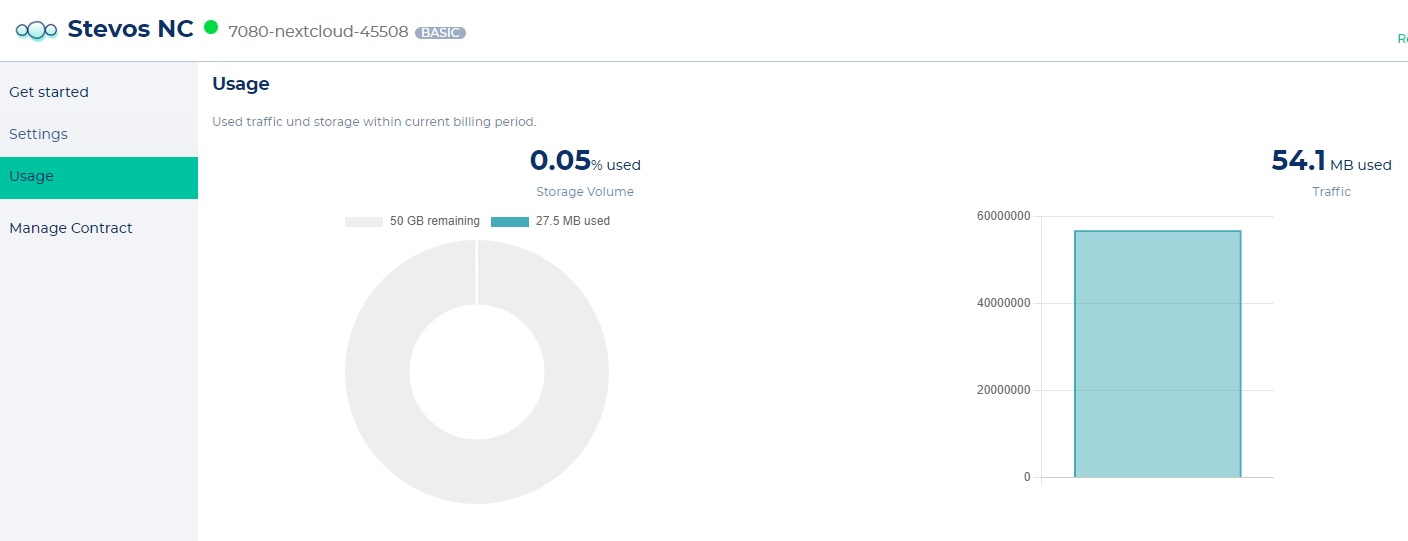
Upgrade to a bigger plan
Just go to your Nextcloud app in the NWS Customer Interface and click on "Manage contract". Here you can upgrade to Advanced or Premium plan. If the Premium plan is no longer sufficient, contact us via sales@netways.de and we will provide you with a customized solution on OpenStack.
Nextcloud App Store
We grant full access to the Nextcloud App store. We offer a certain portfolio pre-installed, but it´s possible to uninstall, deactivate, install or activate, etc. all available apps.
Provided Office suite
We provide Nextcloud office which is based on Collabora.
Backups of the users' data?
No, there is only a backup of the conifuration within the NWS Nextcloud SaaS Apps.
The user data is stored in S3, where it is stored in triple redundancy in our Ceph. But no backup can be created from it. So if a user deletes his data by mistake, it cannot be restored.
If a backup of user data is essential for you, we can set up an individual Nextcloud instance on our OpenStack. The user data is stored on SSD hard drives, from which backups can be selected in the form of images with a freely selectable retention cycle. Just contact us here, if you are interested in a managed Nextcloud on OpenStack.
Related links
Rocket.Chat
Getting started
Starting the app
Create an account on NWS Customer Interface.
- After finishing your registration, you have two possibilities to start your app:
- Click on the desired service at the left tool bar
- Click on the "start app now"-button and choose the desired service
- Click on the desired service at the left tool bar
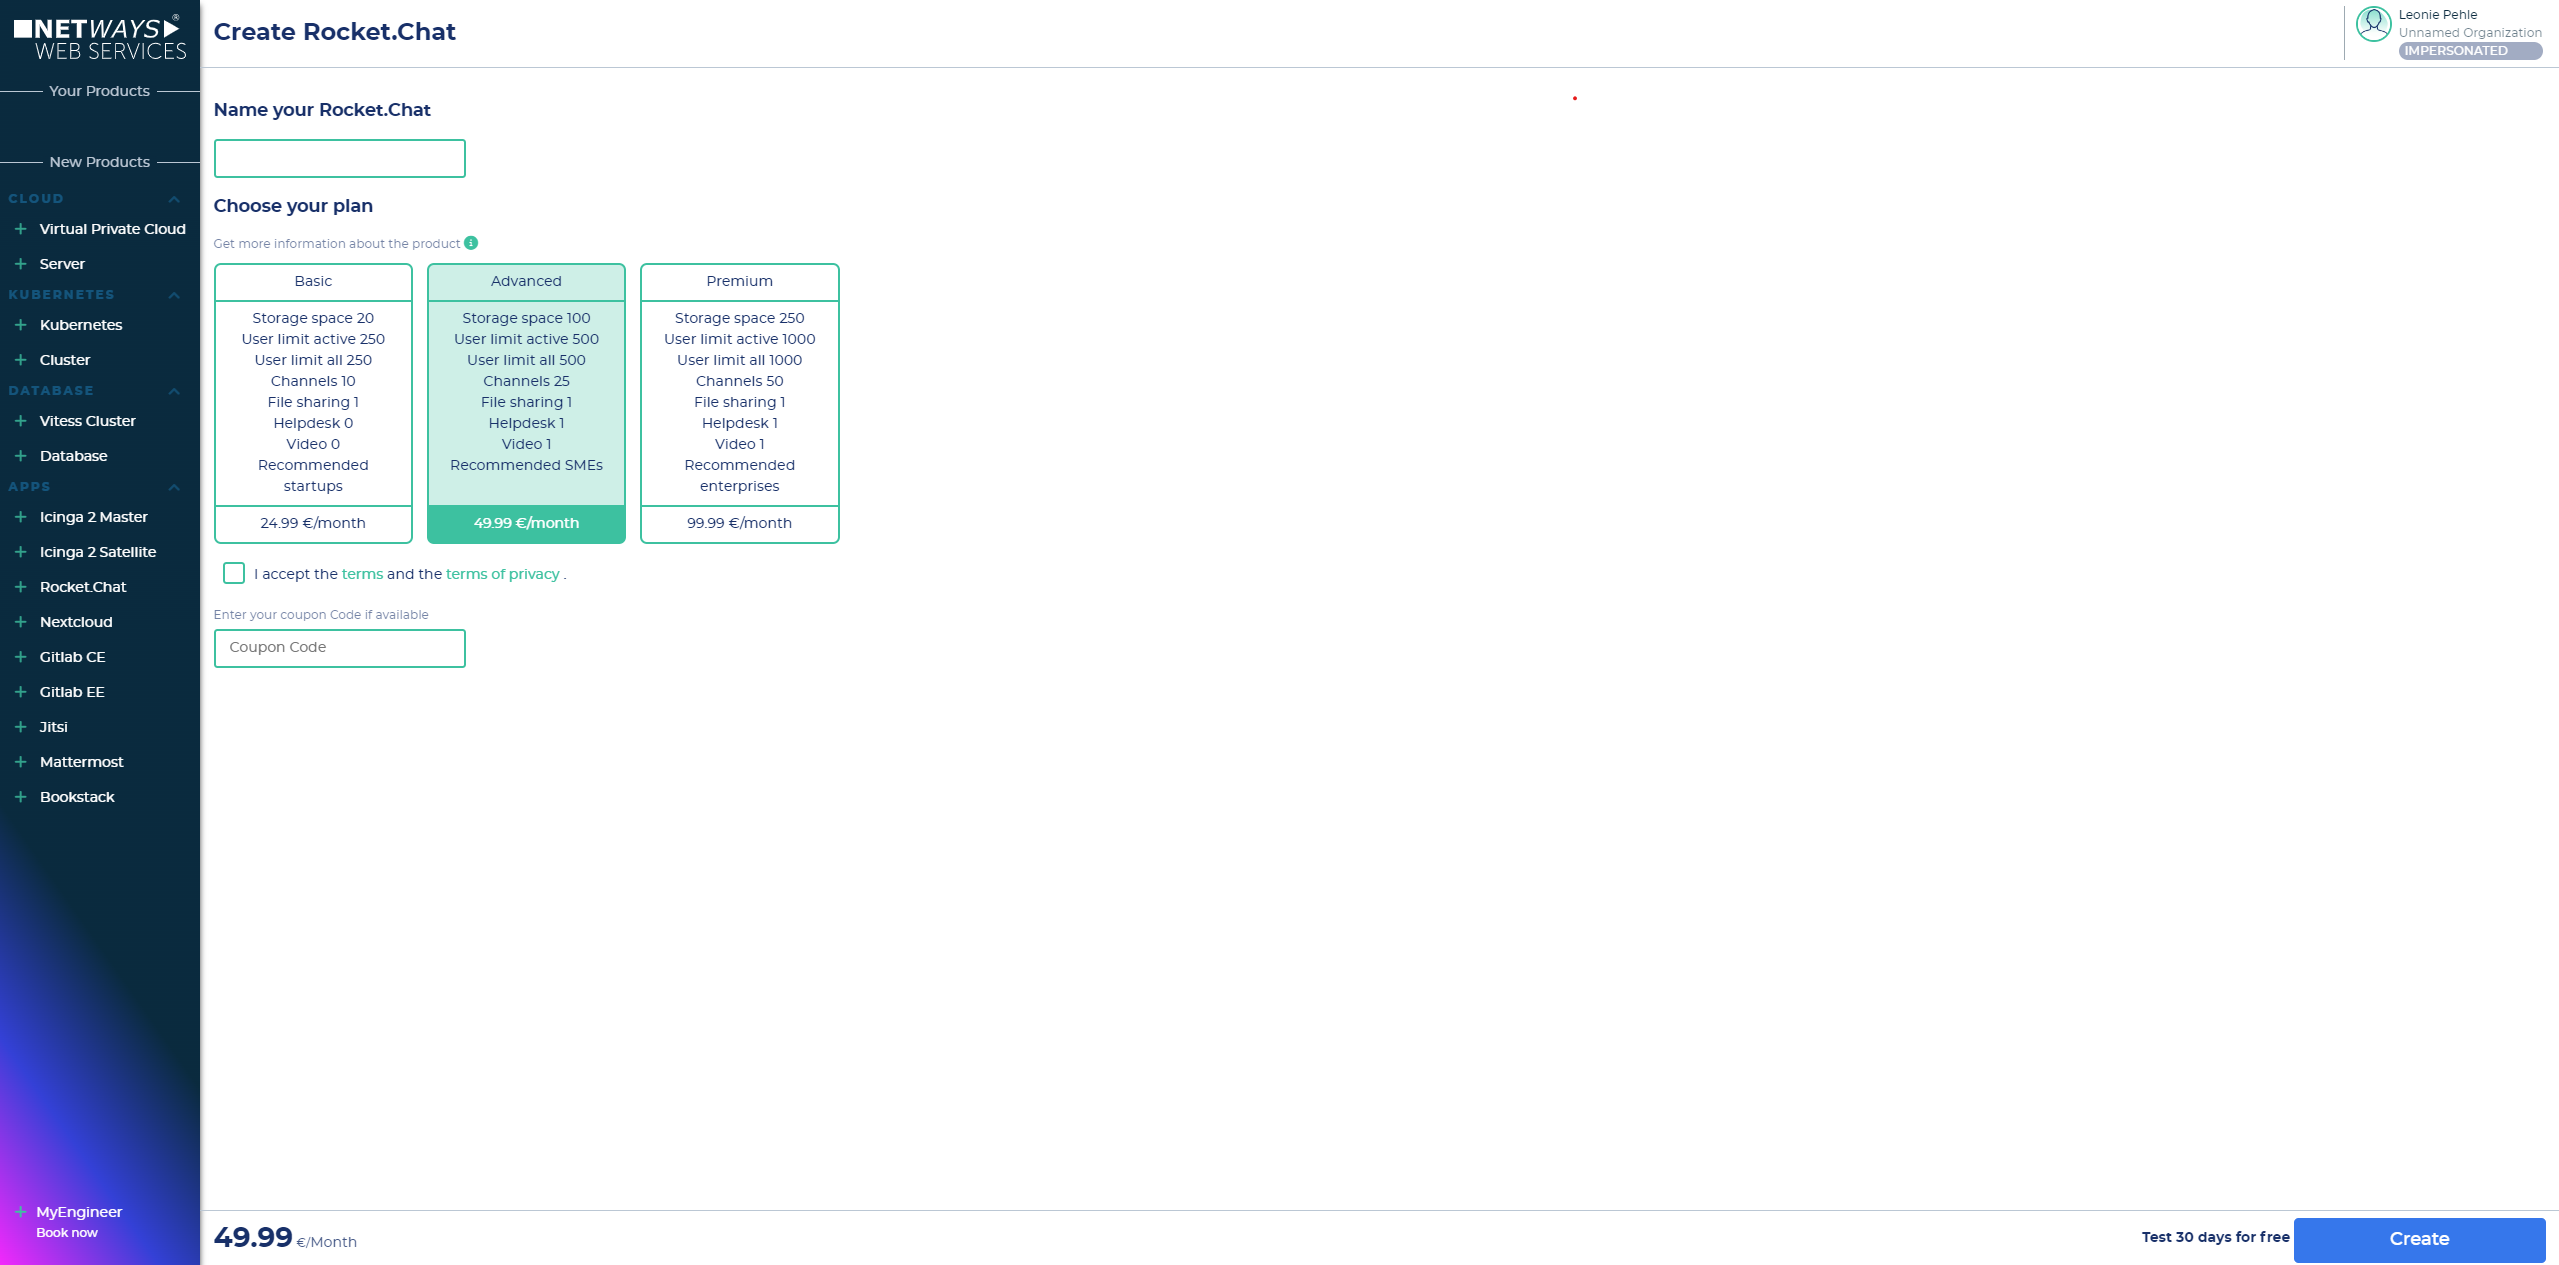
- Now name your instance, choose a plan and accept the terms of conditions -> press down-right "create"-button

- Now your app is beeing created ->
- Now you are ready to go

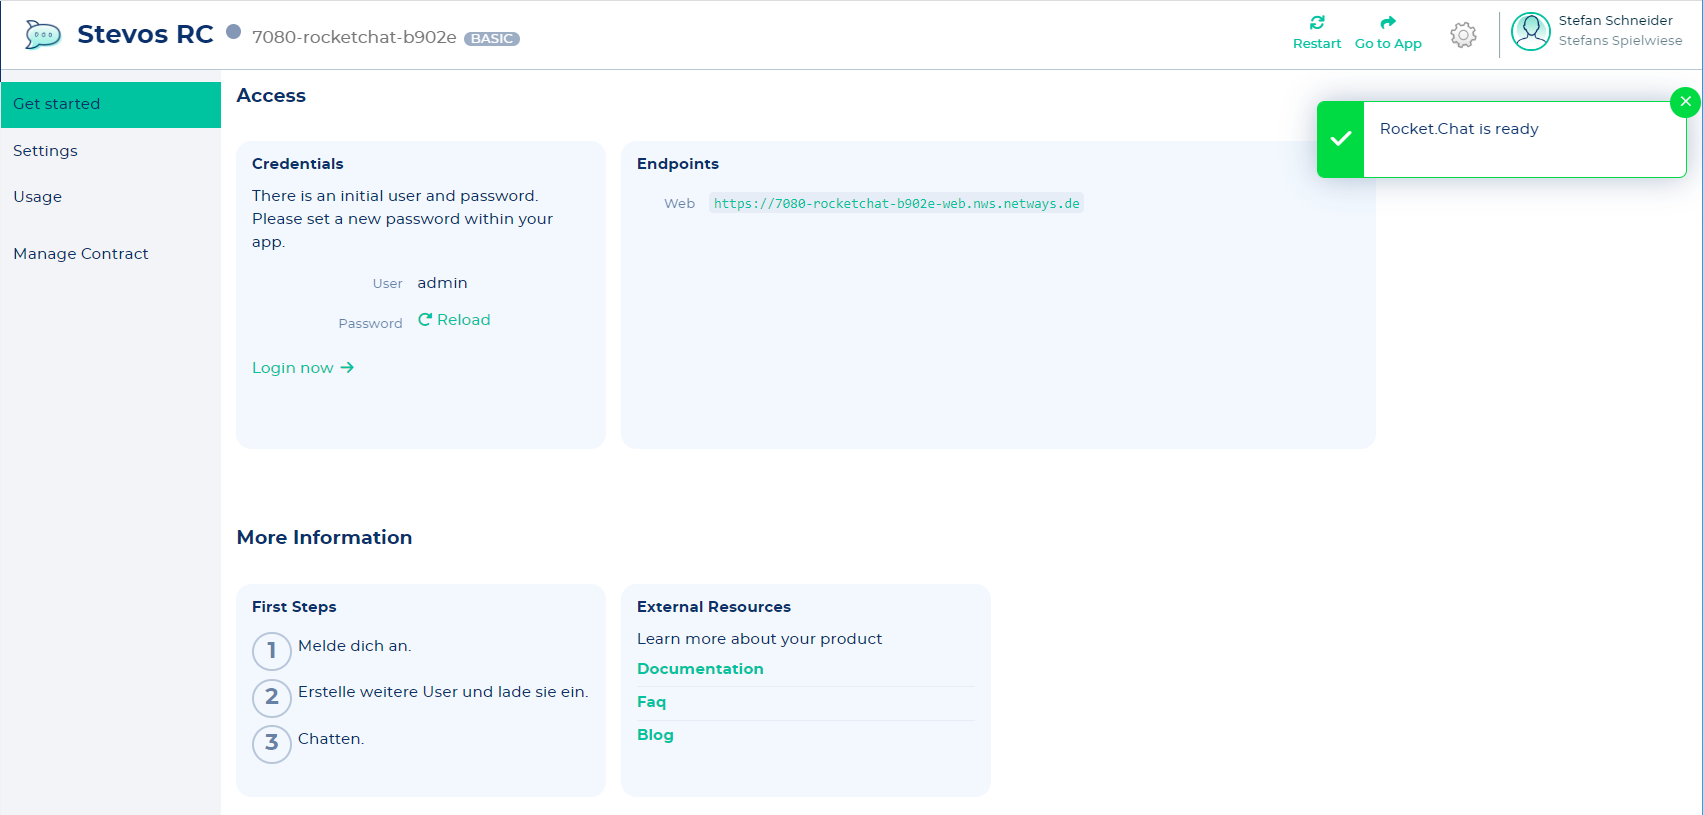
Logging in
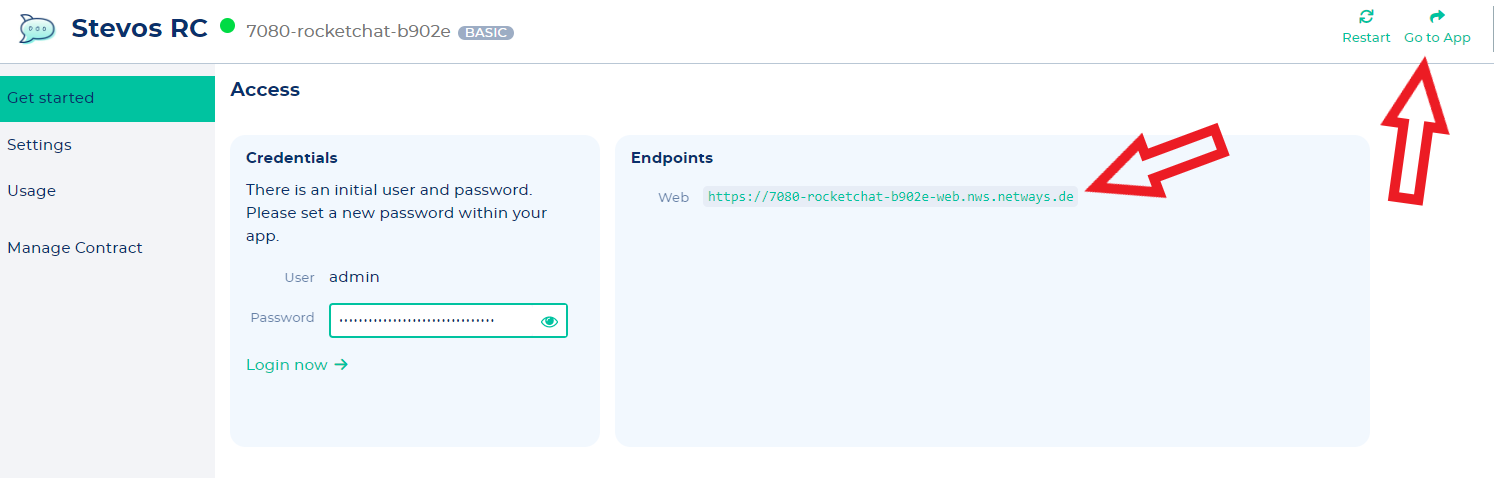
- You will find your credentials on the "Get started" tab -> To copy the password, you must first set it to visible
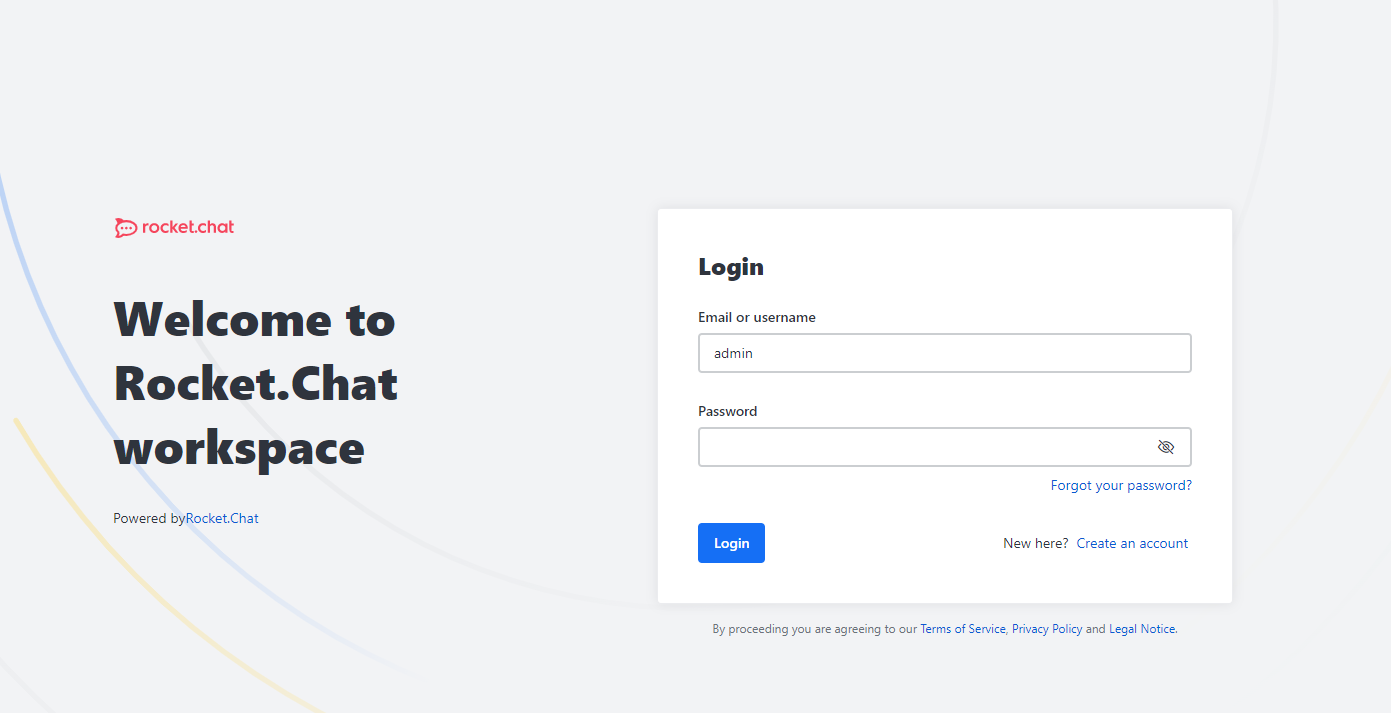
- now click on the Endpoints Web-Link (or on the "Go to App"- button) to get to your Rocket.Chat instance and enter your credentials


Administrative Tasks
Customization
1. Subdomain
Just go to your Rocket.Chat app in the NWS Customer Interface and click on "Settings". Open the "CNAME"- tab and fill in your subdomain.
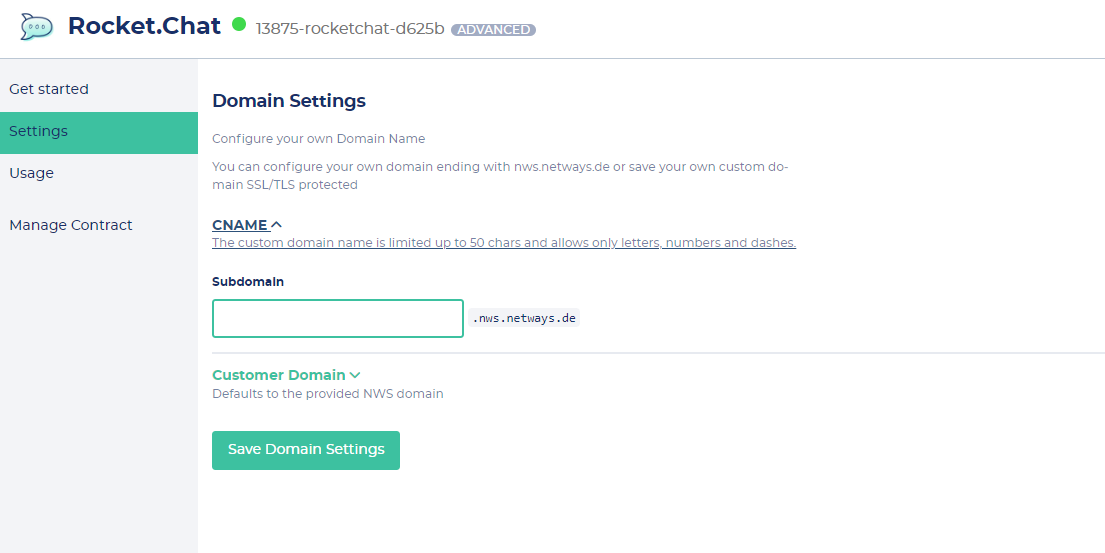
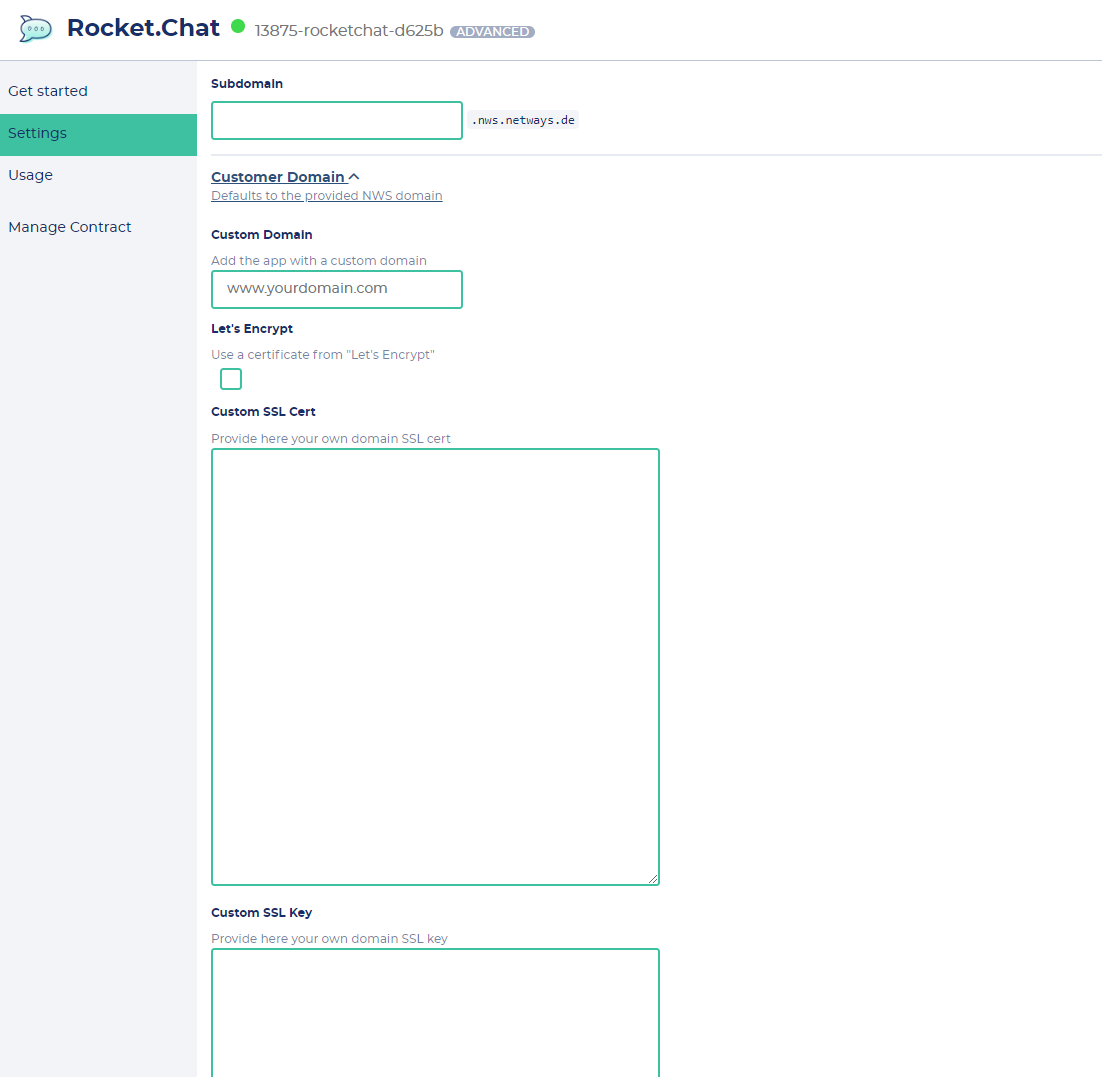
2. Customer domain
Just go to your Rocket.Chat app in the NWS Customer Interface and click on "Settings". Open the "Customer domain"- tab and fill in your domain.
You also have to choose whether you want to take a Let´s encrypt or a Custom SSL certificate.
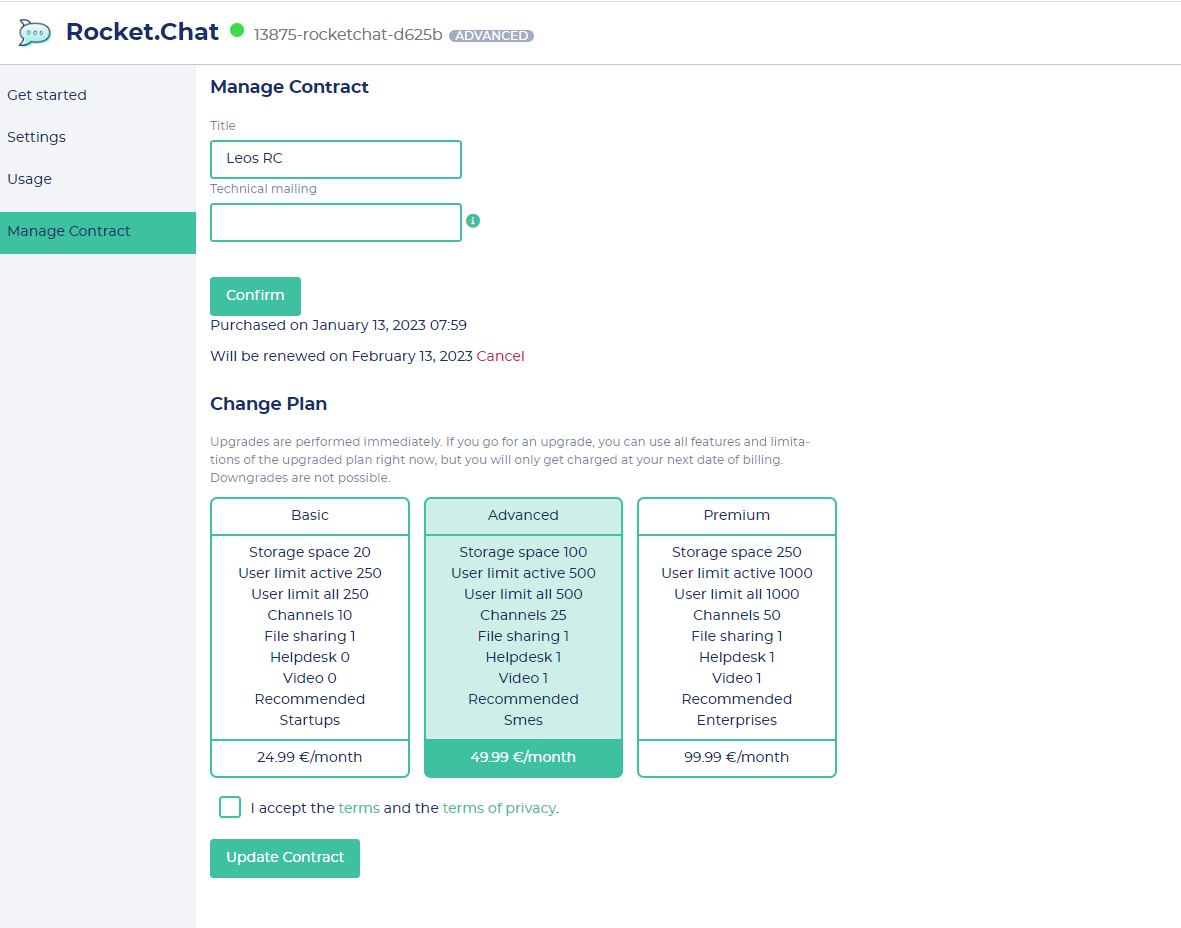
Upgrade to a bigger plan
Just go to your Rocke.Chat app in the NWS Customer Interface and click on "Manage contract". Here you can upgrade to Advanced or Premium plan. If the Premium plan is no longer sufficient, contact us via sales@netways.de and we will provide you with a customized solution on OpenStack.
Adding user in Rocket.Chat
Go to your Rocket.Chat instance and click on your username, open the Administration section, select Users and enter the desired user data after clicking +.

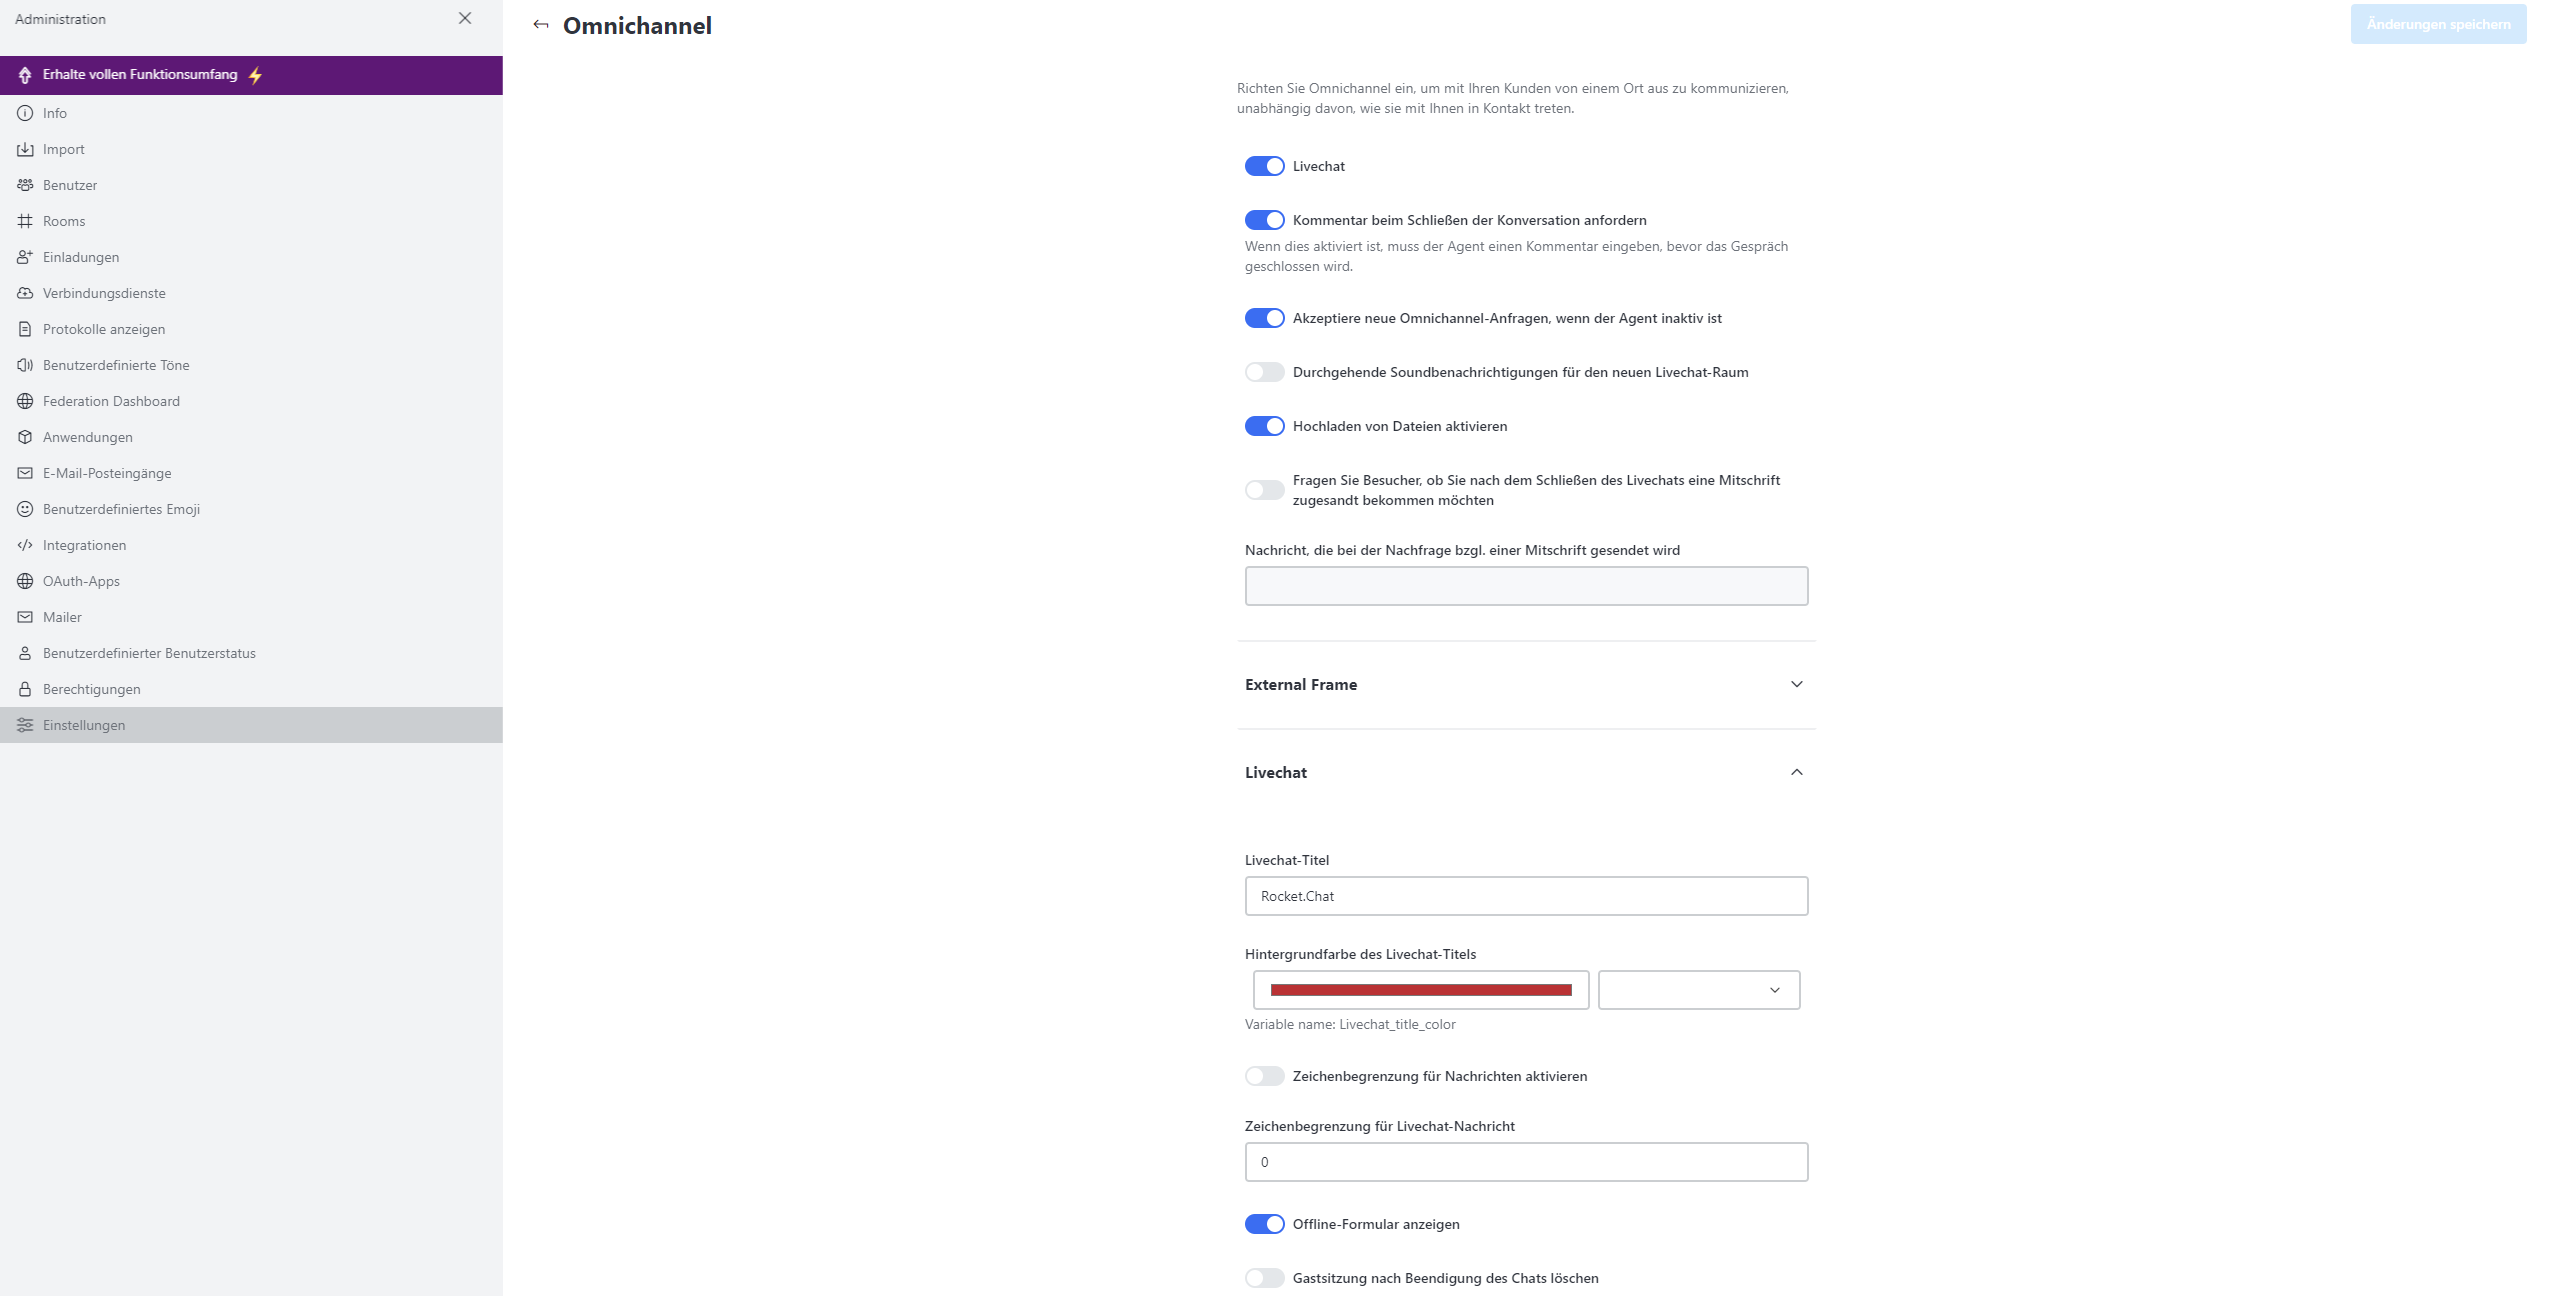
Rocket.Chat LiveChat
The live chat feature is only available in the Extended and Premium plans and is enabled by default.
To activate/deactivate it:
Log in with your credentials, click on the three dots at the top right. Select Settings, then go to OmniChannel and change the LiveChat activation. At the top right you can save the changes. Close the administration screen at the top left and reload the page in your browser. To make LiveChat available on your site, make sure the LiveChat switch on the left is set to green. Then click on the down arrow next to your username, select LiveChat and then Installation. If you follow the instructions on the page, you can use the same Java script to embed the LiveChat feature on multiple websites. Again, we have no hard limits. Here you can find more instructions about LiveChat.
Enabling Jitsi for Rocket.Chat
If you would like to use Jitsi with your Rocket.Chat, you need to download Jitsi from the Marketplace. For any further information and what to do it exactly, feel free to read Joshua’s helpful blogpost!
Related links
Icinga Master
Getting started
Starting the app
Create an account on NWS Customer Interface.
- After finishing your registration, you have two possibilities to start your app:
- Click on the desired service at the left tool bar
- Click on the "start app now"-button and choose the desired service
- Click on the desired service at the left tool bar
- Now name your instance, choose a plan and accept the terms of conditions -> press down-right "create"-button

- Now your app is beeing created ->
- Now you are ready to go


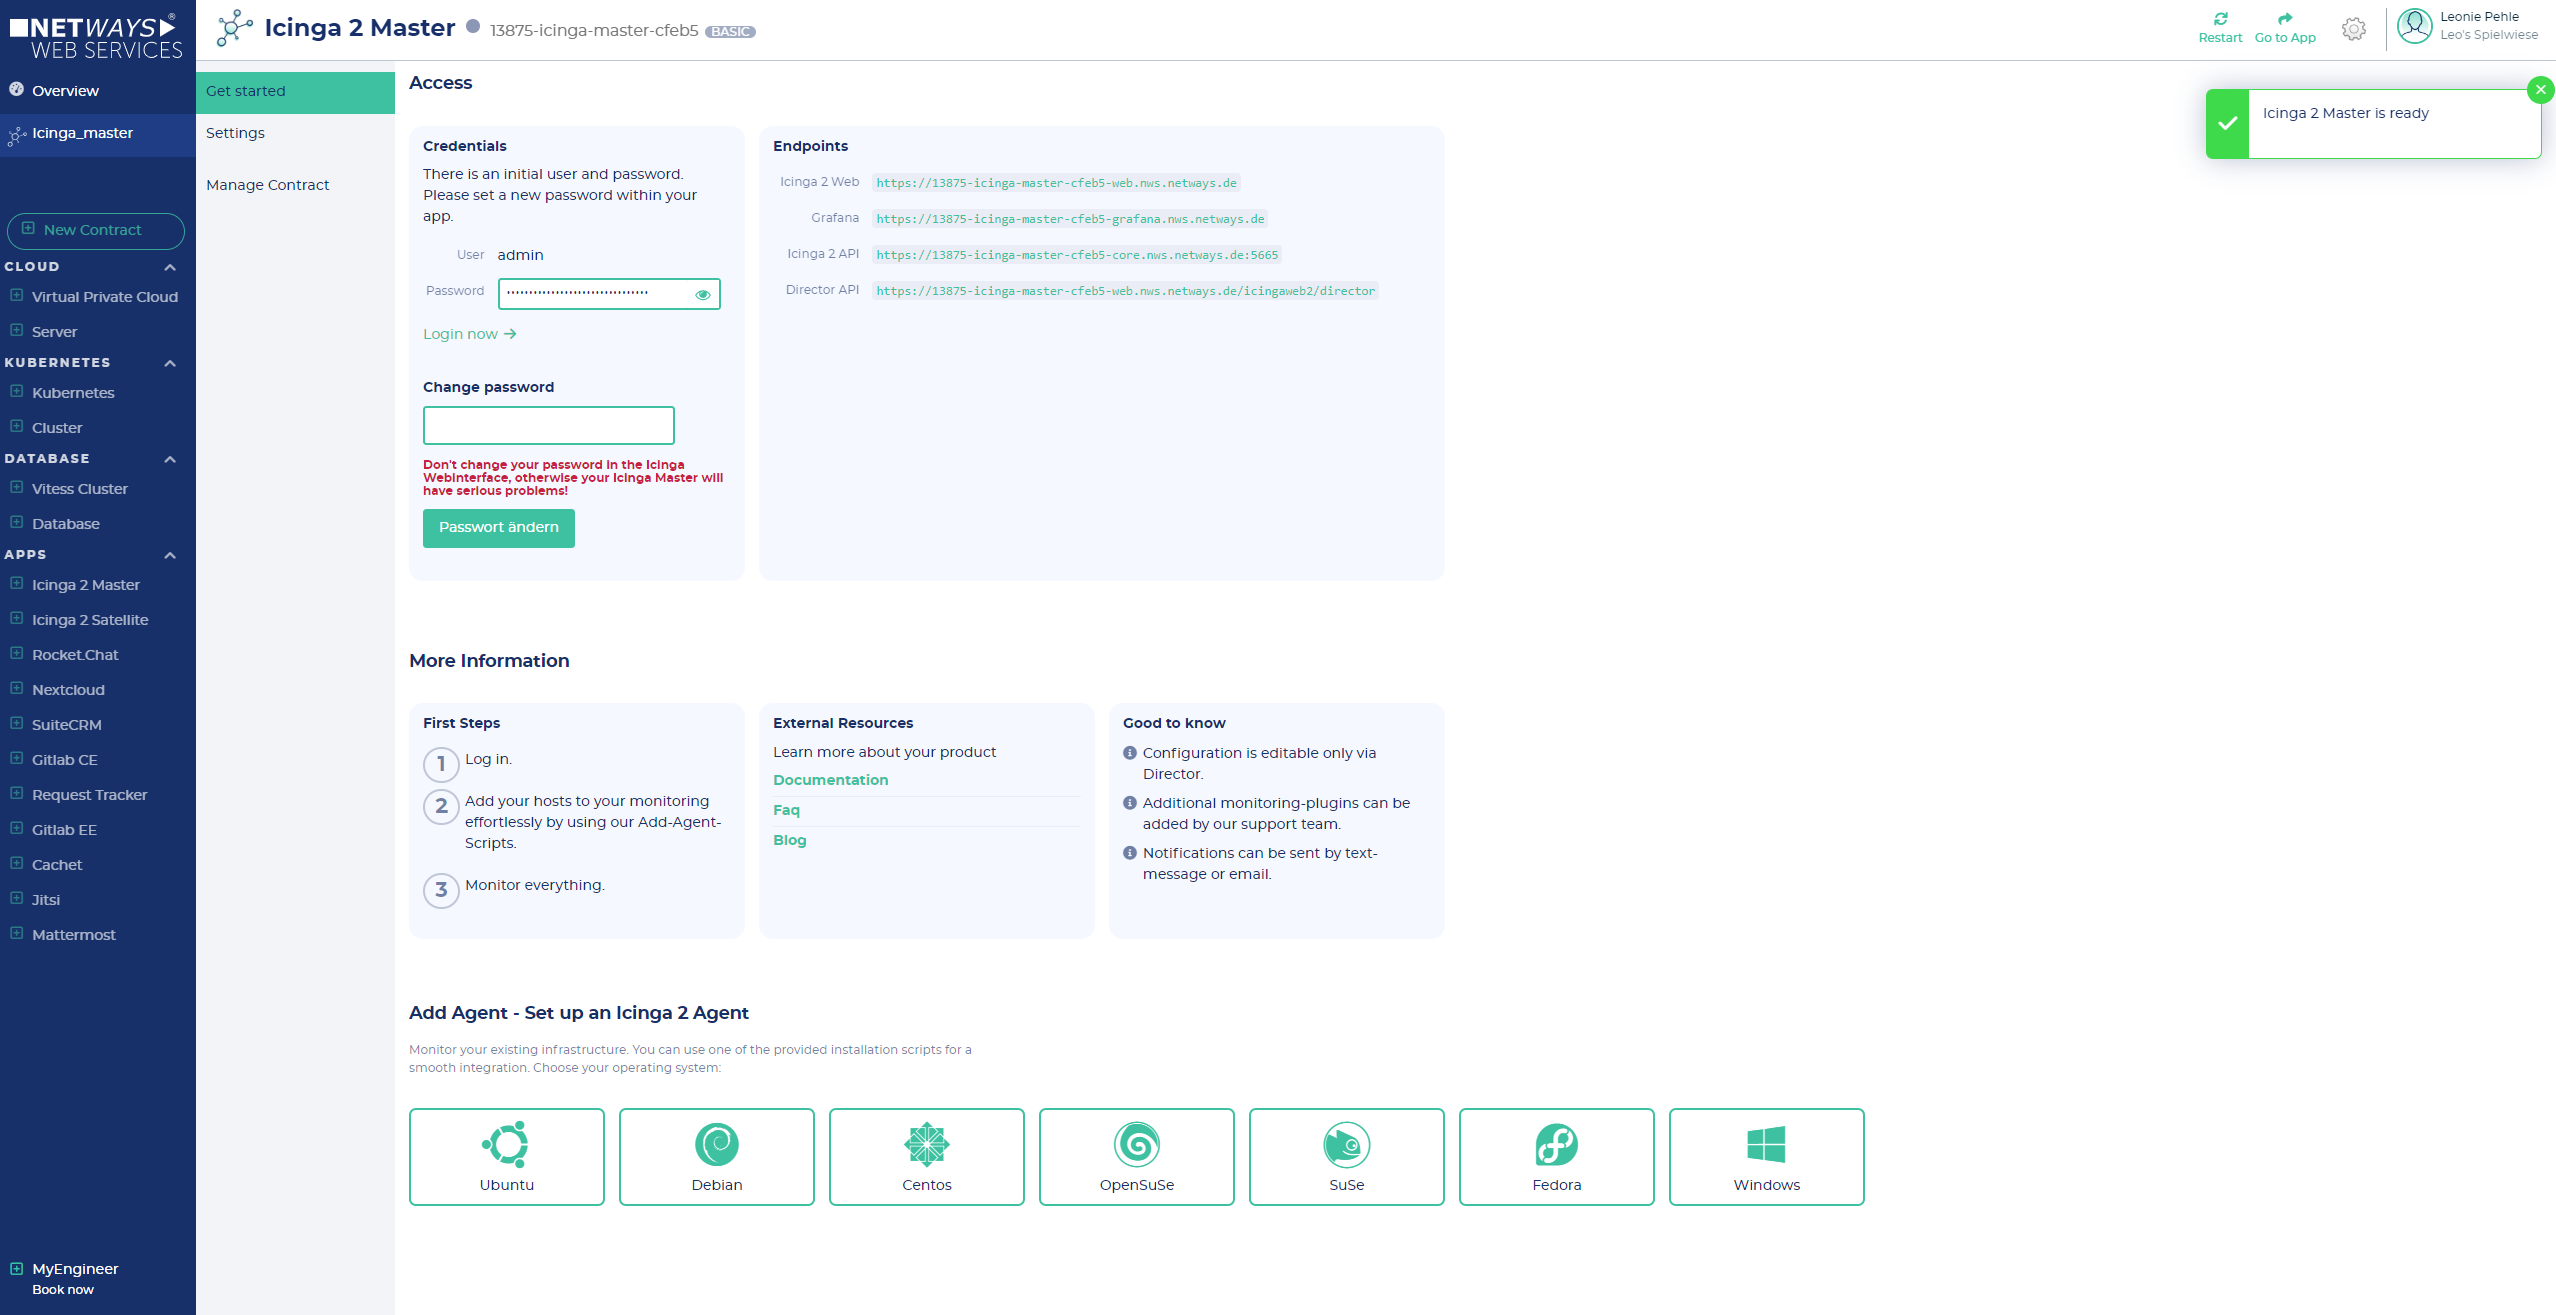
Logging in
- You will find your credentials on the "Get started" tab -> To copy the password, you must first set it to visible
- now click on the Endpoints Web-Link to get to your GitLab instance and enter your credentials
-
Don't change your password in the Icinga Webinterface, otherwise your Icinga Master will have serious problems!

Related links
Jitsi
Getting started
Starting the app
Create an account on NWS Customer Interface.
- After finishing your registration, you have two possibilities to start your app:
- Click on the desired service at the left tool bar
- Click on the "start app now"-button and choose the desired service
- Click on the desired service at the left tool bar
- Now name your instance, choose a plan and accept the terms of conditions -> press down-right "create"-button

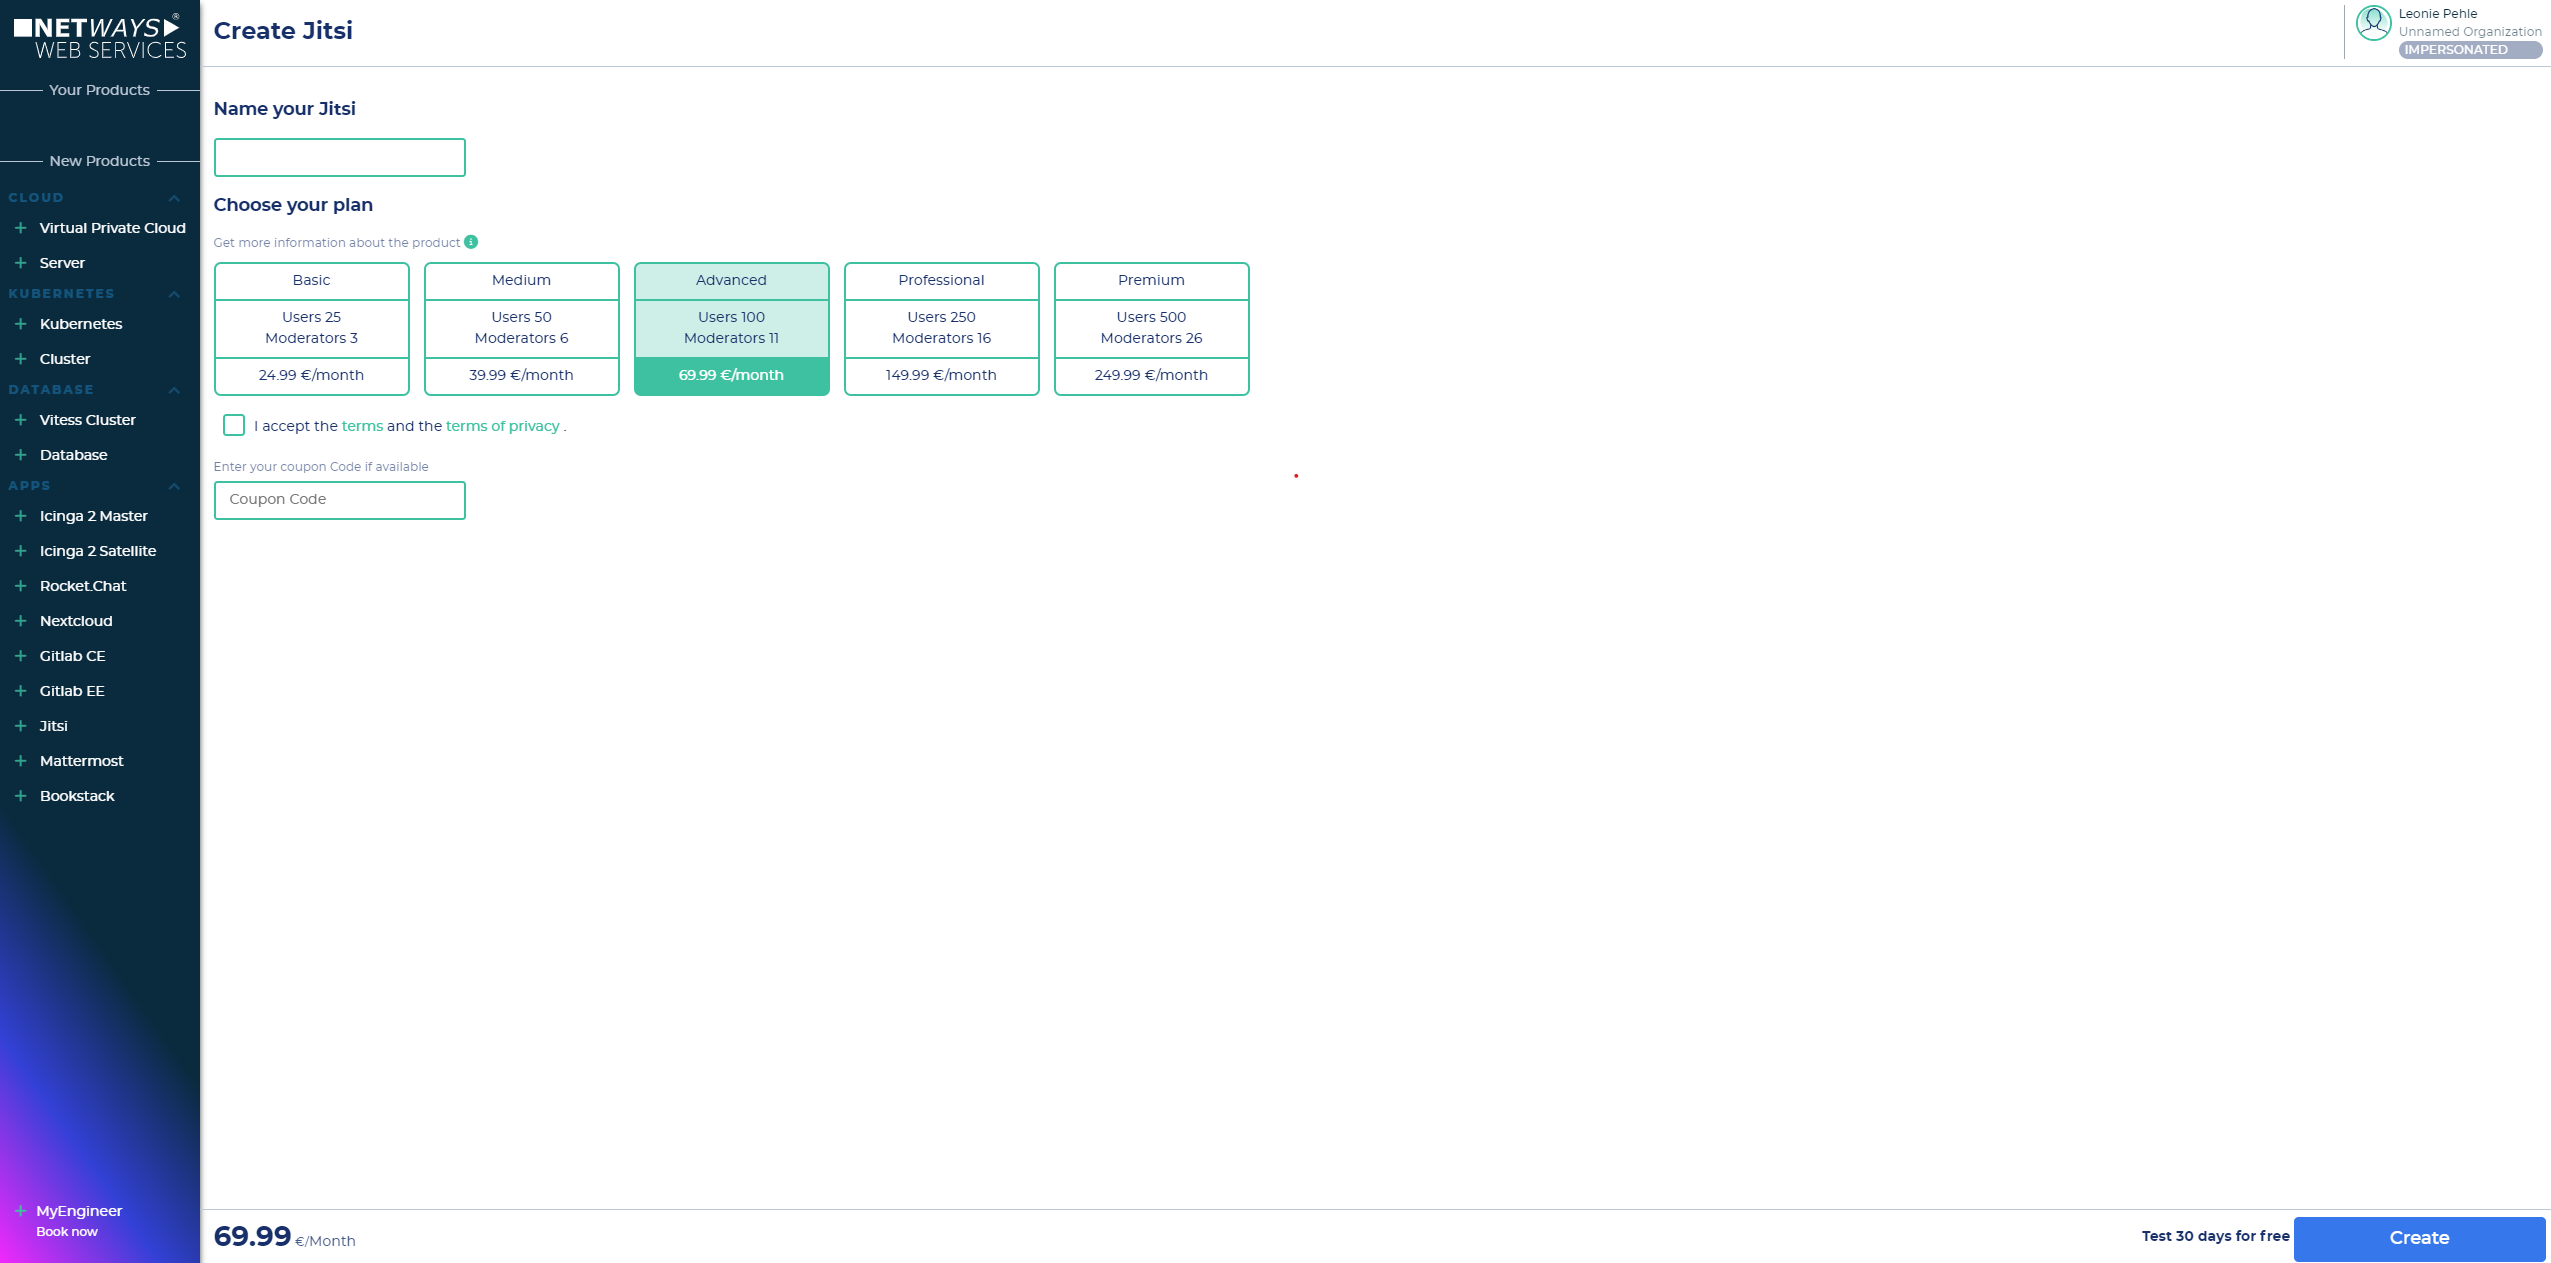
- Now your app is beeing created ->
- Now you are ready to go

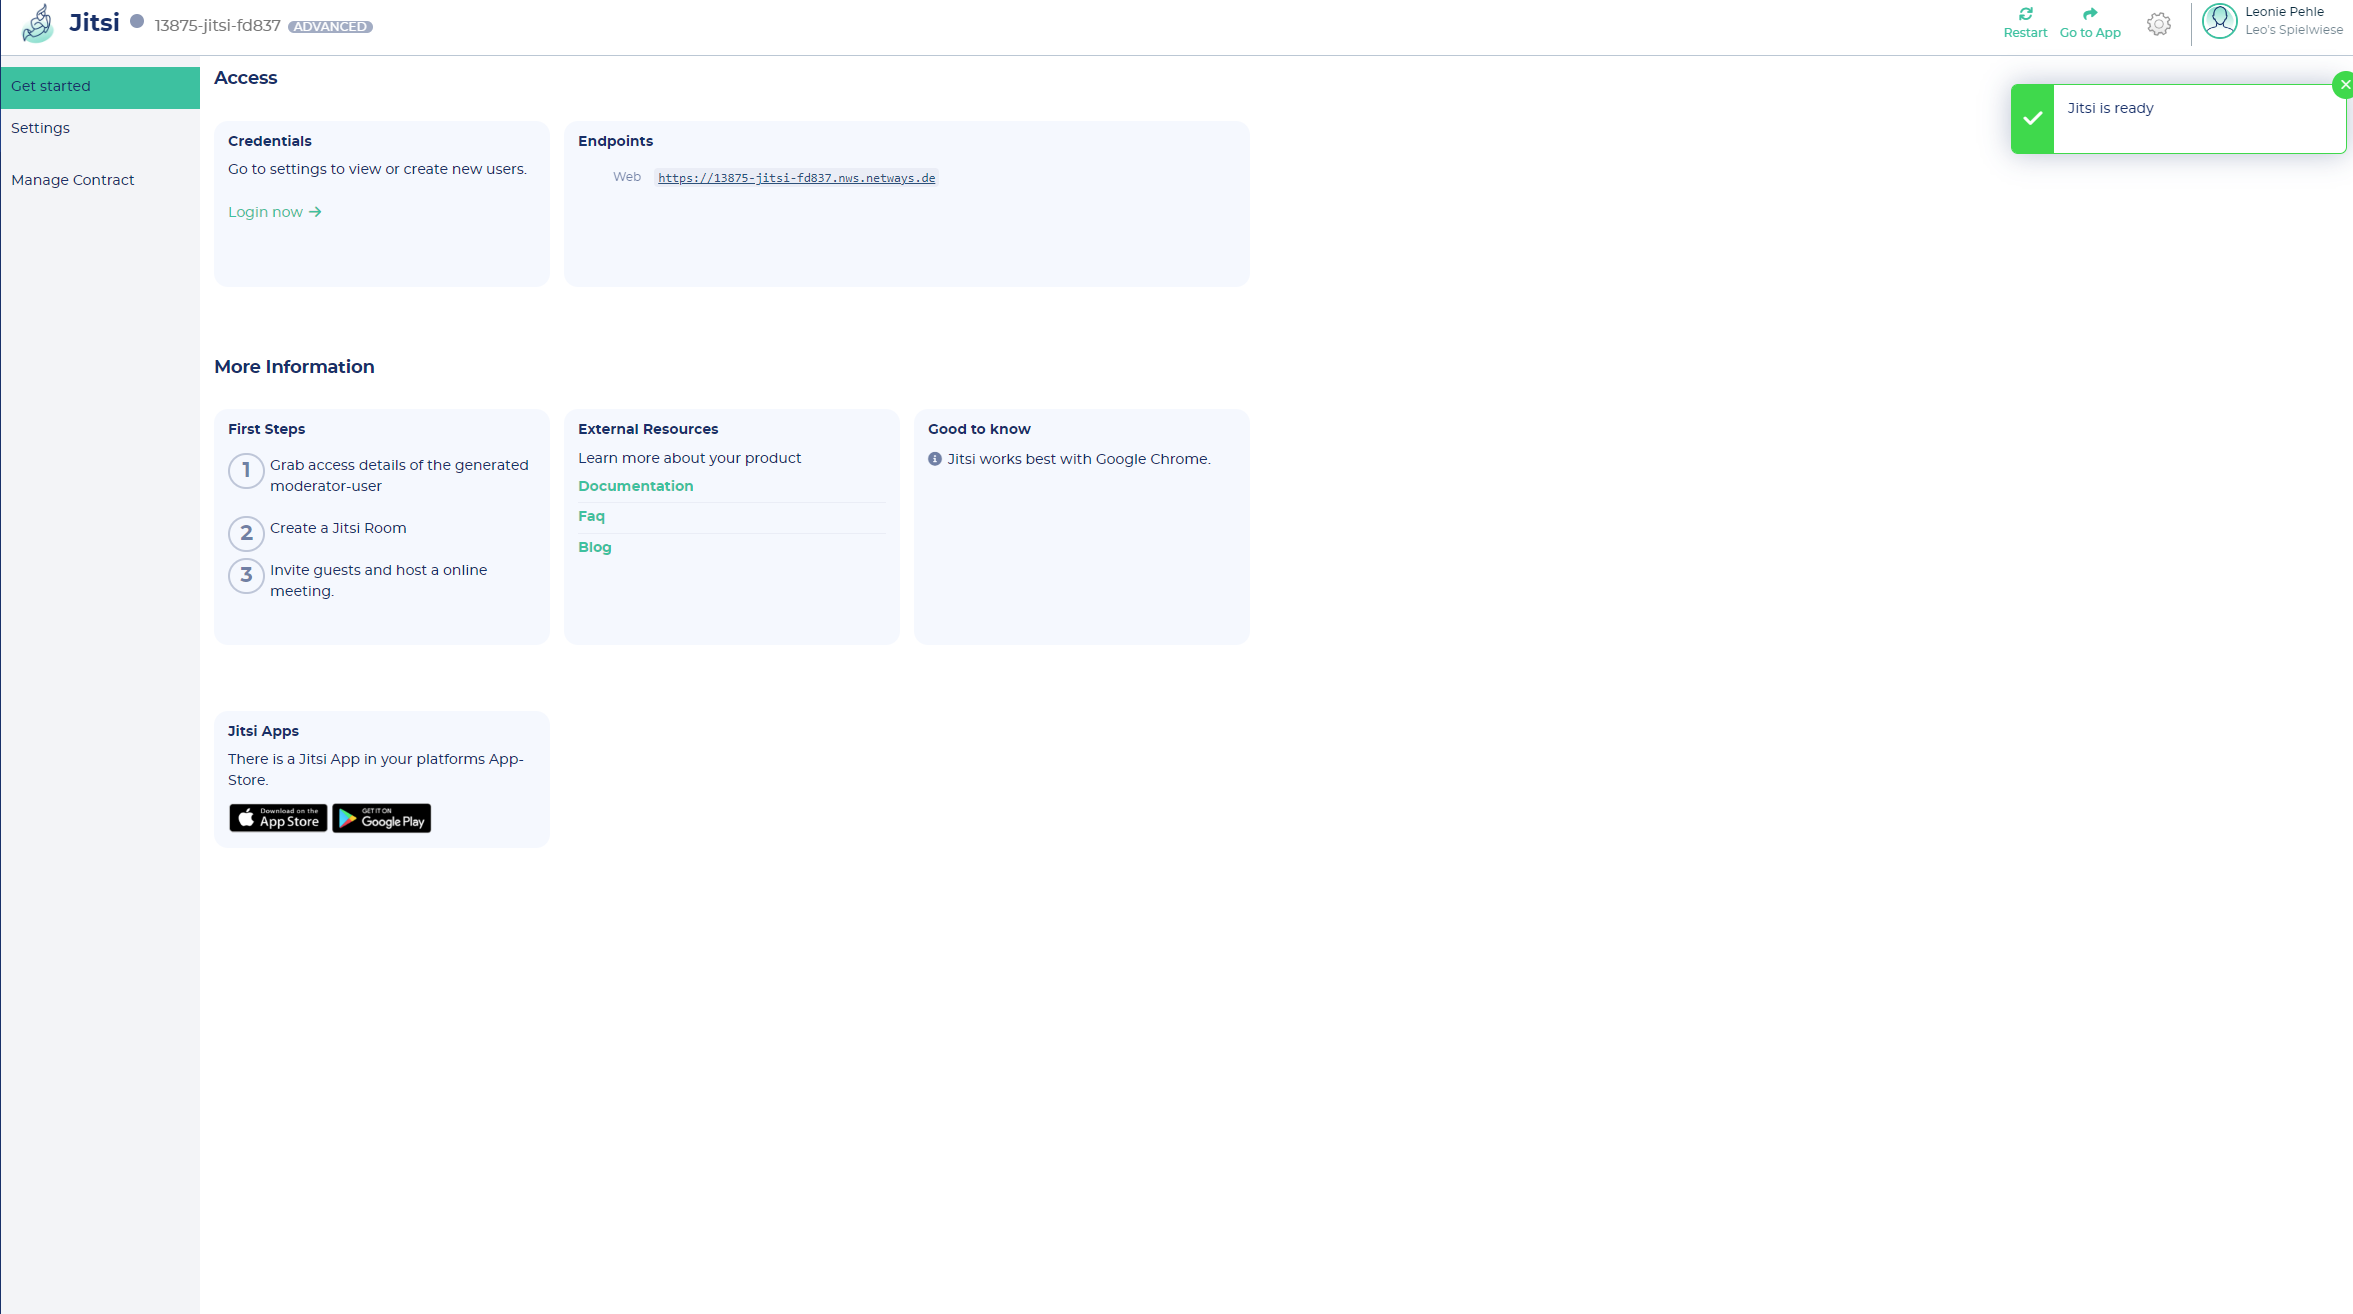
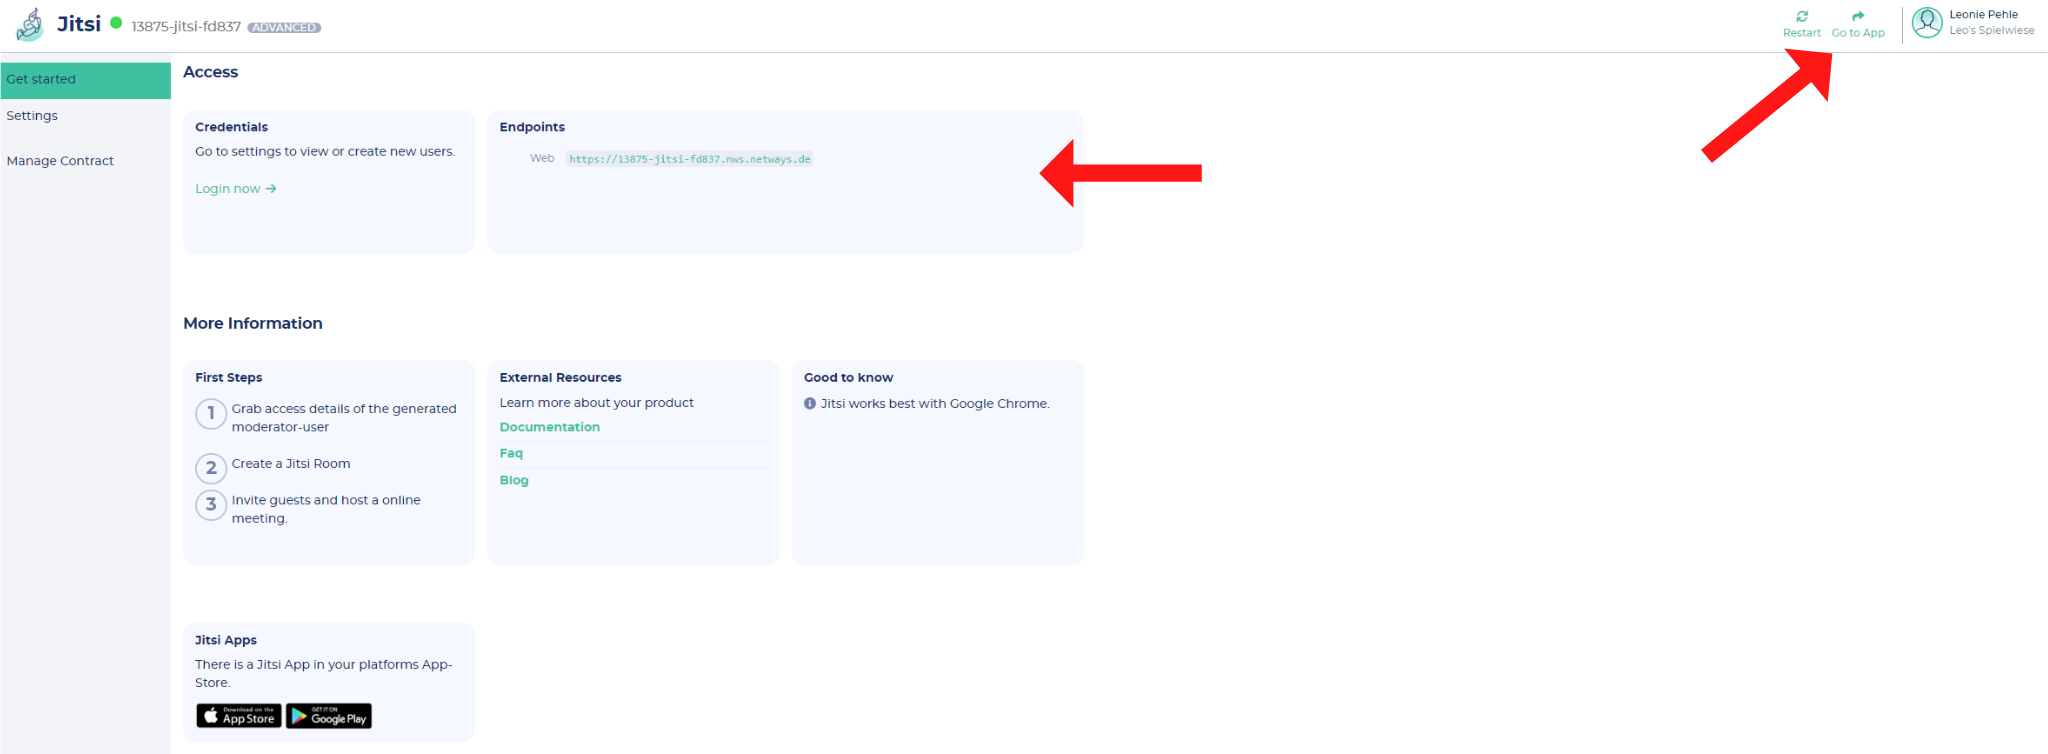
Logging in
- click on the Endpoints Web-Link (or on the "Go to App"- button) to get to your Jisti instance and and you can start your first video conference right away

- when you start your first videoconference you will first be asked to enter your user name and password, which you can find under "Settings" -> to copy the password, you must first set it to visible
- there you can also create new users and enter passwords


Moderators in NWS Jitsi
In our Jitsi app, only one moderator can create video conference rooms. To do this, he creates a conference room and to open it, he must enter his user name and password. After his successful entry, all other participants can join the call without entering a password.
Creating more moderators
By default, an admin user is always created when starting a Jisti app. This user is not editable (name and password cannot be changed).
However, additional moderators can be created. The number of possible moderators depends on the started plan. The higher the plan, the more moderators can be created.
In the Customer Interface, go to Settings on your Jitisi app.
At the point "Customer Settings" you can now simply enter the desired username and user password and then add the user with "Add User". 
Starting a video conference
Log in to your Jitsi app.
In the start menu you will find the input field to name your videoconference room (1). Enter the desired name here or just use the randomly suggested name. Go to "Start Meeting".
On the start menu you will also find a history of recent meetings (2). If you want to use one of the old meeting rooms again, just click on the room and it will open. 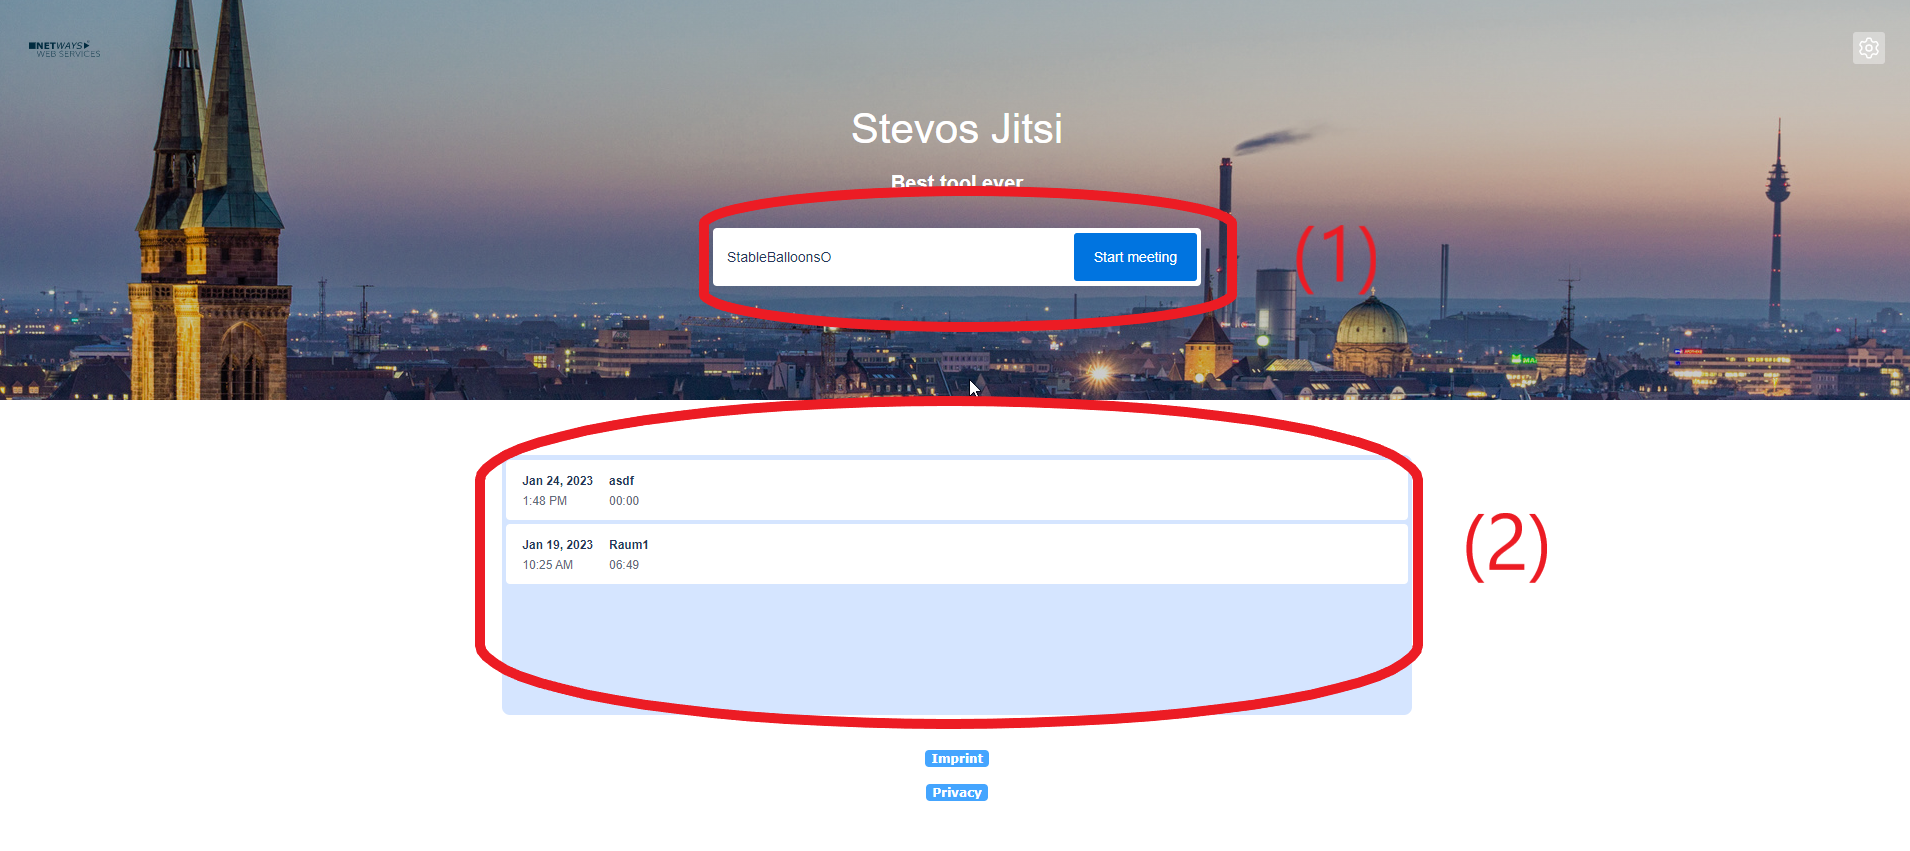
Now enter your name. You can also set various adjustments concerning Background-picture, mircophone, camera and general settings. Click on "Join Meeting":
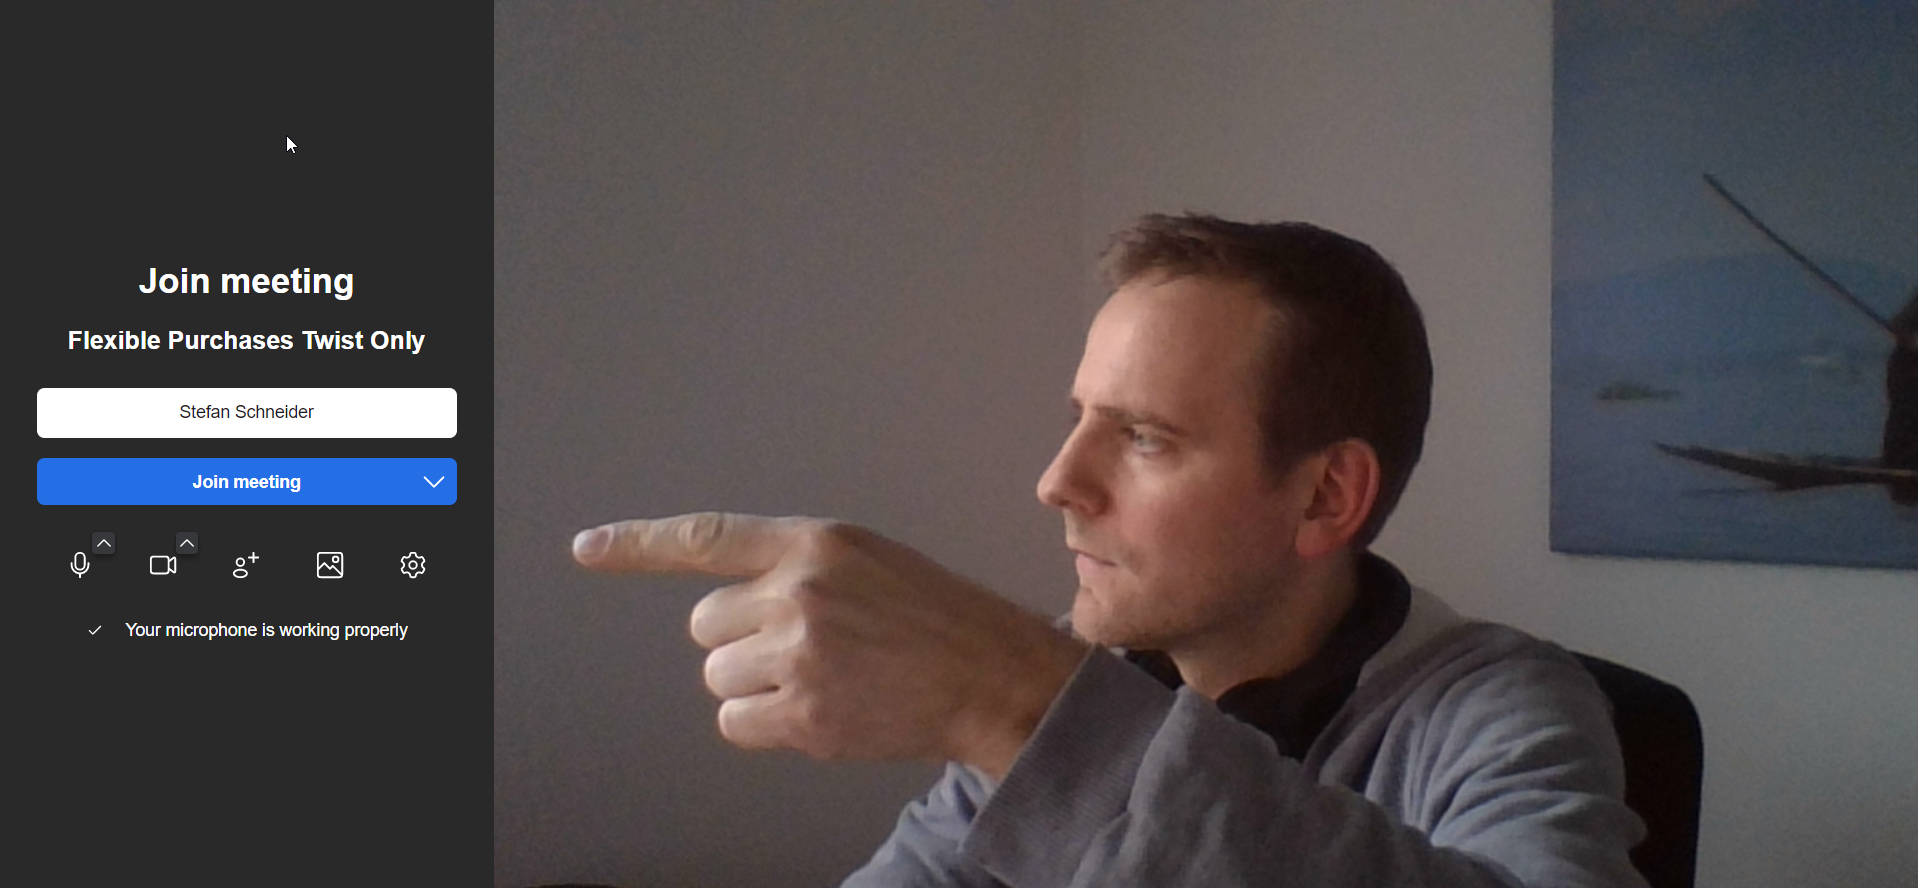
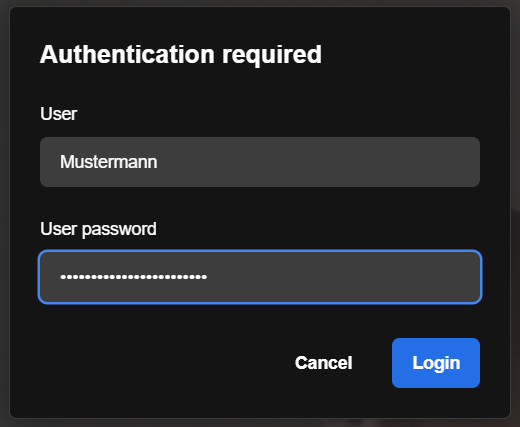
Now you have to confirm that you are the host (guests just have to wait till the host has opend the room) and then you have to enter your login data (username and password).

Administrative Tasks
Customization
Just go to your Jitsi app in the NWS Customer Interface and click on "Settings". Go to "Design Settings".
Here you can:
1. Edit Background color
Click on the Color-field and choose your desired color. Press "Save customization" to save the change. 

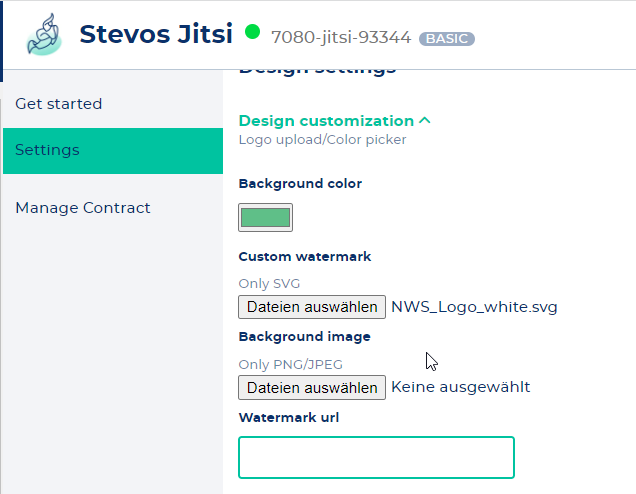
2. Insert own background picture and/or own logo
Just upload your company logo to the design settings under the item "Custom watermark" - please note that only SVG files can be used here.
For the background image it works the same way - only this is inserted at the point "Background image" - here JPGs or PNGs can be used.
![]()
3. Customize your App name, the header title and sub header title
To customize the text in the Jitsi start menue, you can change the App name, the Header title and the Subheader title at the design settings under the item "Title customization".

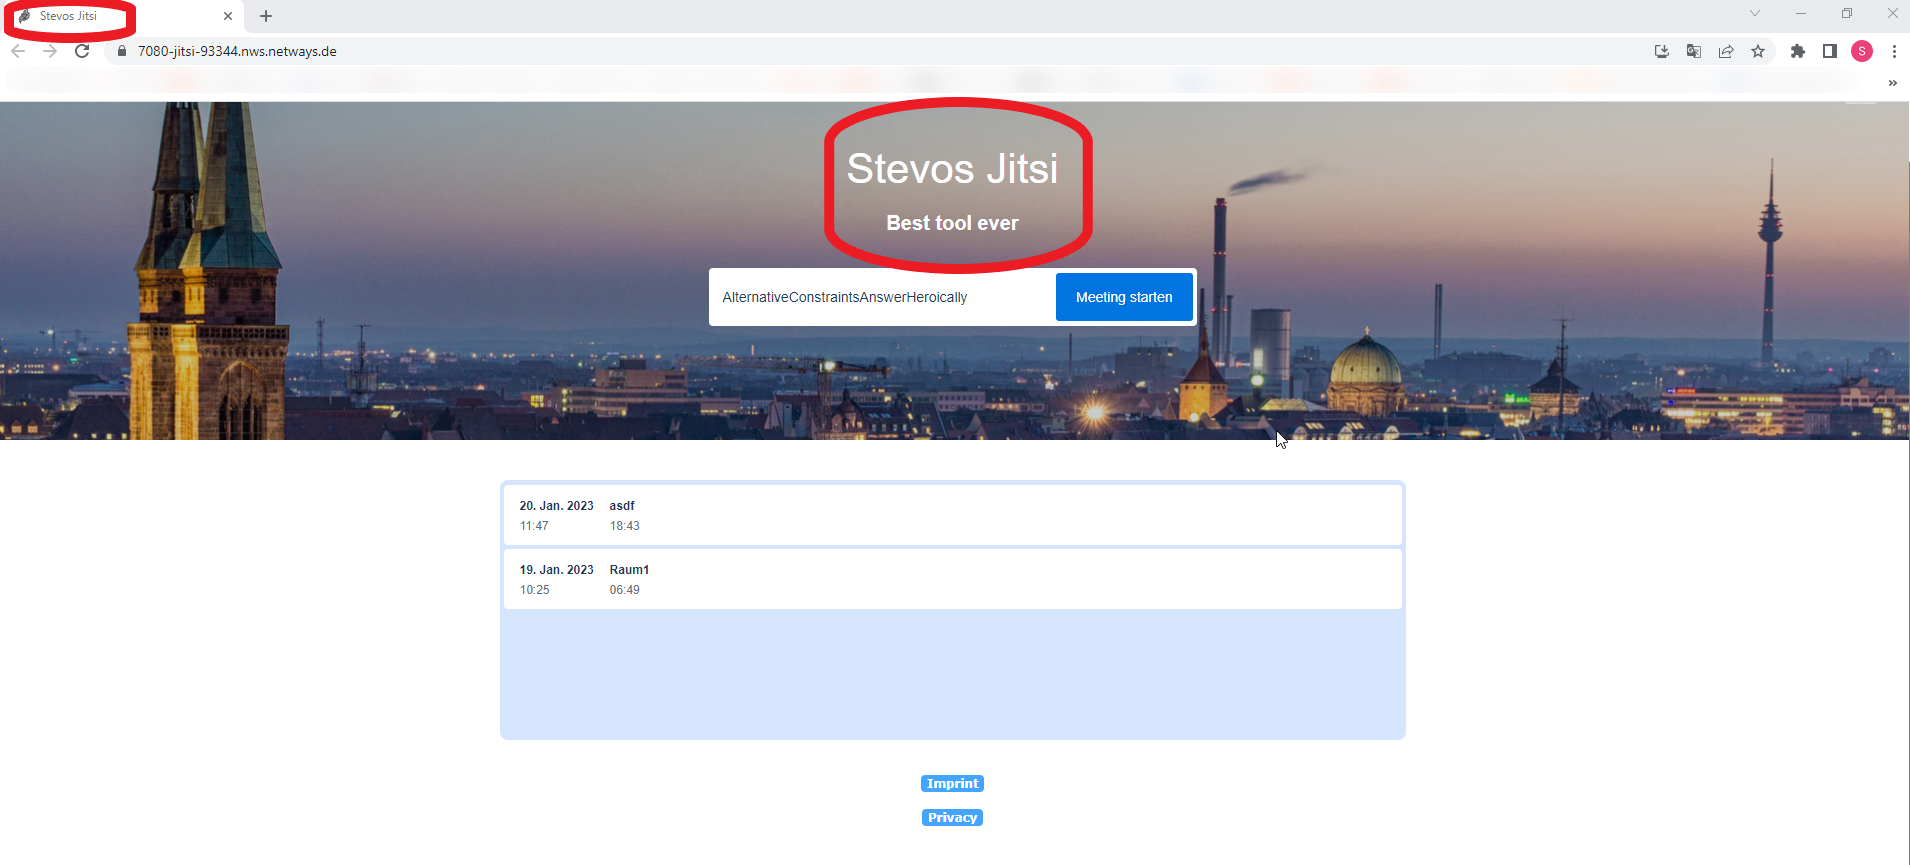
4. Customize the legal settings
Here you can insert the link for your imprint and privacy policy. 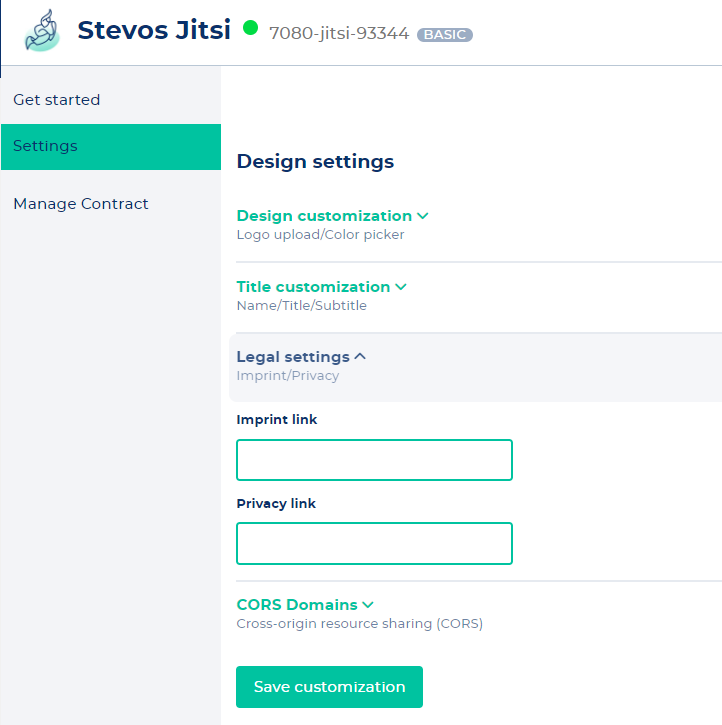
5. Subdomain
Just go to your GitLab app in the NWS Customer Interface and click on "Settings". Open the "CNAME"- tab and fill in your subdomain.

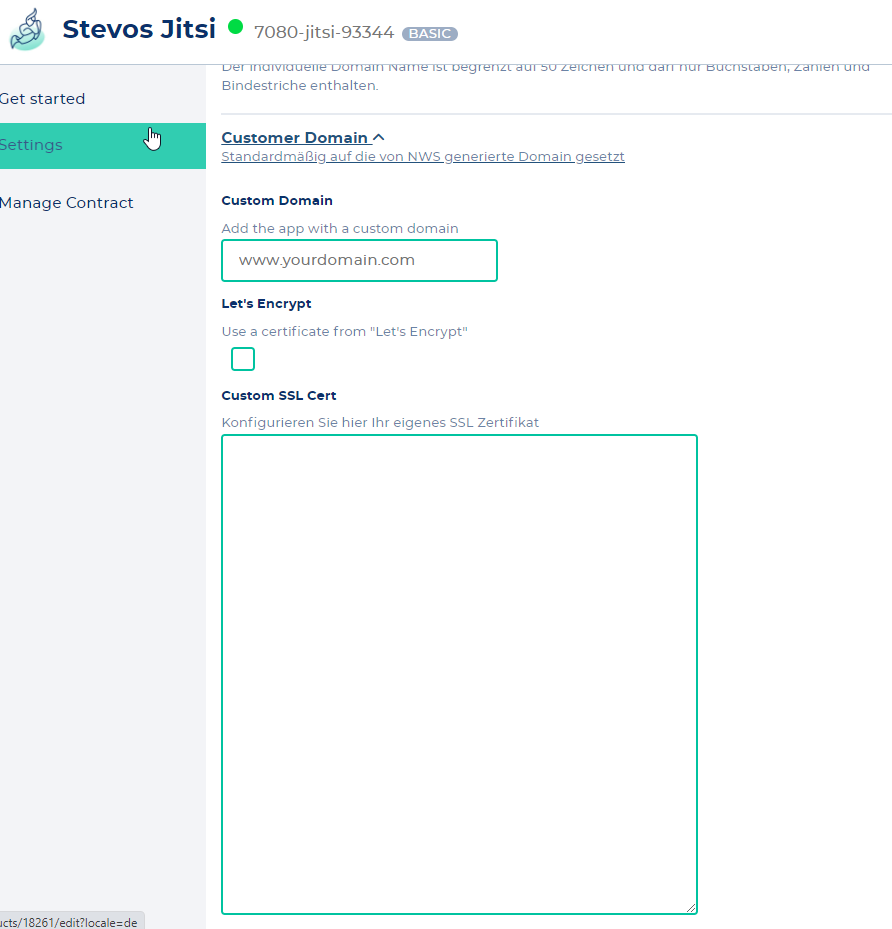
6. Customer Domain
For this, the following things must be fulfilled /accomplished:
- Domain must belong to you
- You must set an A-record to IP 185.11.255.46 for the domain name
- You enter this in our NWS Customer interface at your Jitsi app under "Settings"

- You specify if you want to have a Let's encrypt certificate or an SSL certificate
Advanced Topics
Recording a video conferene
Recording is not possible in our Jitsi app.
If recording is an indispensable tool for you, we can setup an individual Jitsi instance for you on our OpenStack where we can activate custom features like recording, special branding, connection to you AD or joining via telephone with SIP. Just contact us here.
Secure a video conference room
Yes, that´s possible. You have three options to secure your Jitsi room.
At first you have to open the conference room. You will now find the security options under the "more options" field. 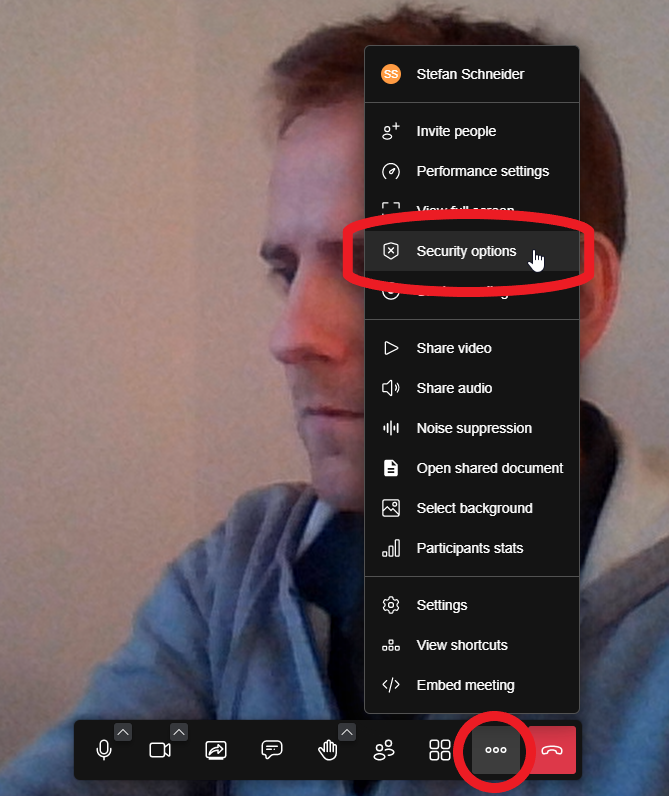

- Enable lobby: Lobby mode lets you protect your meeting by only allowing people to enter the room after a formal approval by the moderator.
- Password: You can add a password to the meeting. Participants will need to provide the password before they are allowed to join the meeting.
- End-to-End Encryption: this mode ist currently EXPERIMENTAL. Keep in mind that the meeting will only work for people joining from browsers with support for insertable streams.
Related links
Icinga Satellite
Getting started
Starting the app
Create an account on NWS Customer Interface.
- After finishing your registration, you have two possibilities to start your app:
- Click on the desired service at the left tool bar
- Click on the "start app now"-button and choose the desired service
- Click on the desired service at the left tool bar
- Now name your instance, choose a plan and accept the terms of conditions -> press down-right "create"-button

- Now your app is beeing created ->

- Now you are ready to go

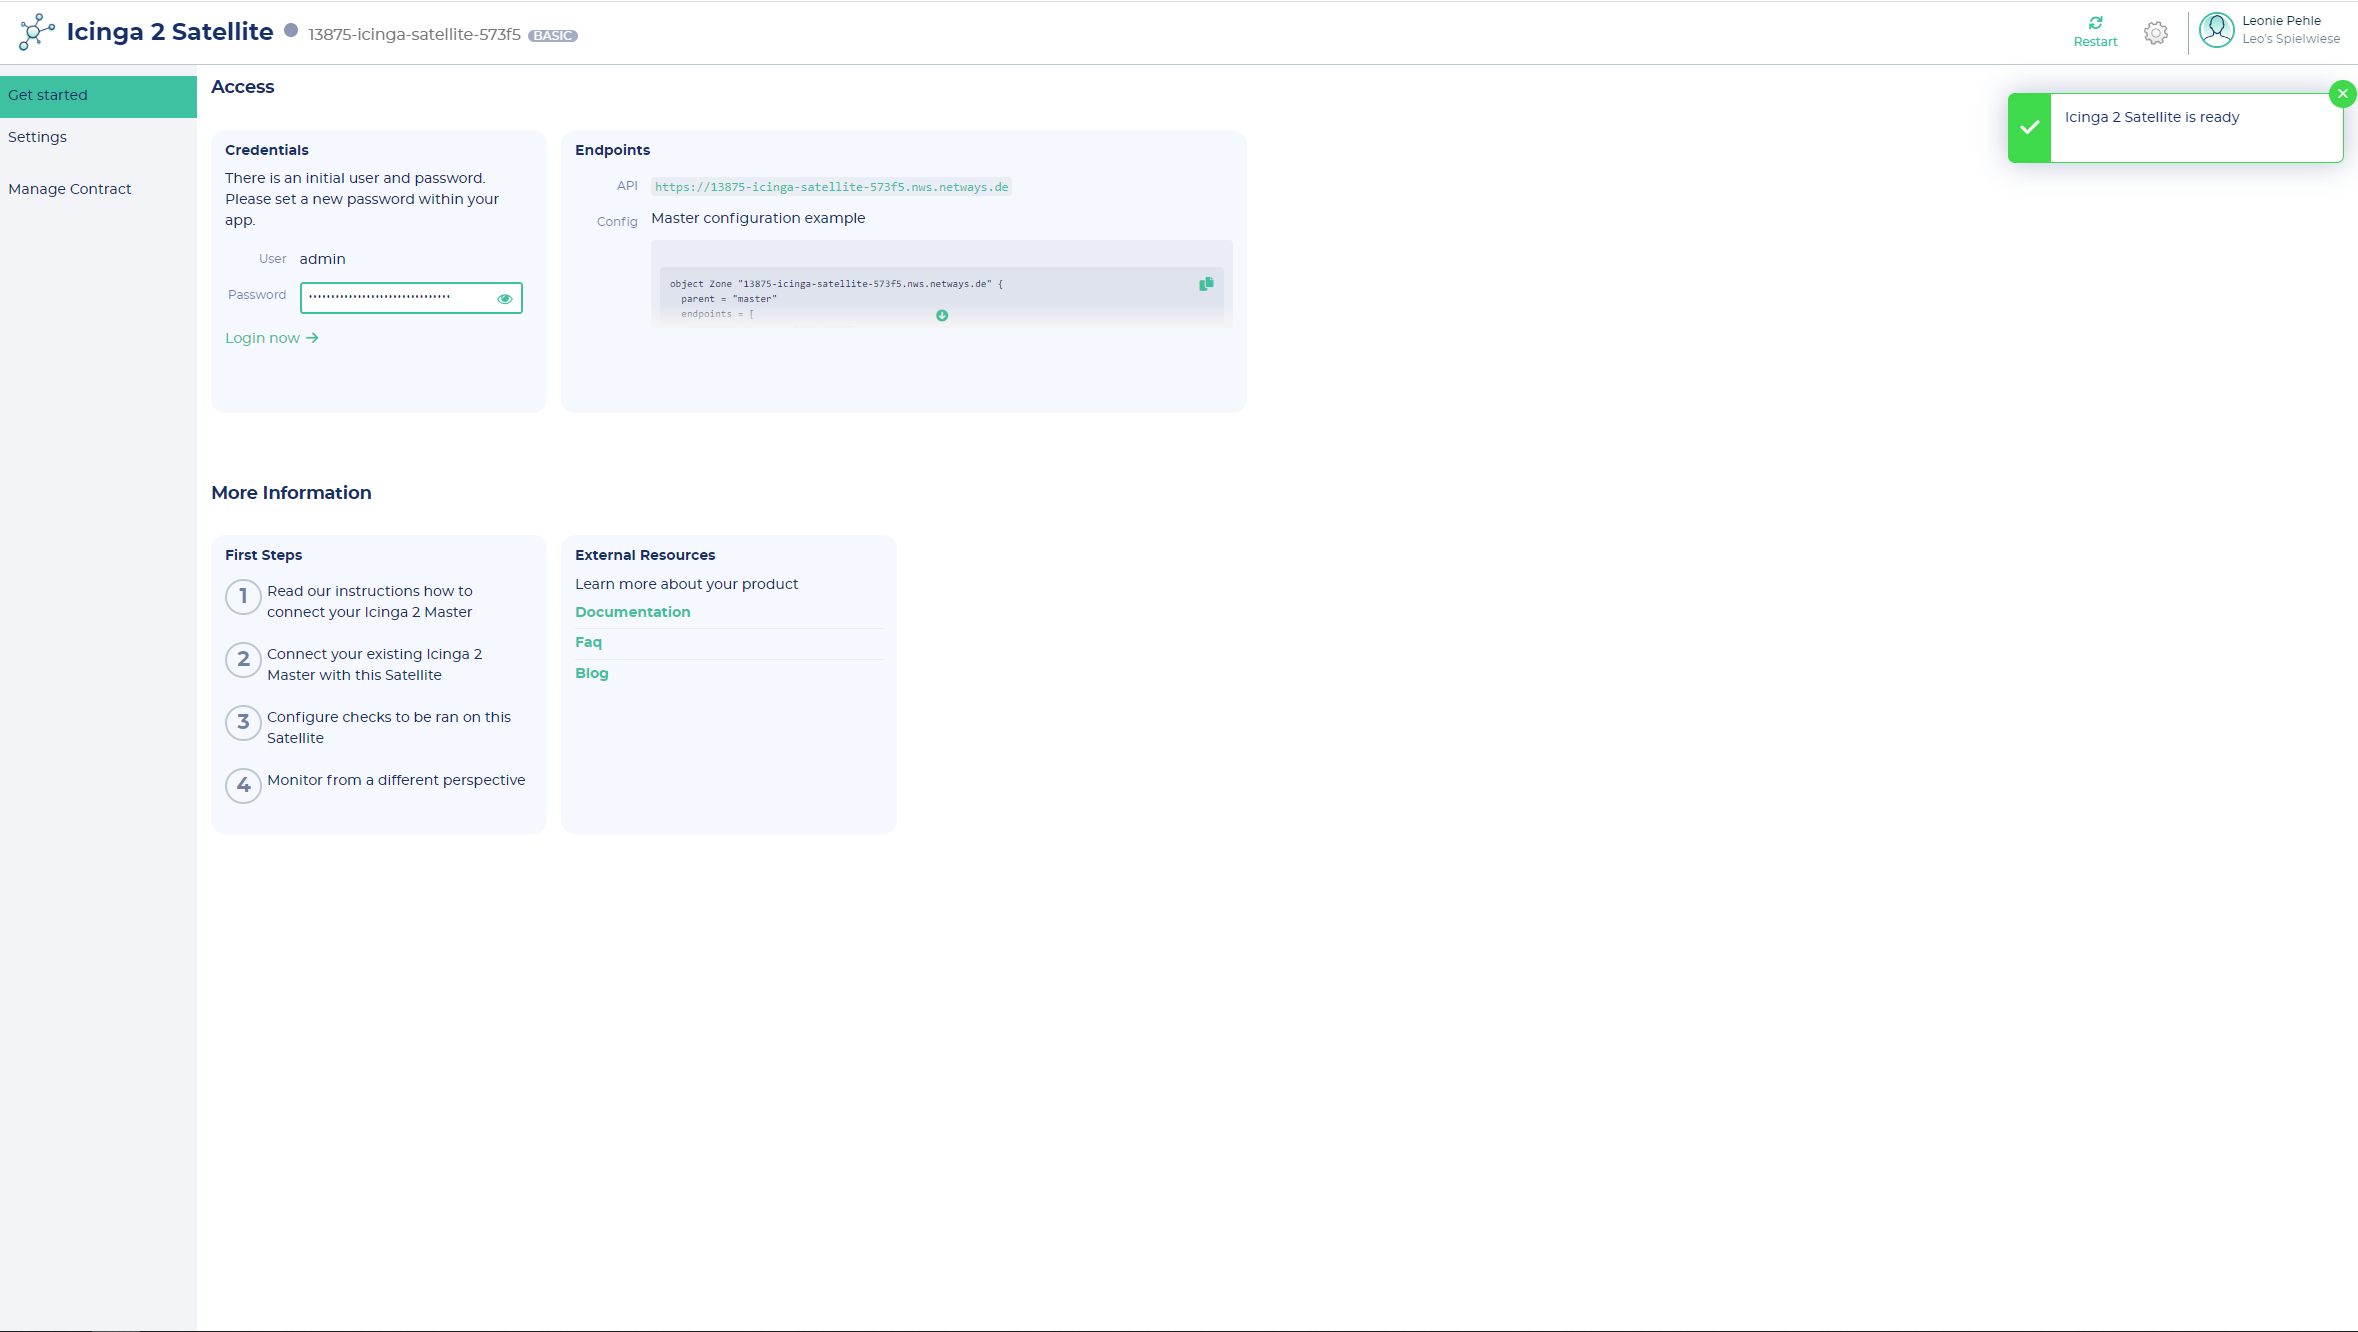
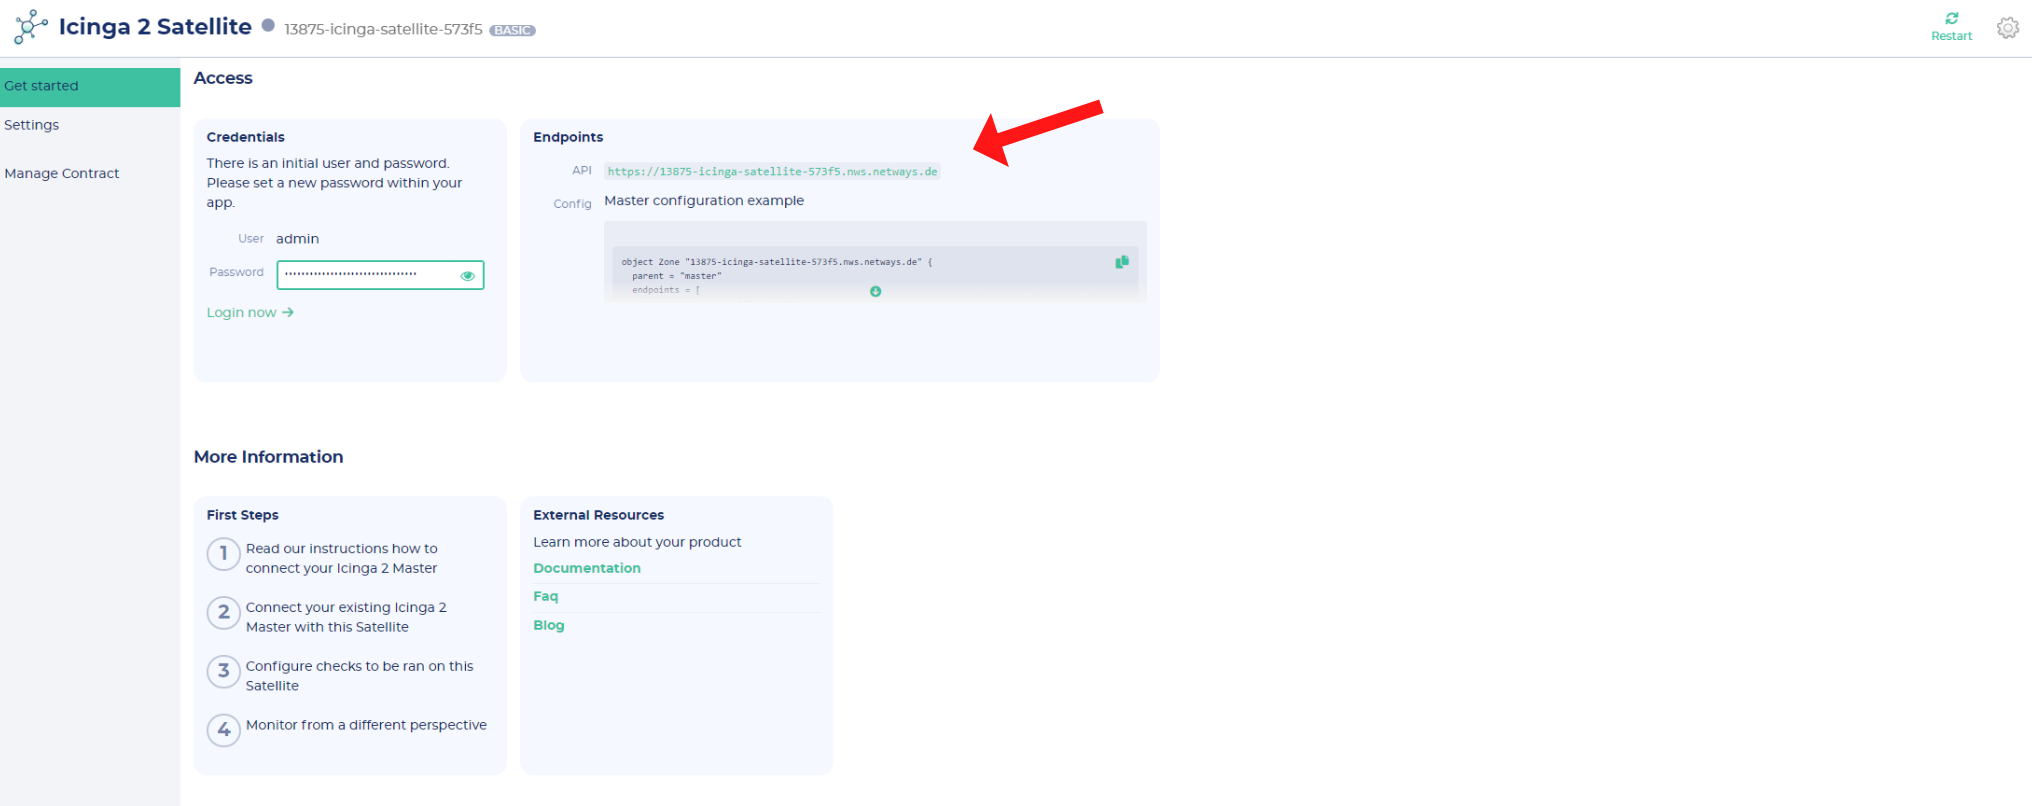
Logging in
- You will find your credentials on the "Get started" tab -> To copy the password, you must first set it to visible
- now click on the Endpoints Web-Link (or on the "Go to App"- button) to get to your Icinga Satellite instance and enter your credentials

Related links
BookStack
Getting started
Starting the app
Create an account on NWS Customer Interface.
- After finishing your registration, you have two possibilities to start your app:
- Click on the desired service at the left tool bar
- Click on the "start app now"-button and choose the desired service
- Click on the desired service at the left tool bar
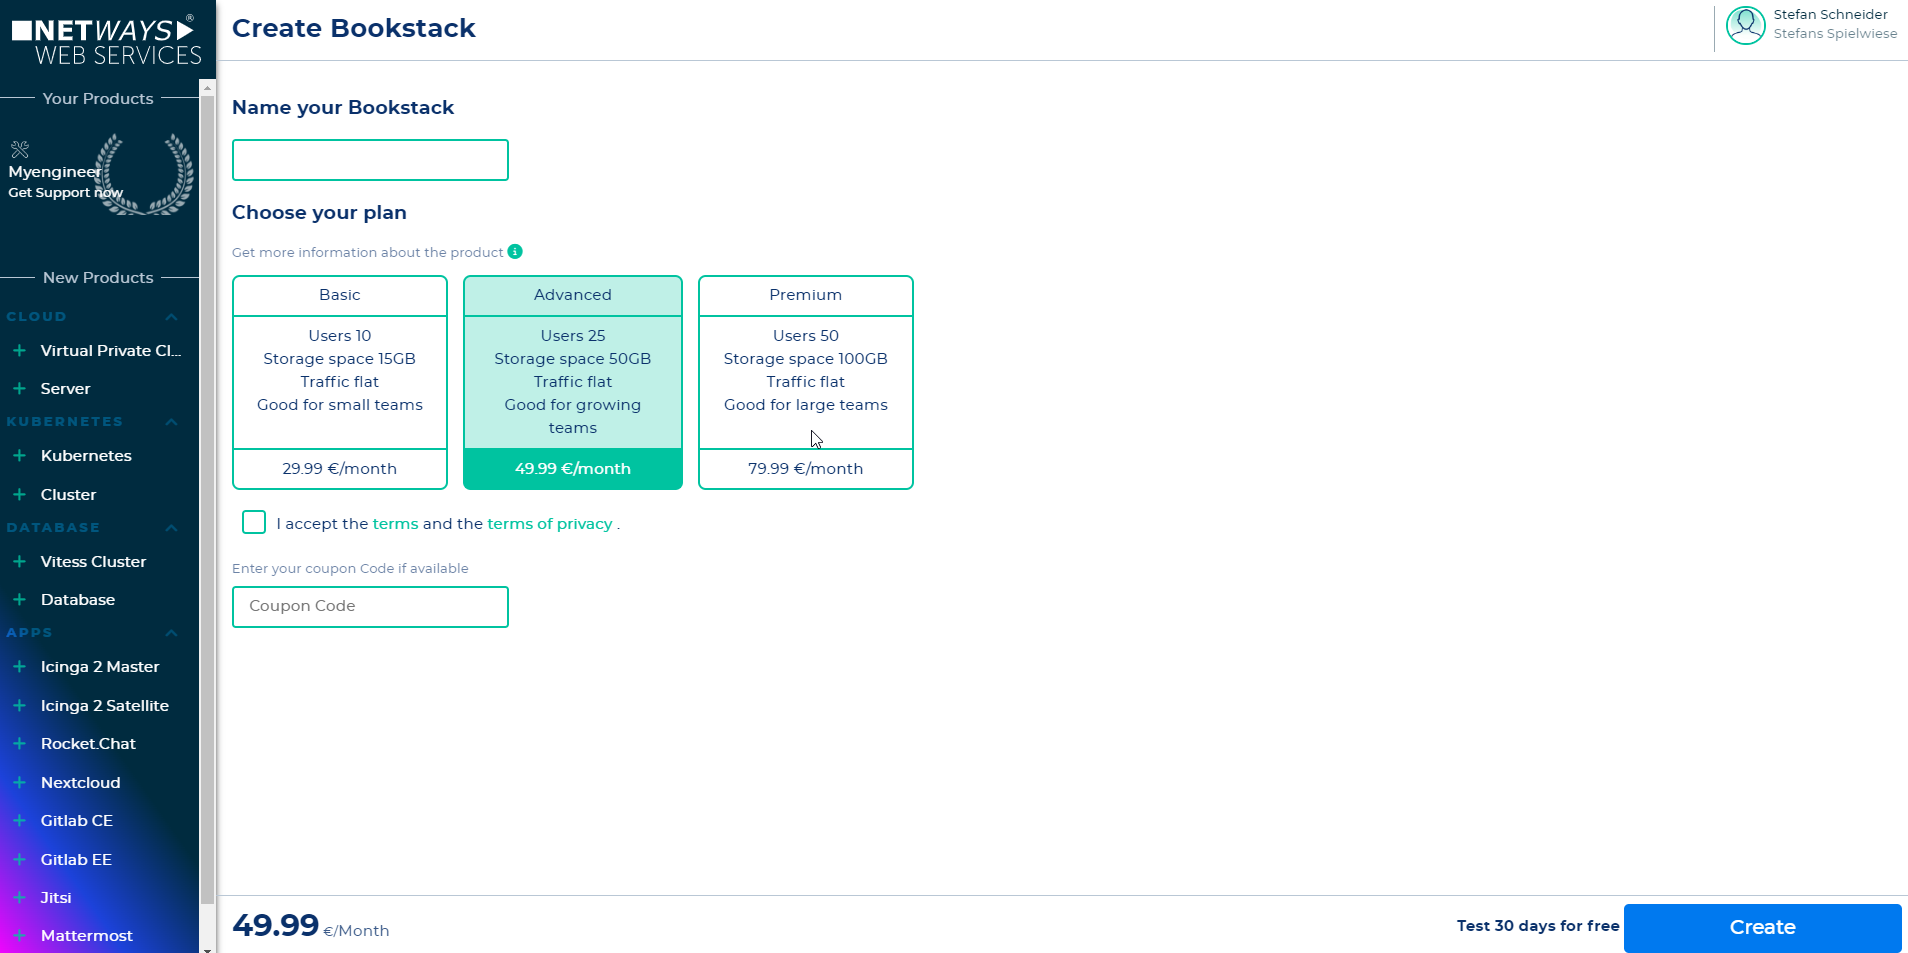
- Now name your instance, choose a plan and accept the terms of conditions -> press down-right "create"-button

- Now your app is beeing created ->
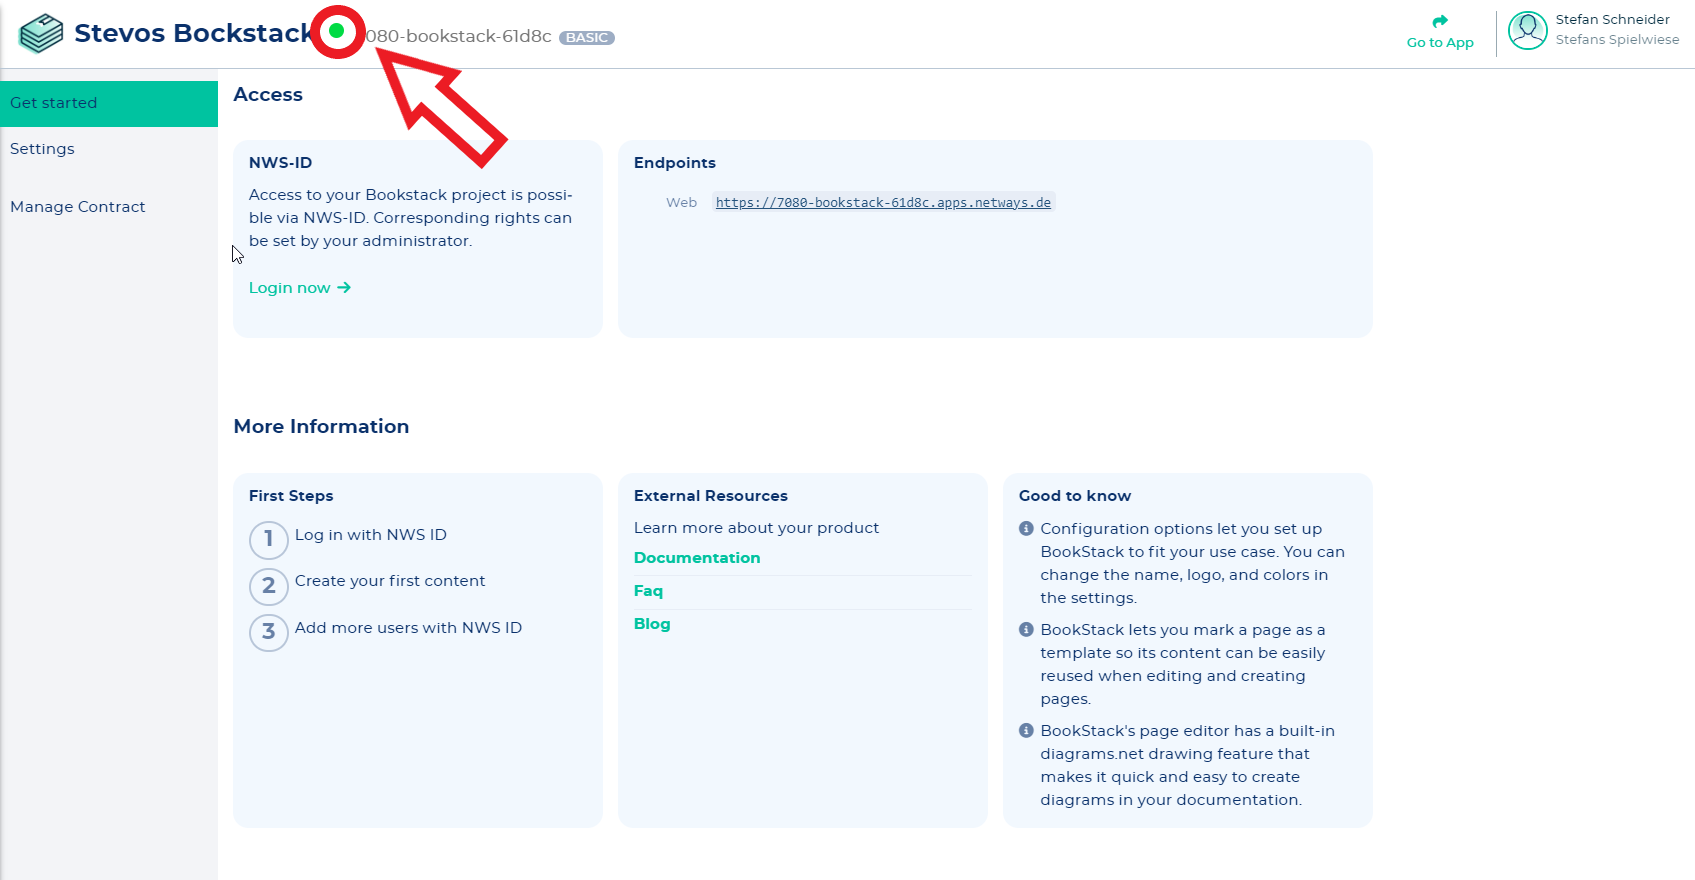
- When the circle turns from grey to green, you are ready to go (may be you have to refresh your browser)

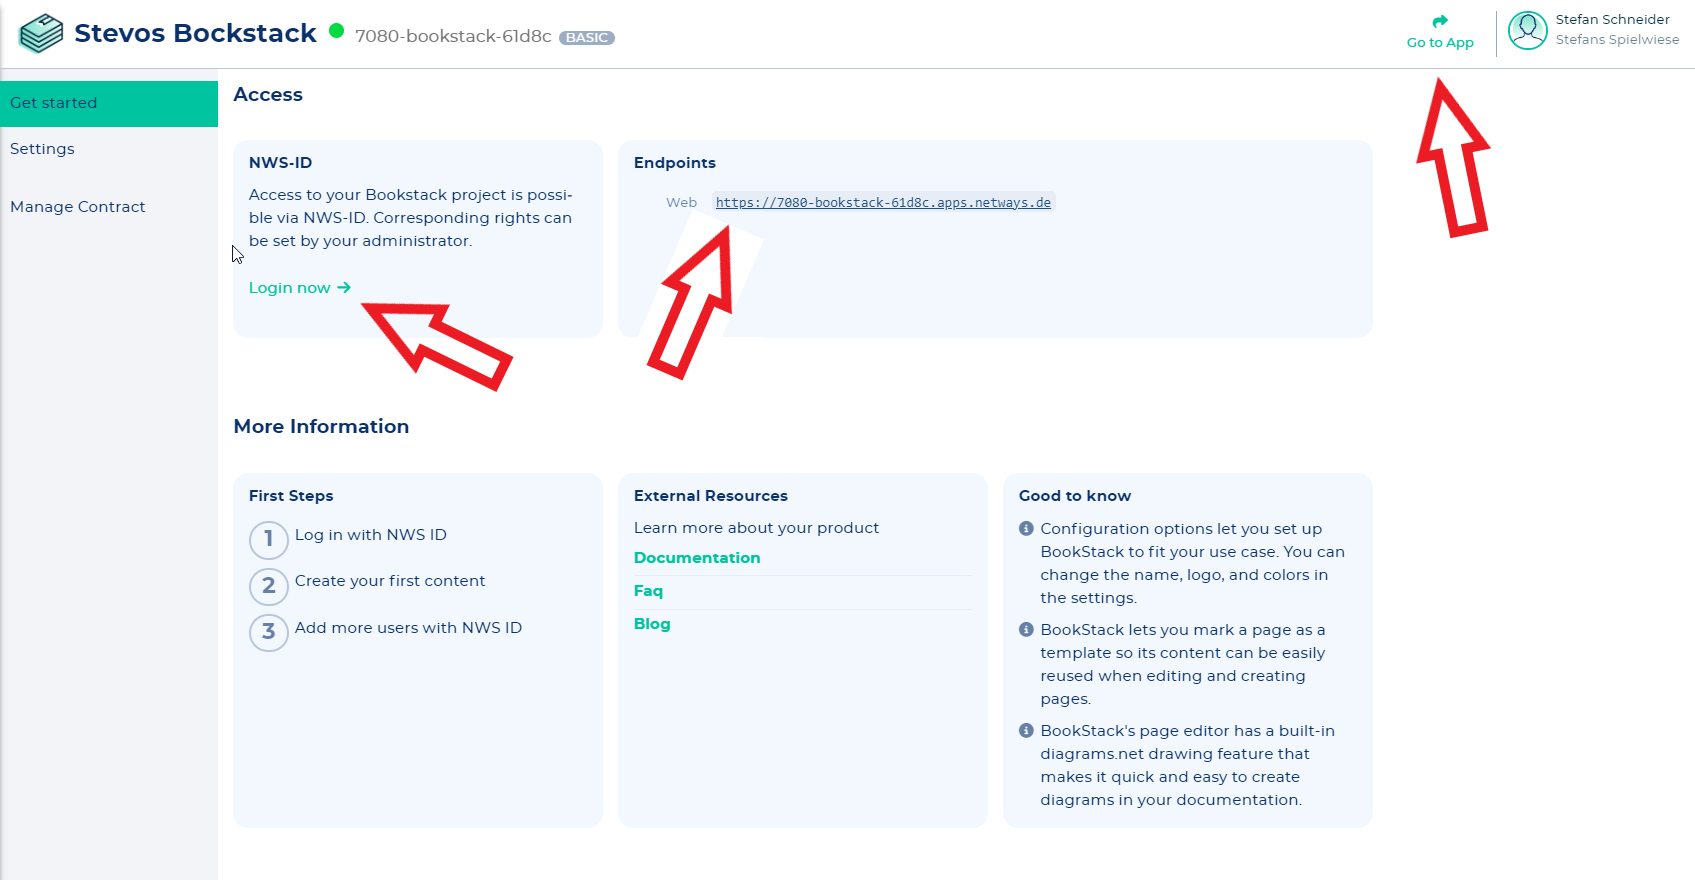
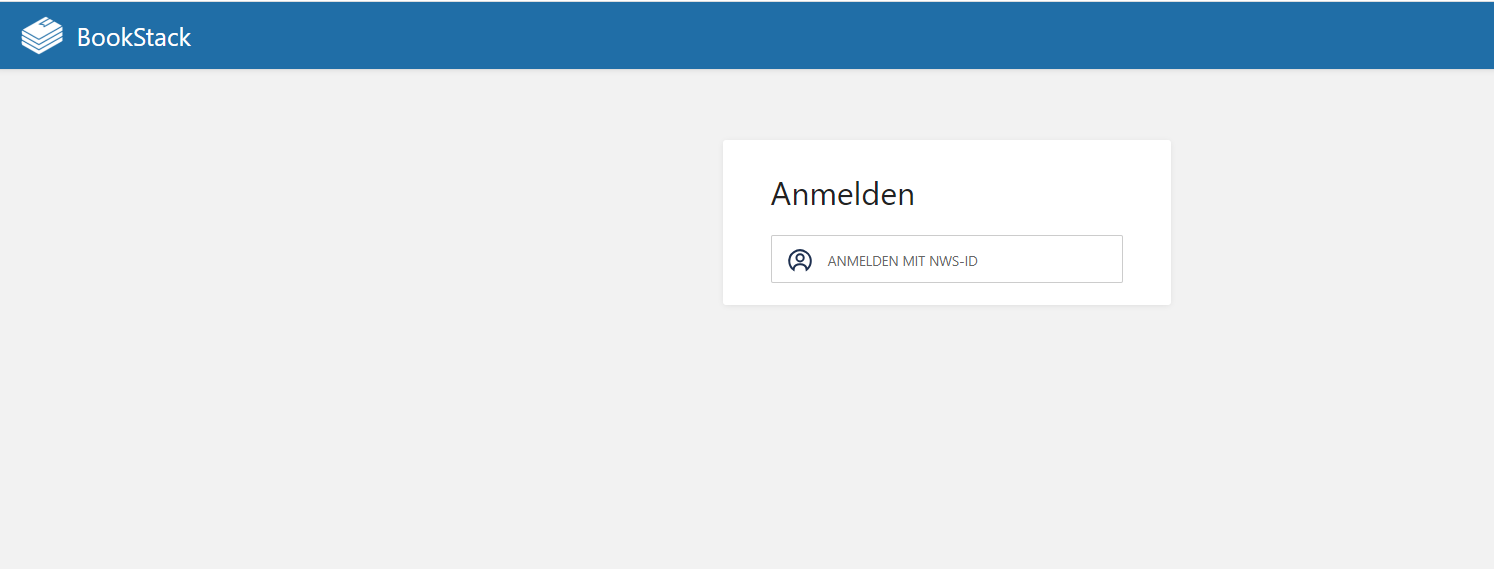
Logging in
- You no longer need a separate password to log in to Bookstack. This works automatically via our NWS ID.
- just click on the Login now - link or the Endpoints Web-Link or the "Go to App"- button to get to your Nextcloud instance


Administrative Tasks
Customization
1. Subdomain
Just go to your Bookstack app in the NWS Customer Interface and click on "Settings". Open the "CNAME"- tab and fill in your subdomain.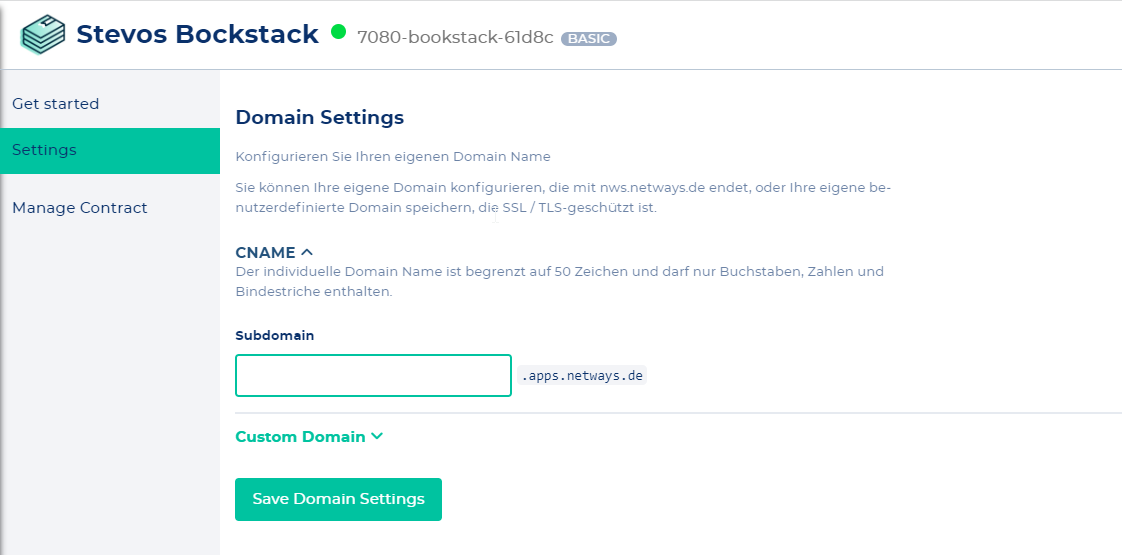
2. Customer Domain
To setup your Customer Domain, the following things must be fulfilled /accomplished:
- Domain must belong to you
- You must set an A-record to IP
193.142.157.137for the domain name- You enter this in our NWS Customer interface at your Bookstack app under "Settings"
- You specify if you want to have a Let's encrypt certificate or an SSL certificate
Upgrade to a bigger plan
Just go to your Bookstack app in the NWS Customer Interface and click on "Manage contract". Here you can upgrade to Advanced or Premium plan. If the Premium plan is no longer sufficient, contact us via sales@netways.de and we will provide you with a customized solution on OpenStack. 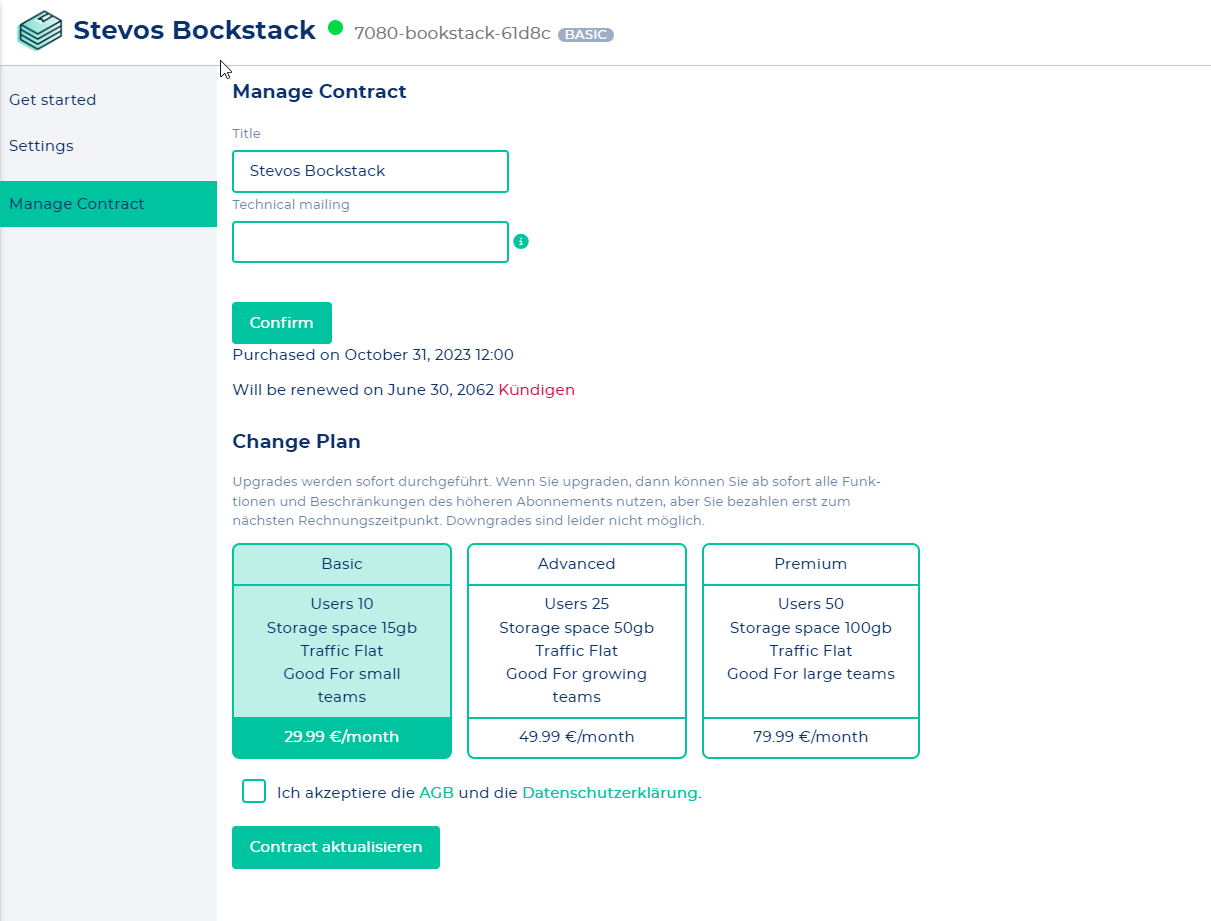
Prometheus
SMS Contact Point
To send SMS alerts from your Grafana instance, you have to configure a SMS Contact Point.
Select the following options:
| Integration | Webhook |
| URL | https://sms.saas.netways.de/v1/grafana_sms |
| HTTP Method | POST |
| HTTP Basic Auth - Username | Phone number |
| HTTP Basic Auth - Password |
App name of your Prometheus App (e.g. 00000-prometheus-fffff) |
