Load Balancer
A load balancer within the NETWAYS Cloud makes it easy, fast, and resilient to direct network traffic to multiple servers, distributing the load evenly and improving the availability and performance of your applications.
The following examples cover only the basic required settings.
Configuration via the OpenStack Dashboard
Load Balancers appear as a submenu under the Network menu item in the left‑hand navigation.
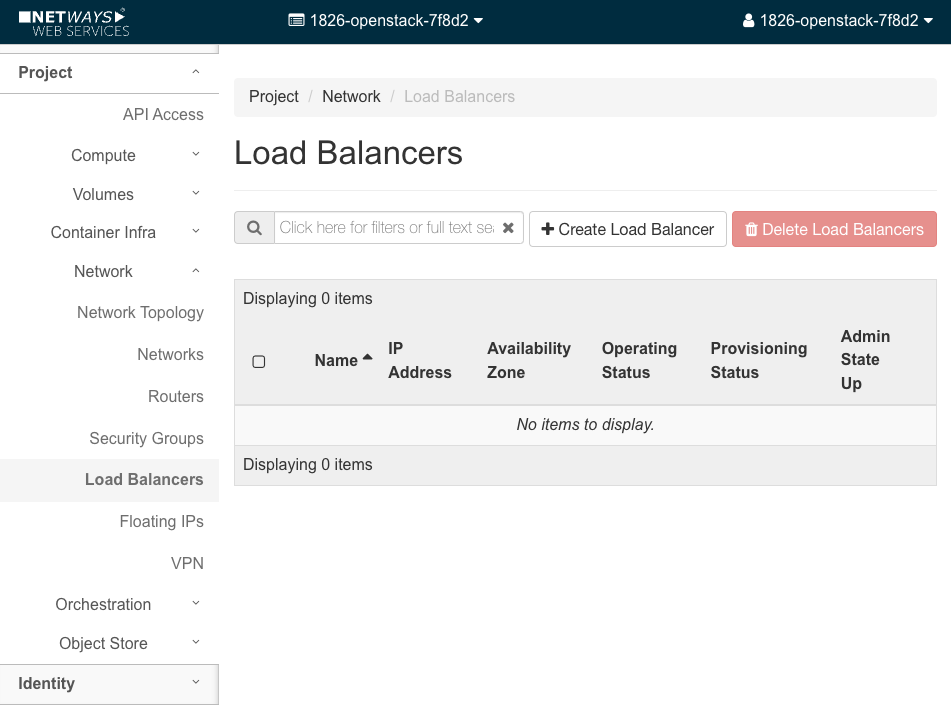
To create a load balancer, click the “+ Create Load Balancer” button. A window opens and walks you through the initial configuration.
On the first page you can enter basic details such as name and description. Setting a name is optional but recommended. Selecting a subnet, however, is mandatory.
In a new OpenStack project the primary subnet can be found by searching for a subnet that has the same name as the OpenStack project, but with the suffix “‑subnet”.
Further information about the advanced fields can be accessed by clicking the question‑mark on the right side of the window.
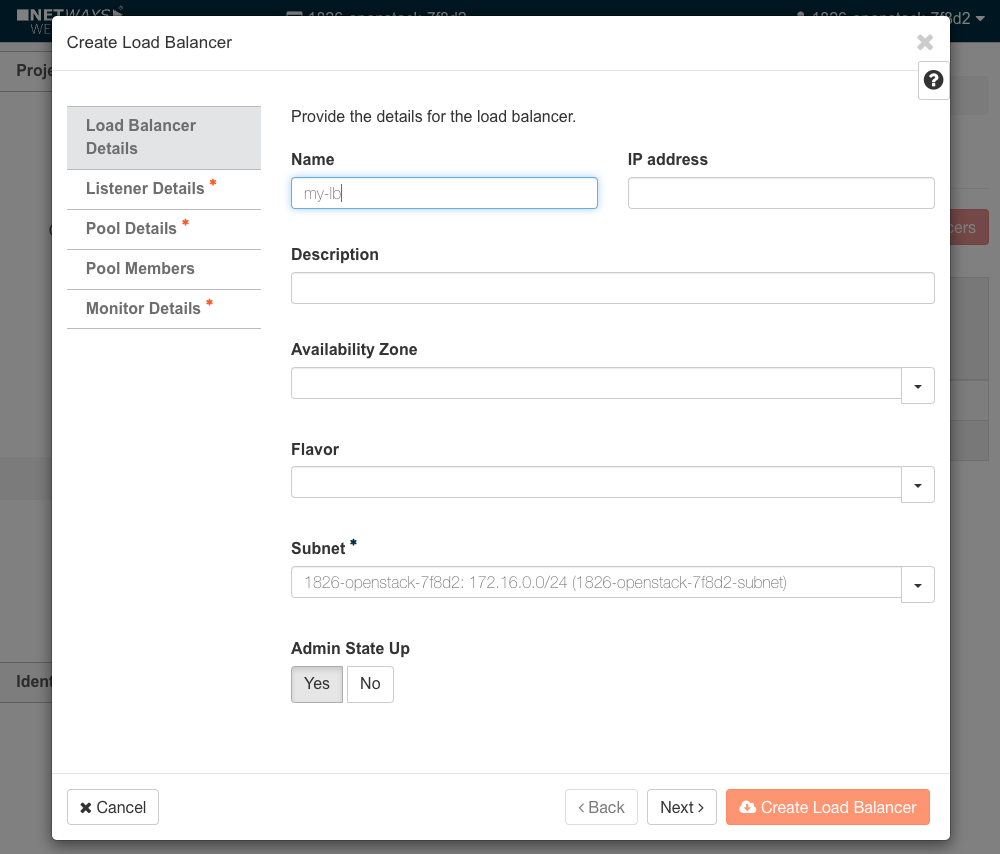
Click Next to continue.
On the next page you must enter the listener details. A name is optional, but you must select a protocol and set a port number. The listener defines the frontend port of the load balancer. If the load balancer is to be used for web servers, it is advisable to choose HTTP or TCP as the protocol and use port 80 or 443.
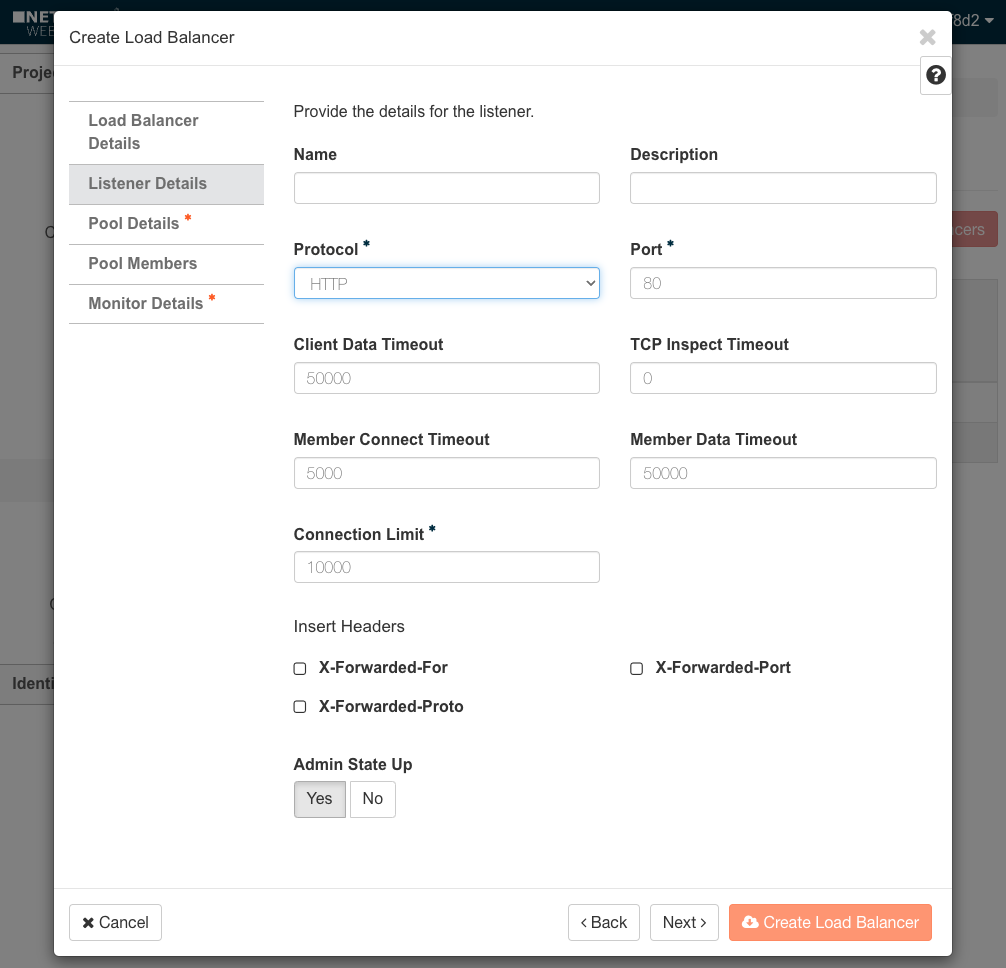
By default the Connection Limit is set to “‑1”, which means no limit is enforced. However, the absence of a limit can cause issues.
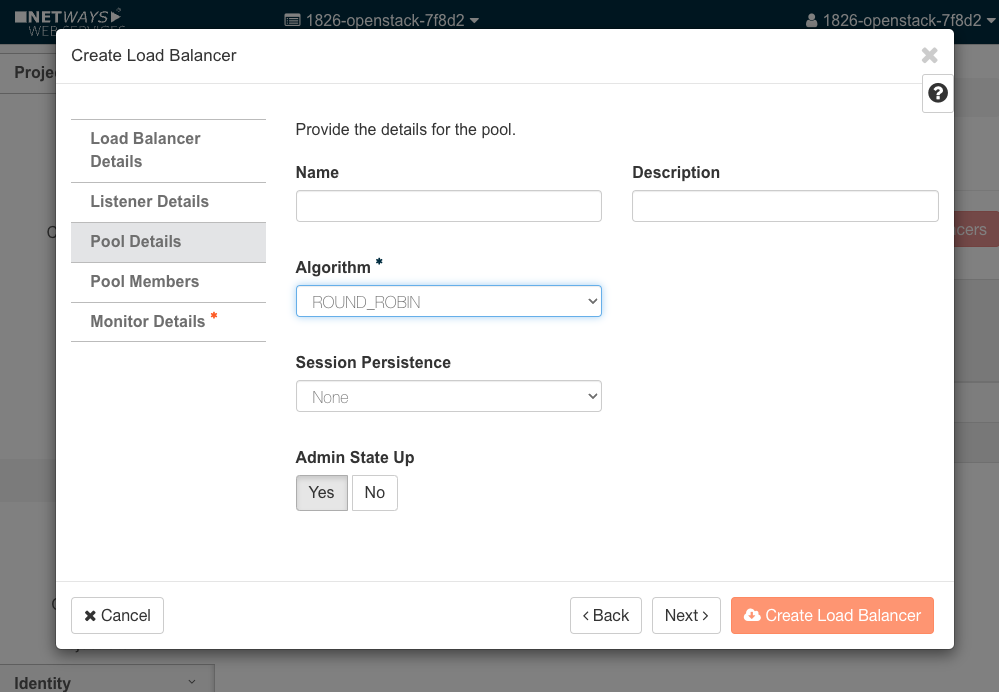
After clicking Next, a load‑balancing algorithm can be selected. For standard setups, “ROUND_ROBIN” is recommended.
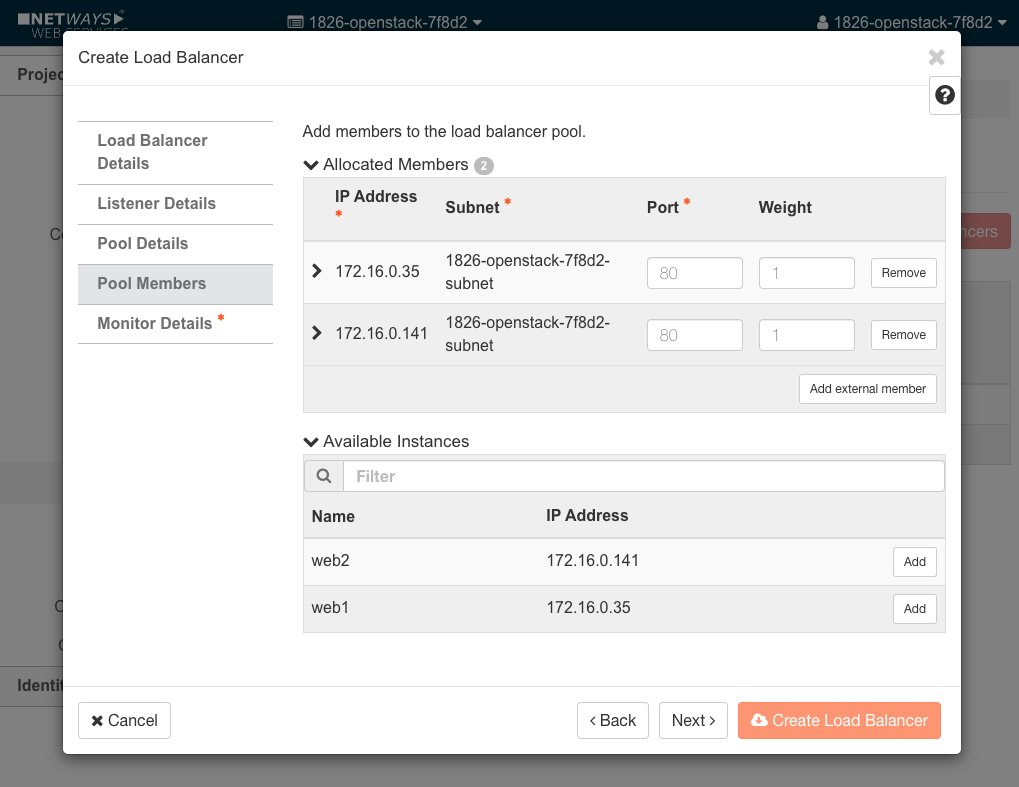
In the Pool Members section you can assign members to the pool. These members are the VMs to which incoming requests will be forwarded.
You also need to specify the port number on which the application or web server runs inside each VM.
Optionally, you can set a weight – members with a higher weight receive more requests than those with a lower weight.
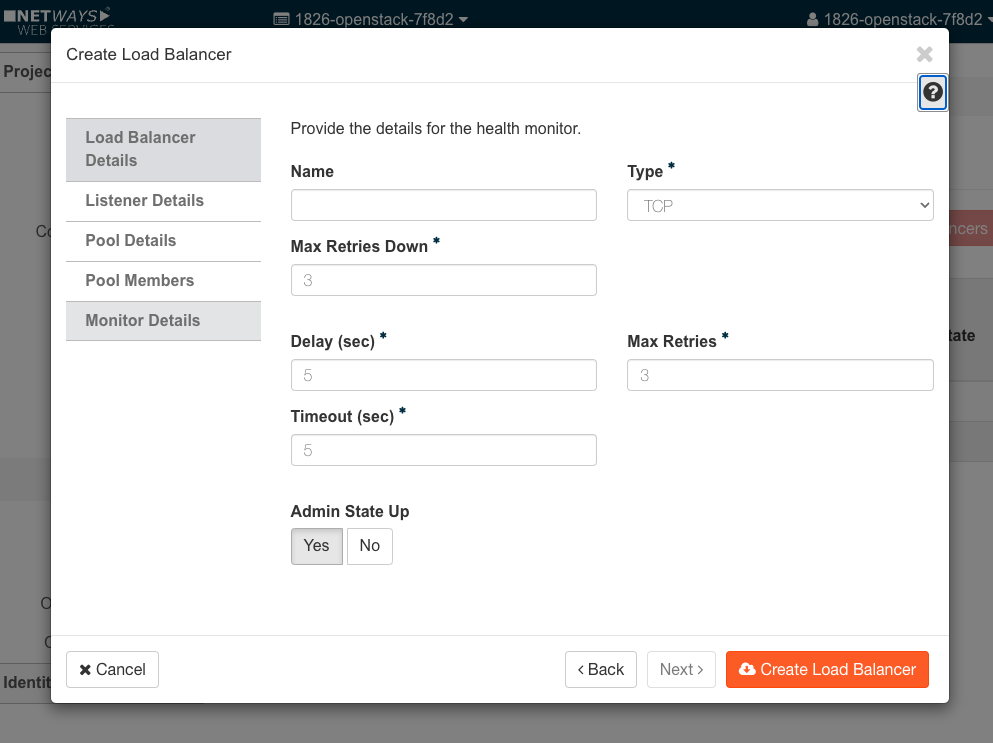
In the final section you can define a health monitor for the pool and its members. Depending on the application or web server, choose an appropriate protocol. You can also set time‑outs and delay parameters that control how often the health monitor performs its checks.
Note: Additional information about these parameters is available by clicking the question‑mark on the right side of the window.
Once all required fields are filled in, click the orange Create Load Balancer button.
It will take a while for the load balancer and all dependent resources to be provisioned.
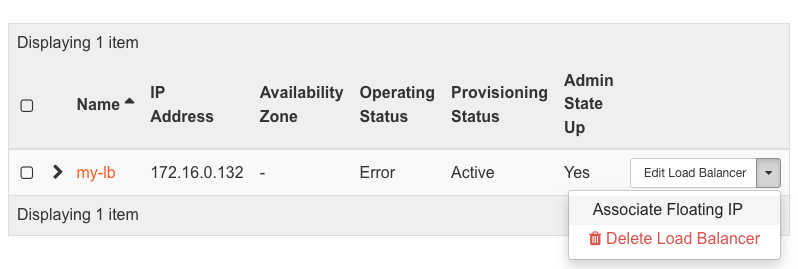
As an optional final step you can assign a Floating IP to the load balancer. This makes the load balancer publicly reachable on the Internet. Be aware that this also exposes the application or website on the VMs to anyone on the Internet.
To assign a Floating IP, open the load balancer's dropdown menu and select Assign Floating IP.
If Floating IPs have already been allocated to the OpenStack project, you can choose an existing Floating IP or allocate a new one from the window that opens.
When allocating a new Floating IP from a pool, it is advisable to select the “public‑network”.
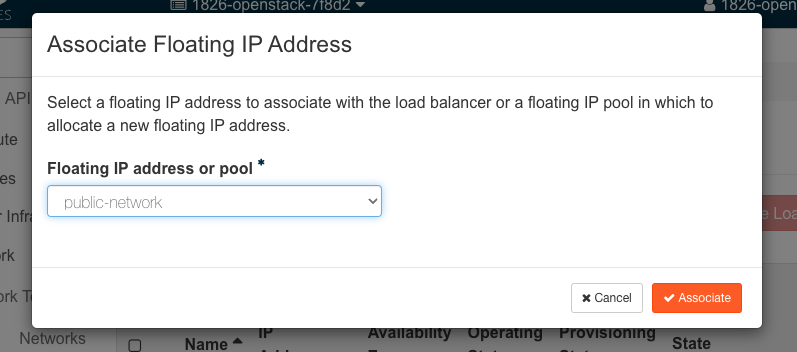
Finally, click Assign.
The basic configuration of the load balancer is now complete.
Create a Load Balancer with the OpenStack CLI
To create a load balancer via the OpenStack CLI as shown in the example above, you can use the following commands:
openstack loadbalancer create --name lb1 --vip-subnet-id private-subnet --wait
openstack loadbalancer listener create --name listener1 --protocol HTTP --protocol-port 80 --wait lb1
openstack loadbalancer pool create --name pool1 --lb-algorithm ROUND_ROBIN --listener listener1 --protocol HTTP --wait
openstack loadbalancer healthmonitor create --delay 5 --max-retries 4 --timeout 10 --type HTTP --url-path /healthcheck --wait pool1
openstack loadbalancer member create --subnet-id private-subnet --address 192.0.2.10 --protocol-port 80 --wait pool1
openstack loadbalancer member create --subnet-id private-subnet --address 192.0.2.11 --protocol-port 80 --wait pool1
openstack floating ip create public
Finally, the Floating IP can be attached to the load balancer:
# The necessary IDs are shown in the output of the previous commands
openstack floating ip set --port <load_balancer_vip_port_id> <floating_ip_id>