Usage with RunVSAgent in JetBrains IDEs
NWS Managed AI Models can be integrated into IDEs, similar to models like GitHub Copilot, Google Gemini, or Claude Code.
For JetBrains IDEs, the RunVSAgent plugin can be used.
RunVSAgent enables you to run VSCode‑compatible coding agents directly inside JetBrains IDEs, ideal for working with OpenAI‑compatible APIs such as the NWS Managed AI Models.
Step 1 – Open Plugin Settings
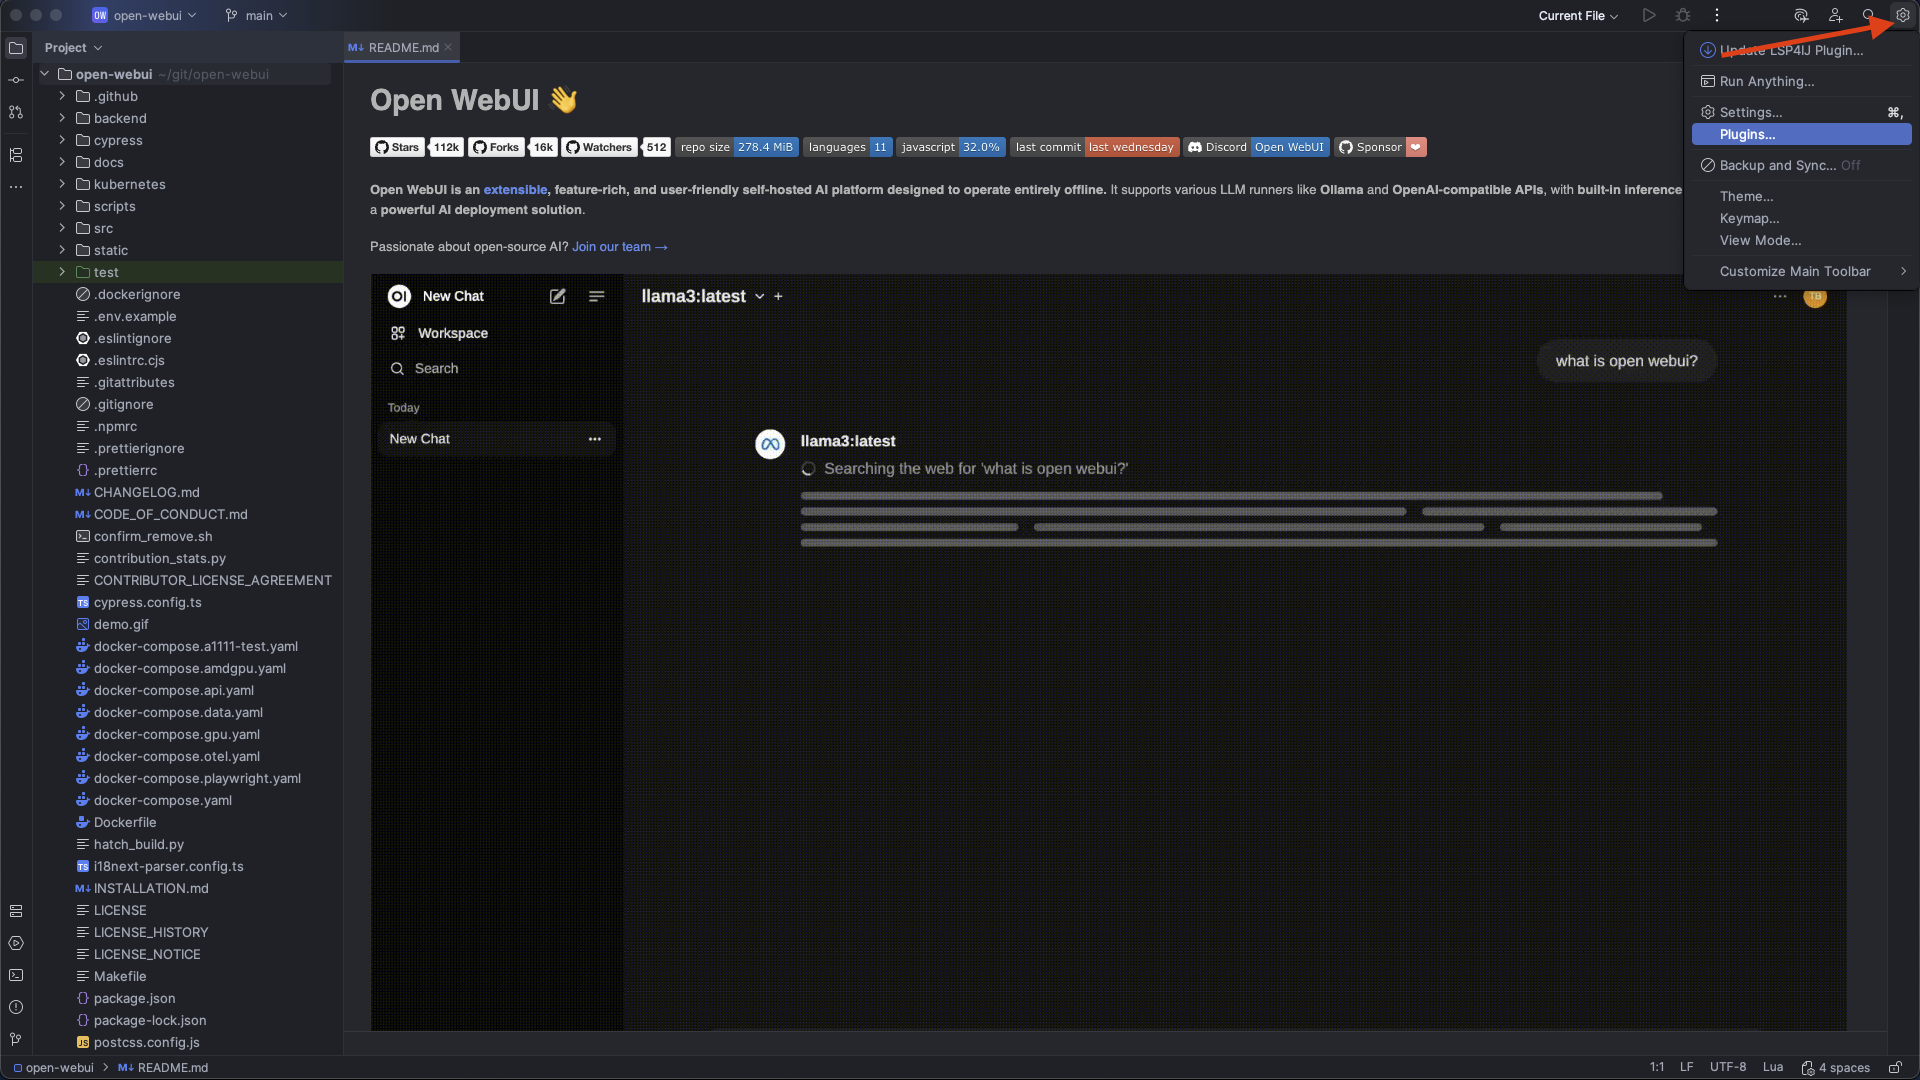
Click the gear icon in the top‑right corner of your IDE and select Plugins from the menu. Here you can install new extensions from the JetBrains Marketplace.
Step 2 – Install RunVSAgent
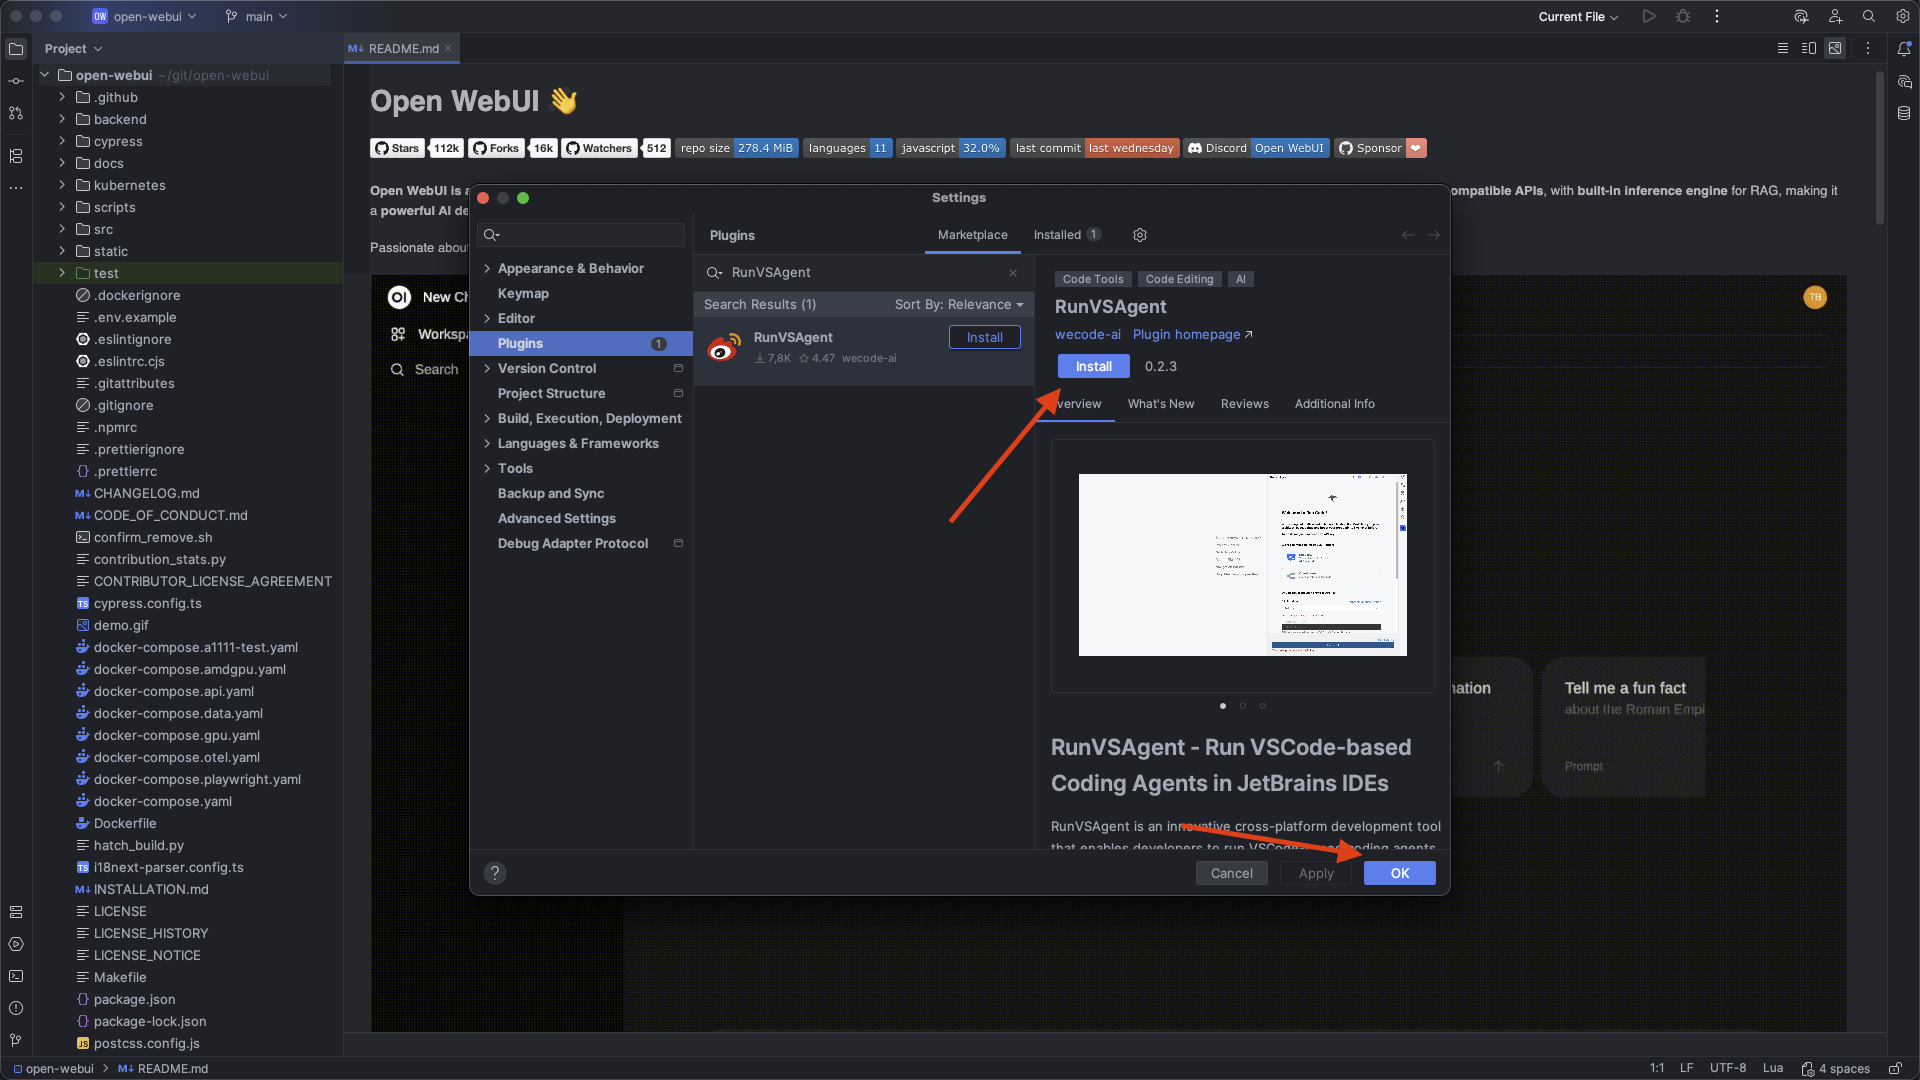
Search the plugin marketplace for RunVSAgent. Click Install to install the plugin. After installation, the IDE must be restarted for the plugin to become active.
Step 3 – Open RunVSAgent
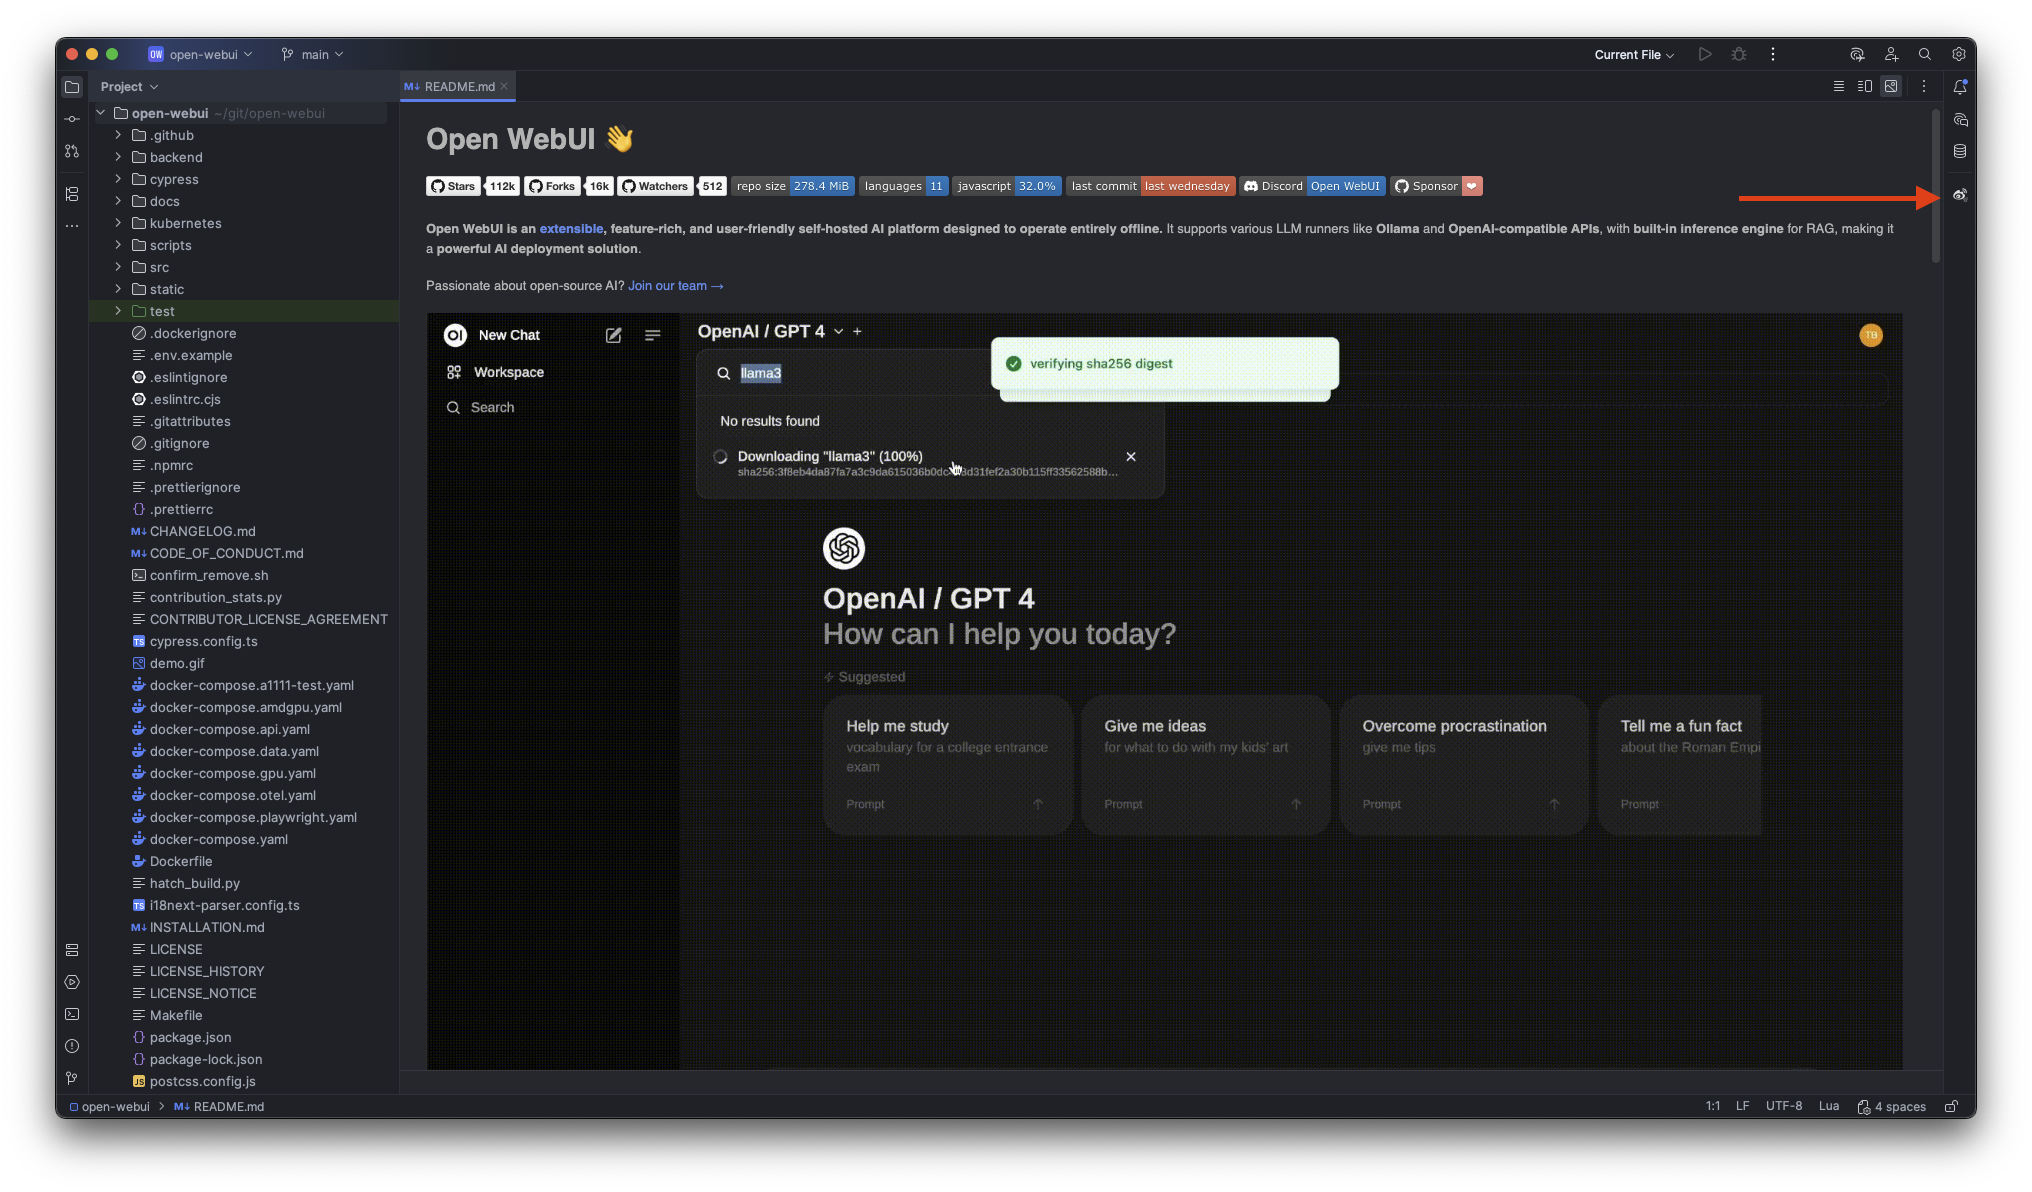
After installation, you will find the RunVSAgent icon in the right sidebar of the IDE. Click it to open the plugin panel.
Step 4 – Open API Configuration
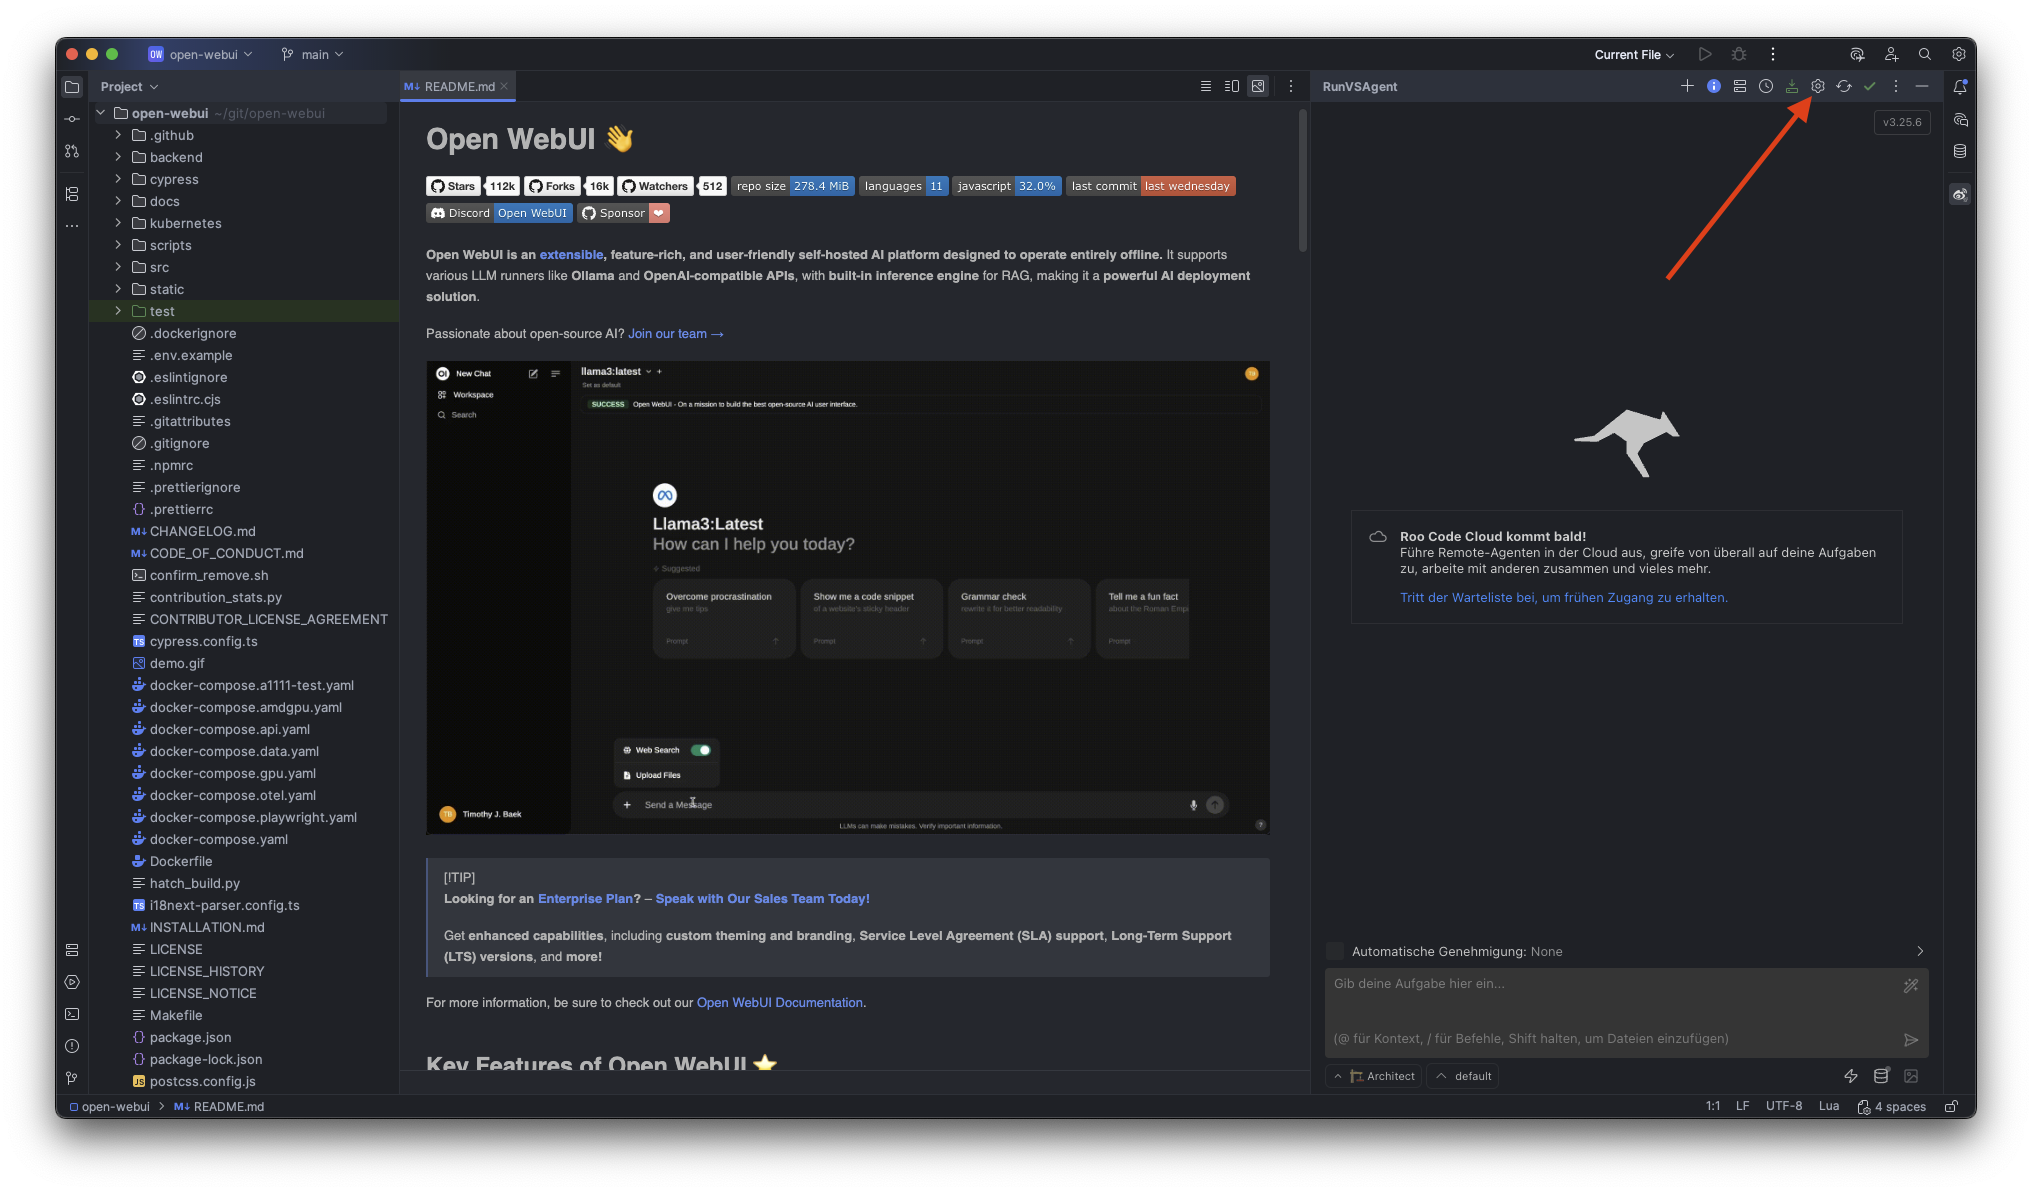
Click the gear icon to open the settings. Switch to the Providers section. Here you specify which API to use.
Step 5 – Configure API Provider and Model
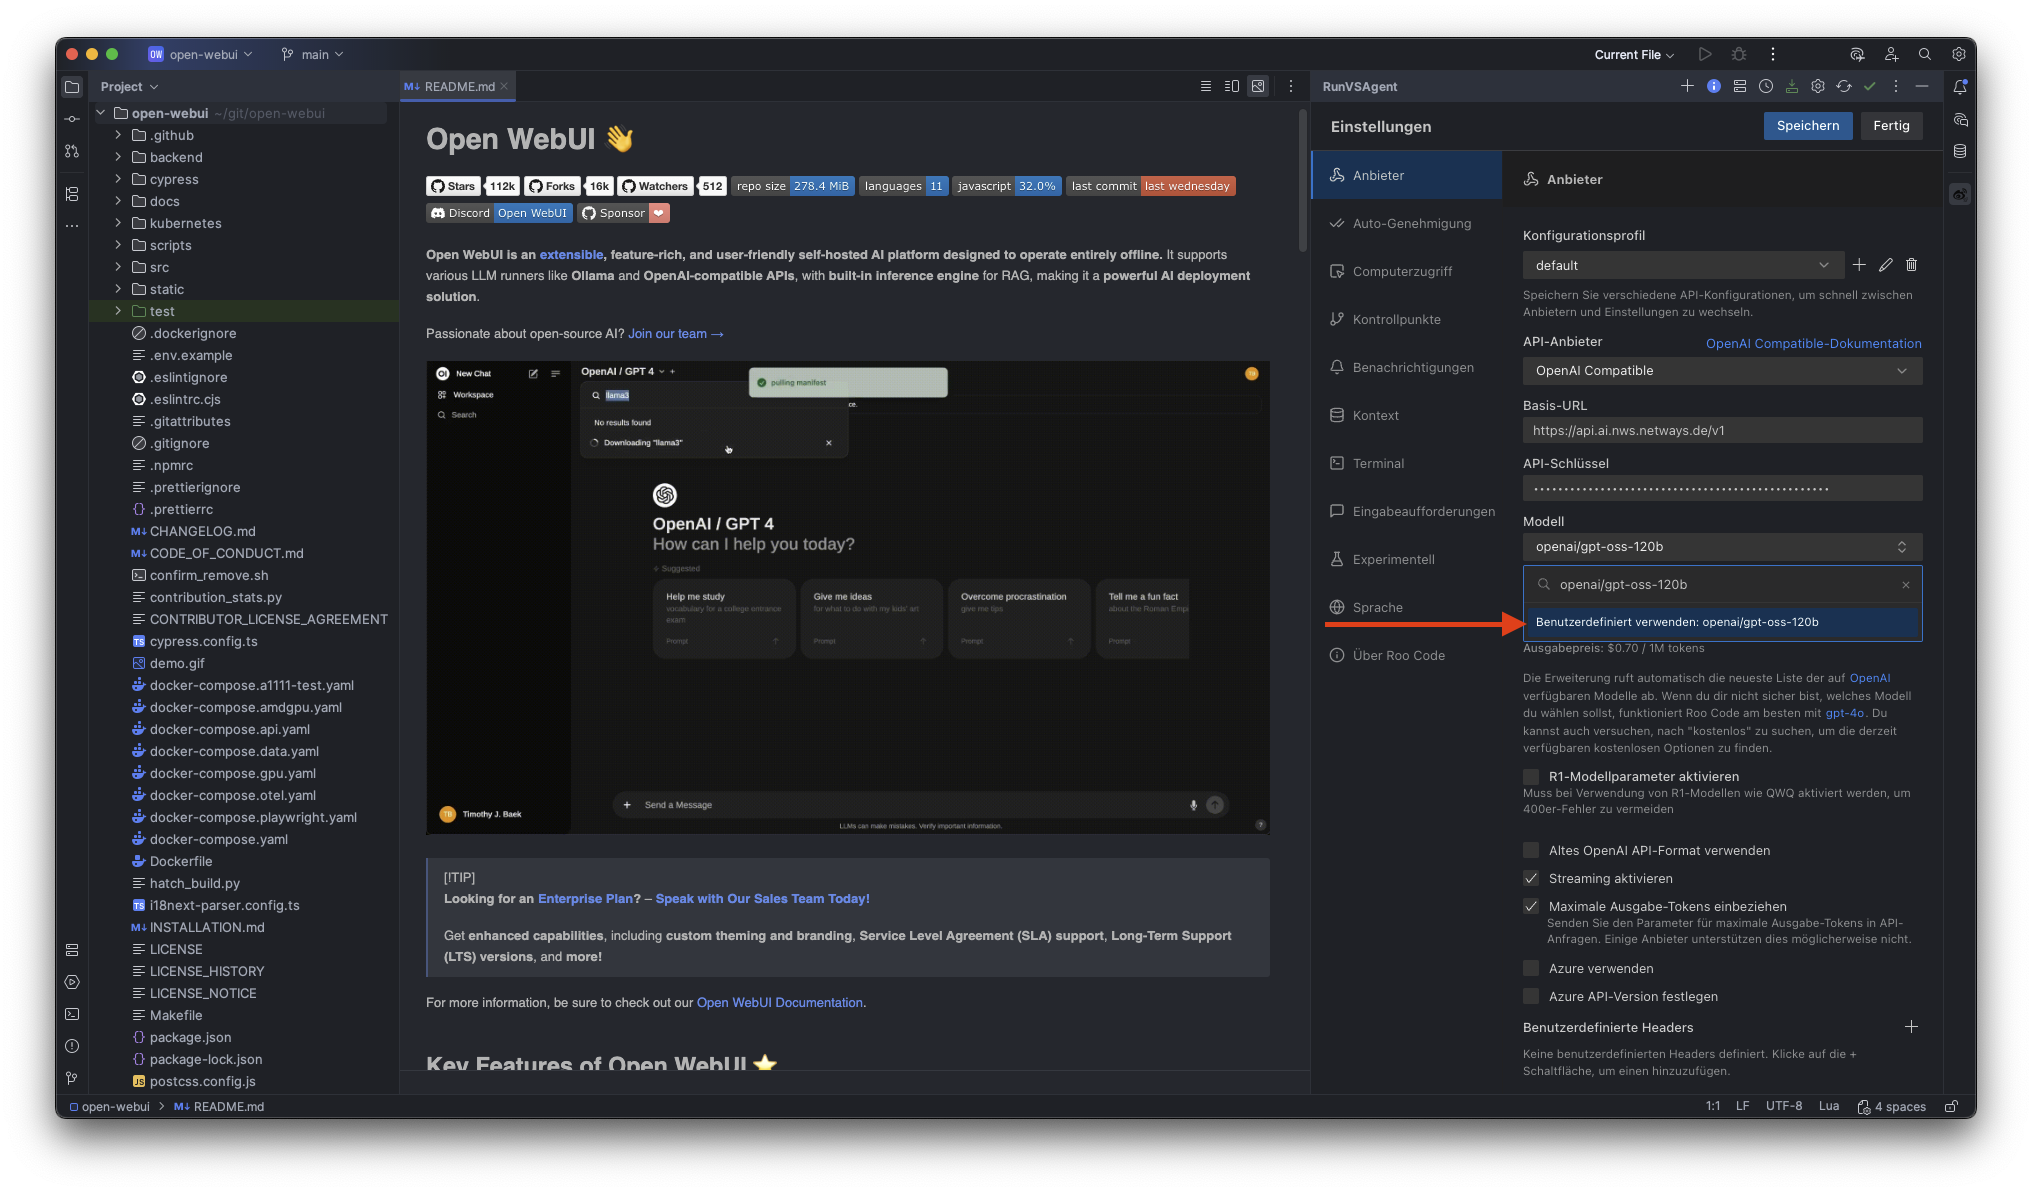
Under API Provider select OpenAI Compatible.
Then enter the Base URL https://api.ai.nws.netways.de/v1 and your personal API Key.
Under Model you must provide the model ID, which in this case is not listed: openai/gpt-oss-120b.
Step 6 – Token and Pricing Configuration
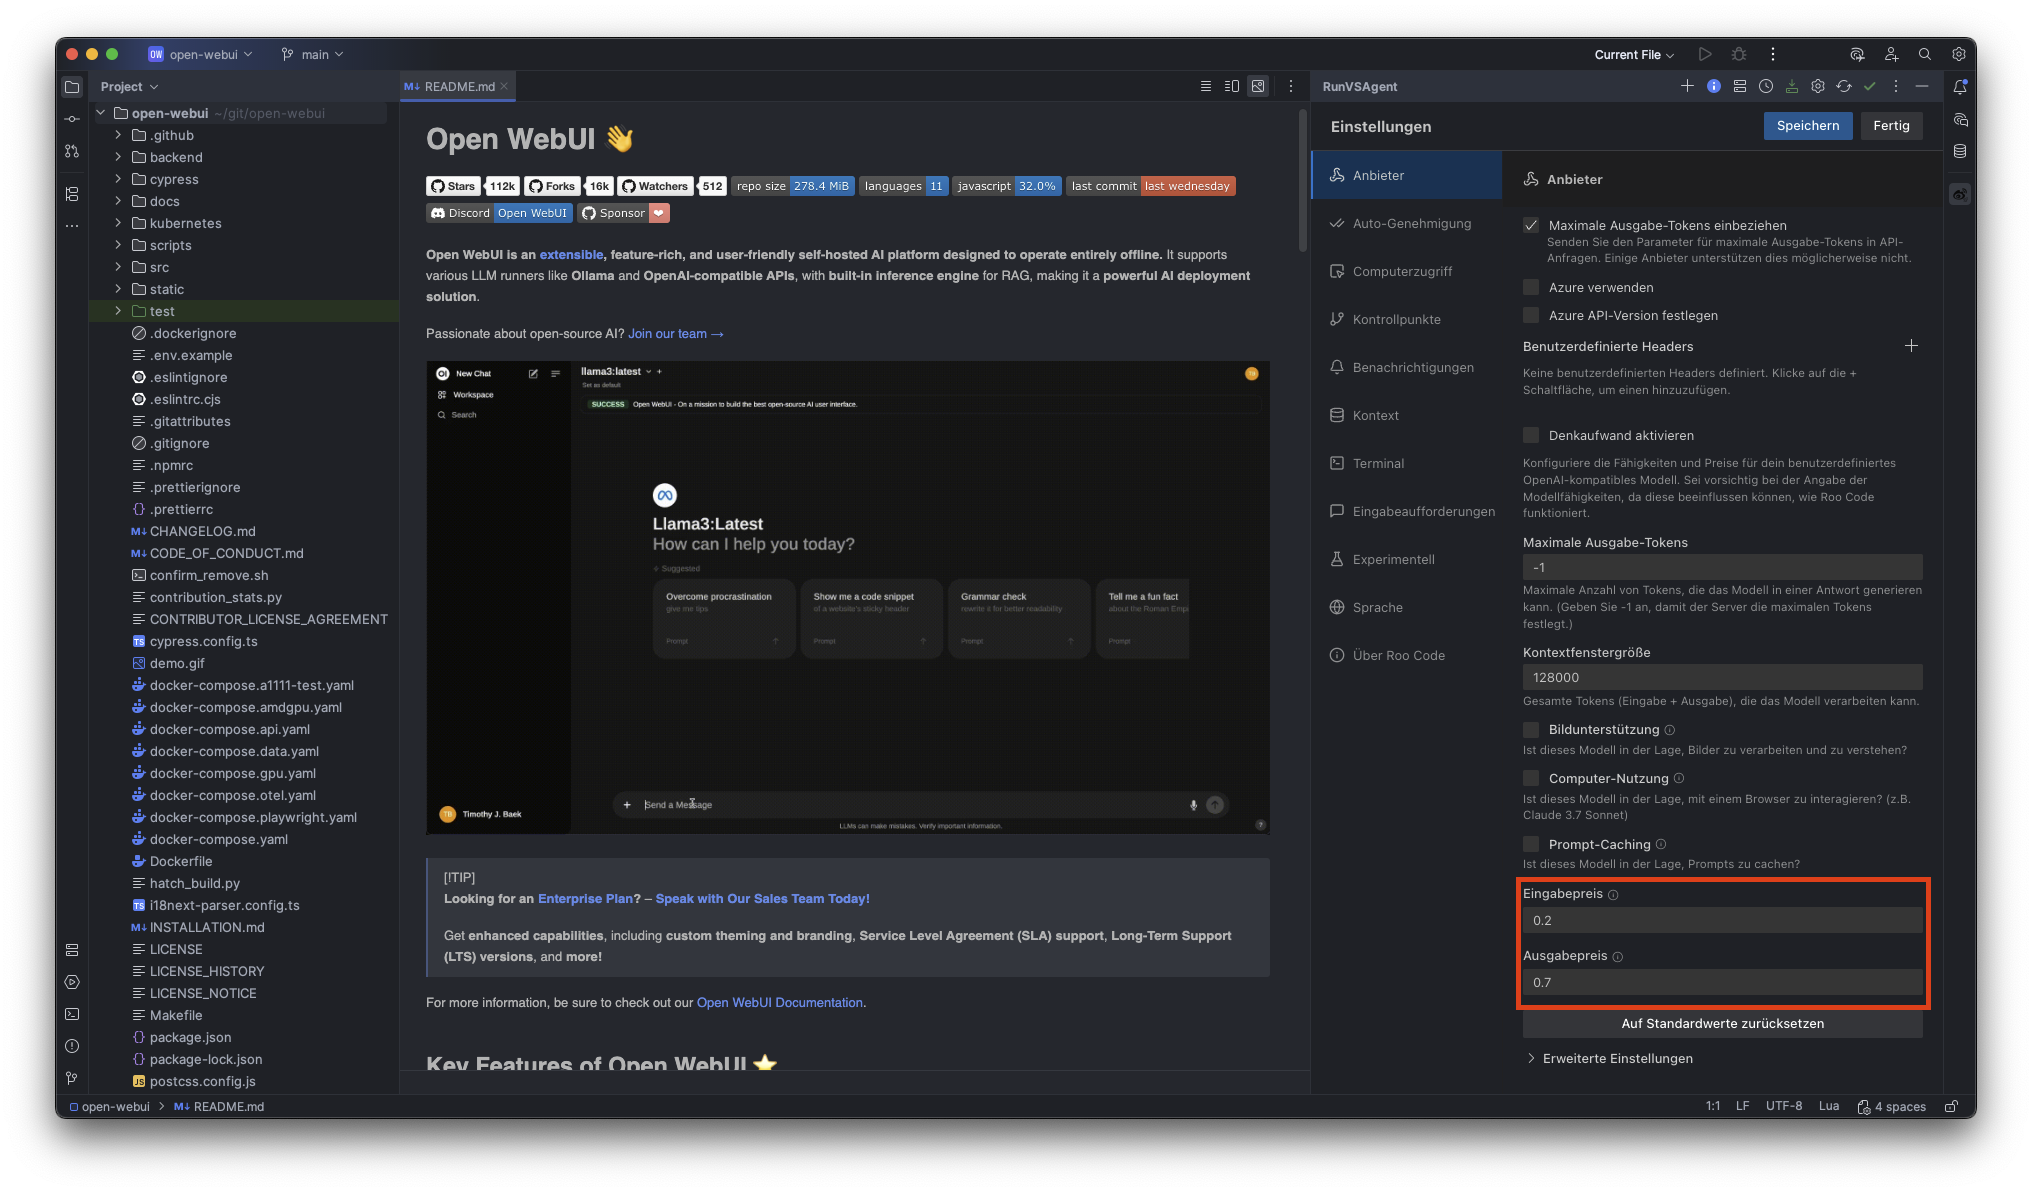
Optionally you can set the maximum number of tokens to process and base values for the cost per request (input and output price). These values are for cost estimation only and do not affect the actual API fees.
Step 7 – Choose Agent Mode
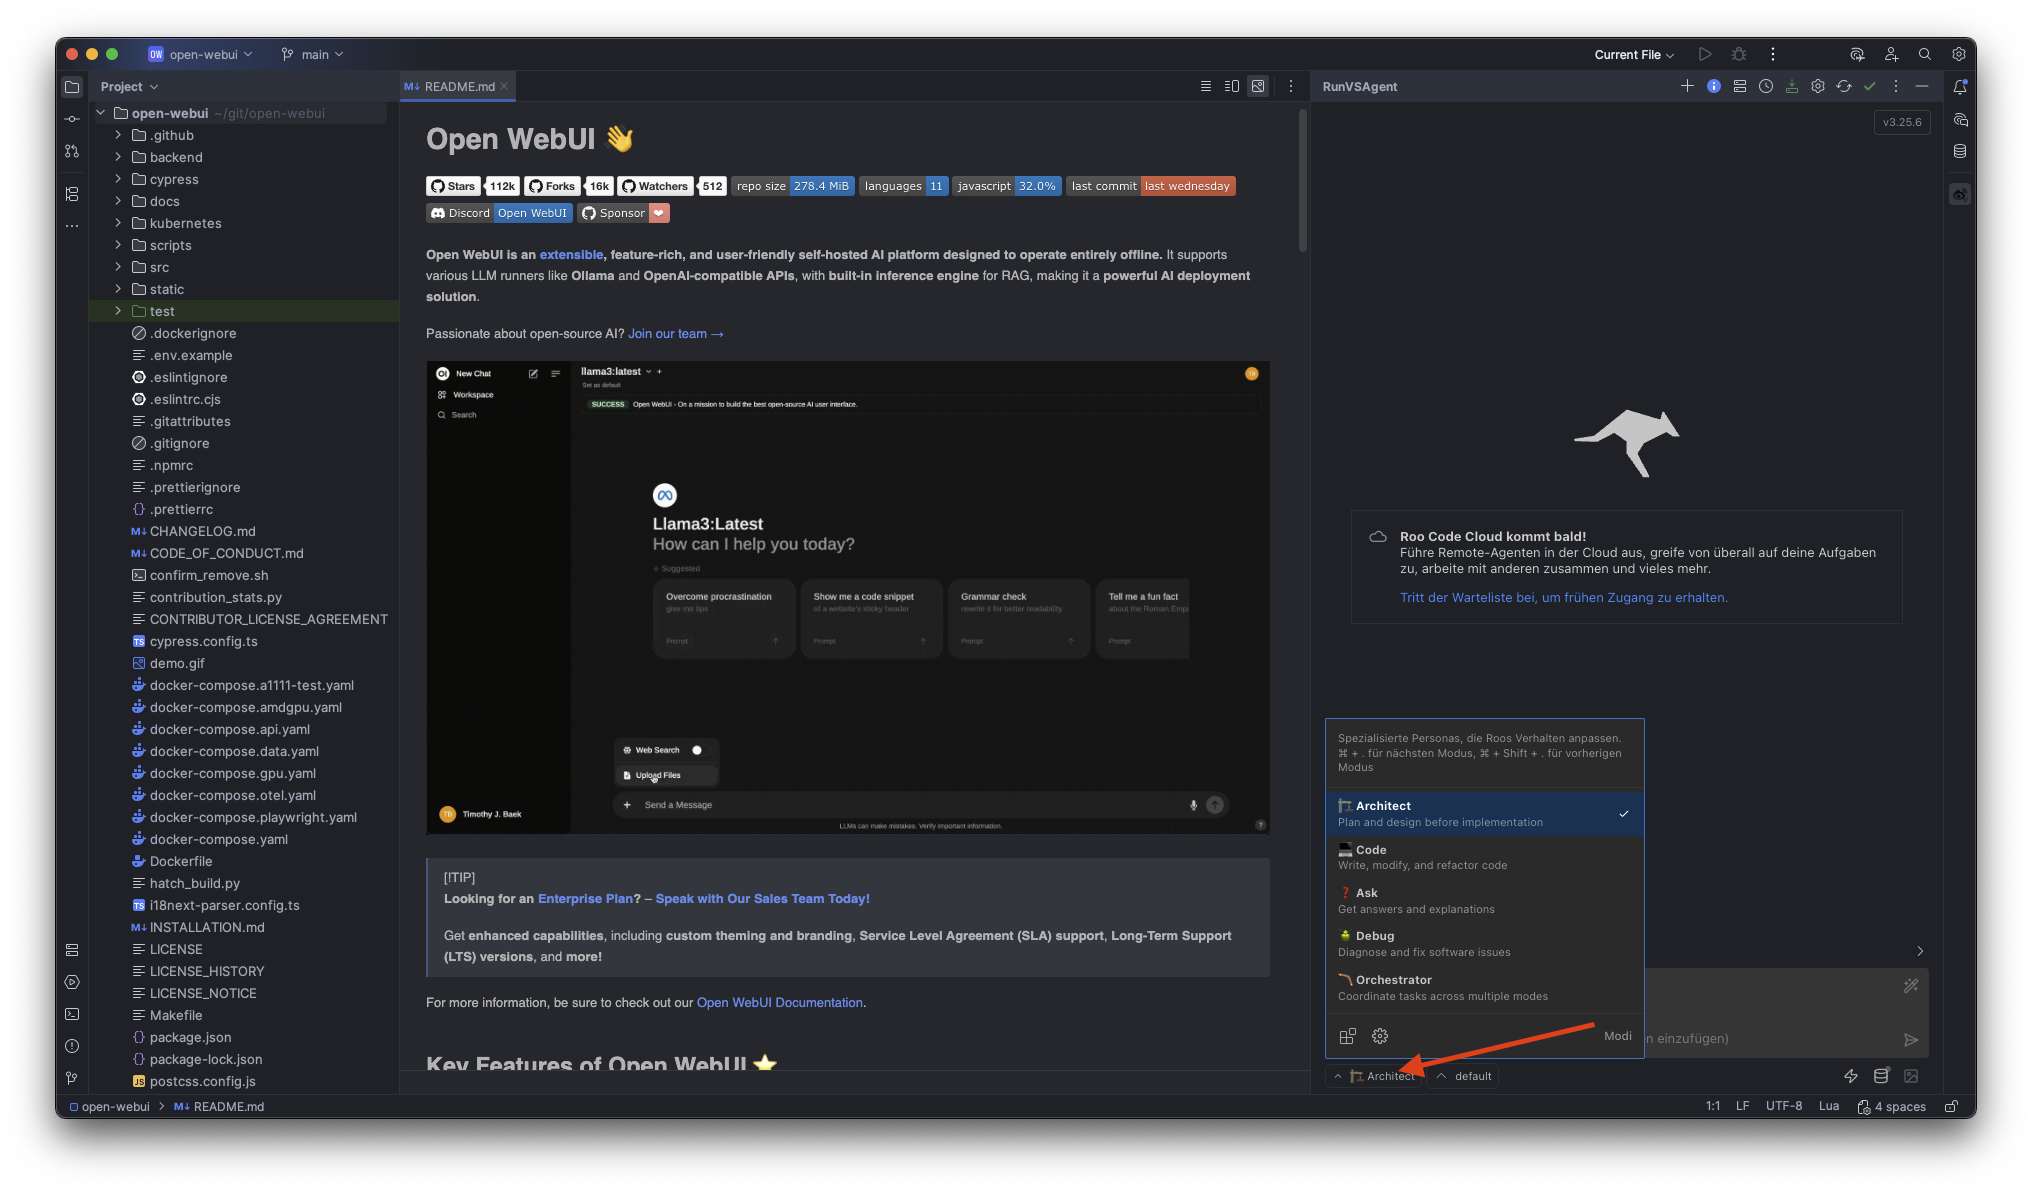
At the bottom of the RunVSAgent window you can switch between different Agent Modes:
- Architect: plans and structures code before it is implemented.
- Code: generates and edits source code.
- Ask: answers questions about code or projects.
- Orchestrator: combines multiple agent modes.
Select the mode that best fits your current task.
Step 8 – First Interaction with the Agent
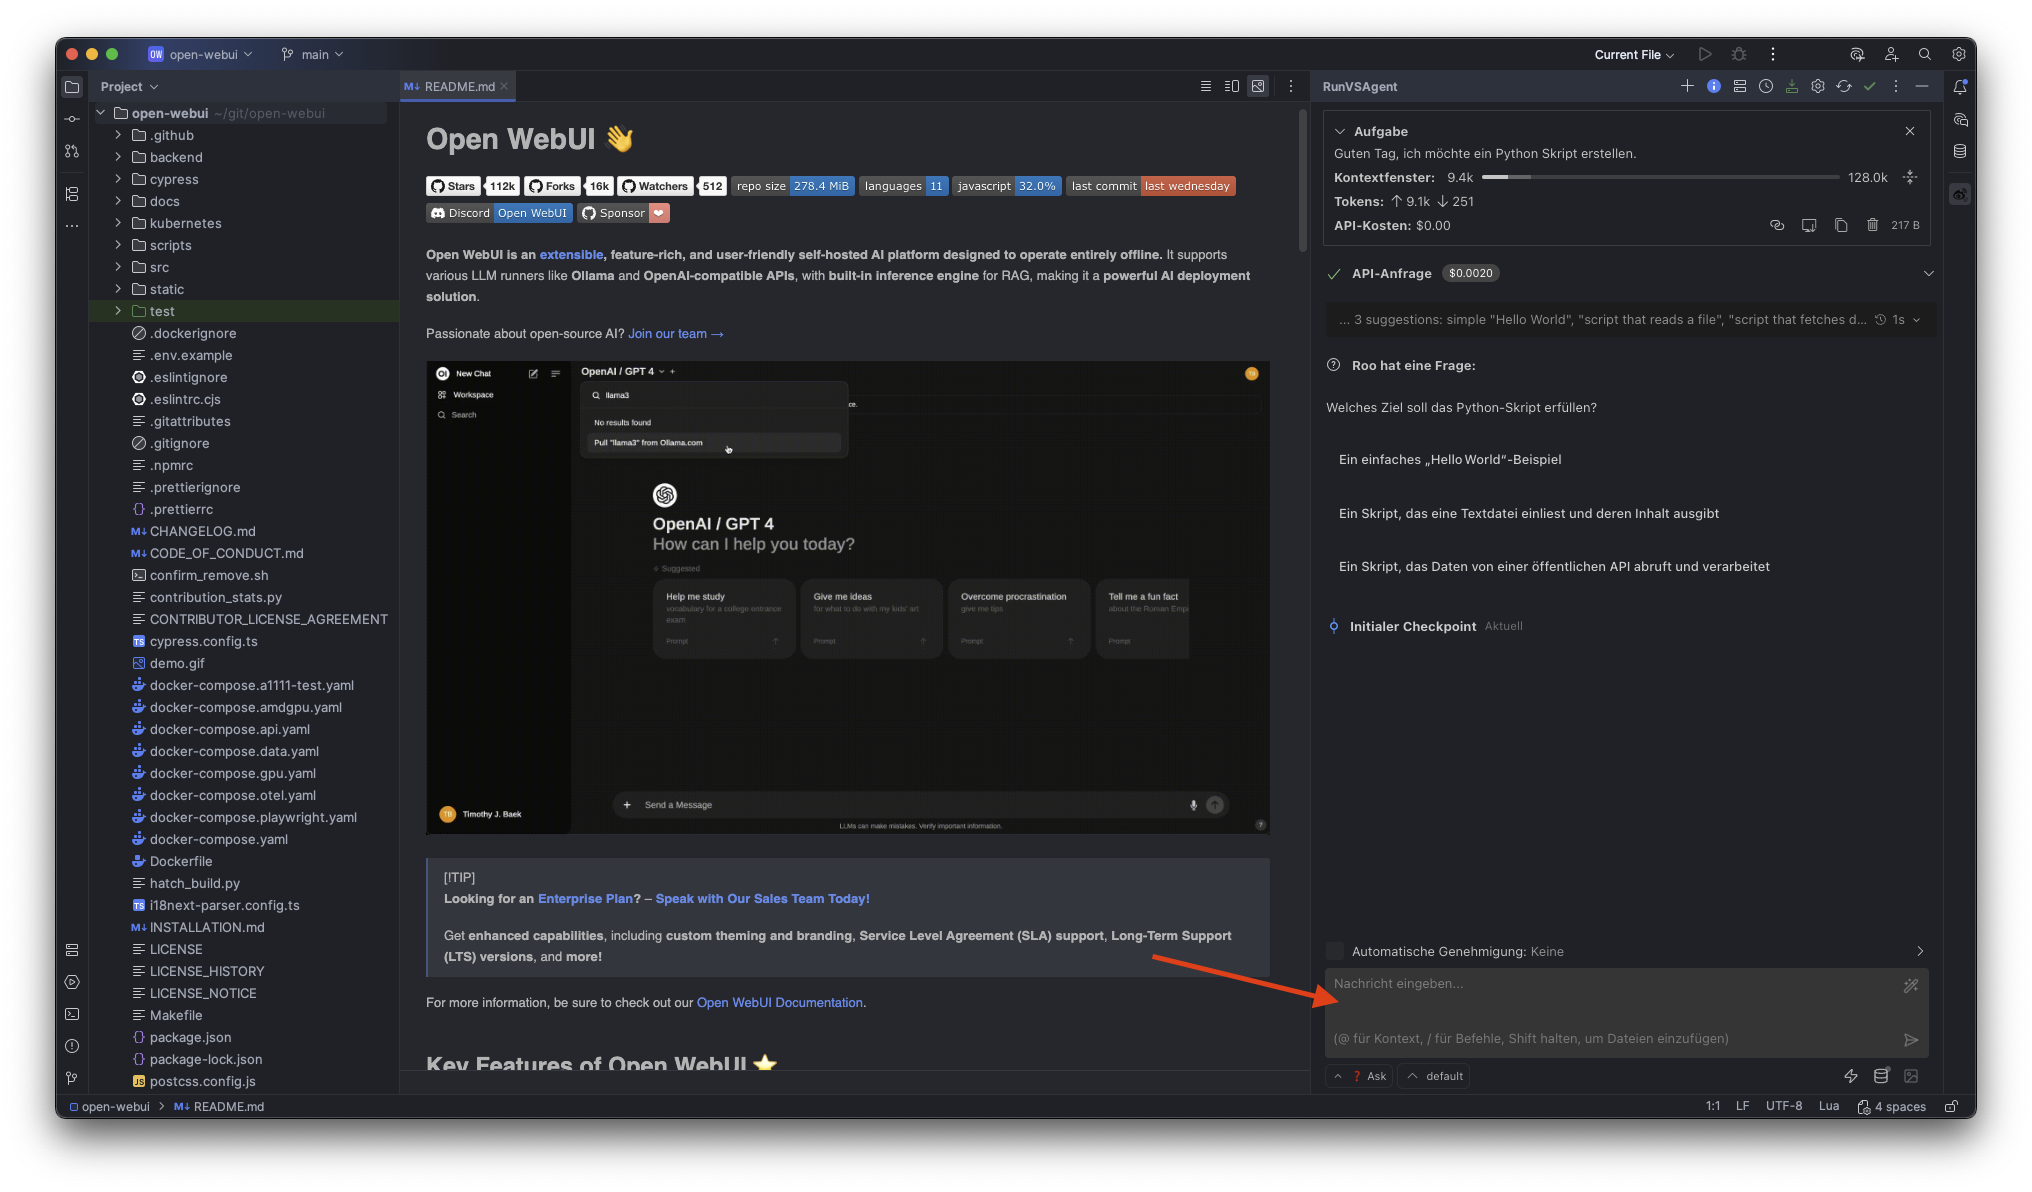
In the input field at the bottom you can now enter the first instruction, e.g.:
"Good day, I would like to create a Python script."
RunVSAgent processes the input and displays the generated code or response directly in the panel.